To hardwire your Ring Doorbell, start by confirming your existing doorbell system supports a power supply between 8 to 24 volts AC. Turn off the power at the circuit breaker for safety. Remove your old doorbell and carefully disconnect the wires, noting their configuration. Use jumper cables to connect the Ring Doorbell's terminals, securing the existing wires onto the screws. Mount the doorbell to your wall, ensuring it's stable, and restore the power. Finally, configure your Ring app for notifications and settings. If you're curious about specific steps and troubleshooting tips, there's more to explore.
Key Takeaways
- Confirm your existing doorbell transformer outputs 8-24 volts AC before installation to ensure compatibility with the Ring doorbell model.
- Turn off power at the circuit breaker, then carefully disconnect the existing doorbell and cap exposed wires for safety.
- Use the included jumper cable to bypass the chime and securely connect existing wires to the Ring doorbell's terminal screws.
- Mount the Ring doorbell using the provided screws, ensuring proper alignment and avoiding over-tightening to prevent damage.

24V AC Doorbell Transformer – 18ft Long Cable Adapter, Universal Compatible with All Ring Doorbells (Pro 1/2, 3, 4, Plus), Nest, Eufy, Wyze – C Wire Thermostat Power Supply
UNIVERSAL DOORBELL COMPATIBILITY – Engineered to power all major smart doorbells seamlessly. This adapter guarantees perfect performance with…
As an affiliate, we earn on qualifying purchases.
As an affiliate, we earn on qualifying purchases.
Understanding Ring Doorbell Requirements
To successfully hardwire your Ring doorbell, you need to confirm it meets specific power supply requirements, typically ranging from 8 to 24 volts AC.
First, check your existing doorbell system to verify it has a compatible transformer. For most models, the transformer should provide between 8VA to 40VA. If you're installing the Ring Video Doorbell Pro, make sure the transformer is rated between 16-24 VAC to prevent any damage.
It's also vital to reflect on the impact of HVAC maintenance on your home's overall electrical system, as a well-maintained system can help guarantee consistent voltage supply.
Before you begin any electrical work, it's important to consult local laws and building codes to guarantee compliance and safety.
If you're unsure about your current setup or the installation process, don't hesitate to consult a qualified electrician. They can help you verify whether your existing transformer is suitable or if you need to upgrade to a new one.
In some cases, using a Pro Power Kit may be necessary to maintain compatibility with your existing wiring system. This kit can help streamline the installation process while confirming your video doorbell functions effectively.

AC 24 Volt Transformer, C Wire Adapter, Compatible with All Versions of Ring Doorbell and Thermostat for Ecobee,Sensi and Honeywell, 315" Long Cable
WIDELY USE: US power cable Powers your popular smart thermostats((Nest 1st/2nd, Ecobee, Honeywell, Sensi) and doorbells(Ring Video Doorbell,…
As an affiliate, we earn on qualifying purchases.
As an affiliate, we earn on qualifying purchases.
Preparing for Installation

Preparing for Installation
Gather all the necessary tools and hardware before diving into the installation process to guarantee a smooth setup. Preparing for installation is essential, especially when dealing with electrical components. Having a clean and well-ventilated workspace can also enhance safety and efficiency during the process. Here's a quick checklist of what you'll need:
- Tools Needed: Screwdriver, drill, and wall anchors (if needed).
- Required Hardware: Ring doorbell, screws, and any additional connectors.
- Safety Checks: Confirm your existing doorbell system is compatible, with a functioning chime or transformer within the voltage range of 8-24 VAC.
Before you begin, make sure to turn off the power at the circuit breaker to guarantee electrical safety. This step is critical to protect you from any potential hazards during the installation.
Additionally, consult local laws and regulations regarding electrical work to ensure you comply with installation requirements and determine if a permit is necessary. By taking these steps, you'll set yourself up for a successful installation, avoiding any complications related to compatibility or safety.

Ring Spare Parts for Ring Wired Doorbell Pro (Video Doorbell Pro 2)
Spare parts to help you set up your Ring Wired Doorbell Pro (Video Doorbell Pro 2) in just…
As an affiliate, we earn on qualifying purchases.
As an affiliate, we earn on qualifying purchases.
Disconnecting the Existing Doorbell

Before you start disconnecting the existing doorbell, make certain the power is turned off at the circuit breaker to guarantee your safety.
Once you're sure the power is off, carefully remove the existing doorbell button from the wall by unscrewing it. As you disconnect the wires, make certain they don't fall back inside the wall, as that could complicate your installation.
It's also wise to take into account the air quality in your home during this process, as indoor air can often be more polluted than outside. Using an air purifier can help guarantee a healthier environment while you work.
Take note of the wiring configuration; typically, you'll find two wires—one labeled "Front" for power and another labeled "Trans" for the transformer. If your existing doorbell has a chime, you might need to bypass it with a jumper cable. This step guarantees that the Ring Doorbell receives a constant power supply without interruptions.
After you've disconnected everything, make sure to cap the exposed wires properly. This is vital to prevent any electrical issues later on.

Video Doorbell Key Removal Tool Compatible with Ring Battery Doorbell 2024 Release, Wired Doorbell Pro (N ewest Model), Wired Doorbell Plus (N ewest Model) 2PACK
COMPATIBILITY: compatible with Ring Battery Doorbell 2024 Release,Compatible with Wired Doorbell Pro (Newest Model), Wired Doorbell Plus (Newest…
As an affiliate, we earn on qualifying purchases.
As an affiliate, we earn on qualifying purchases.
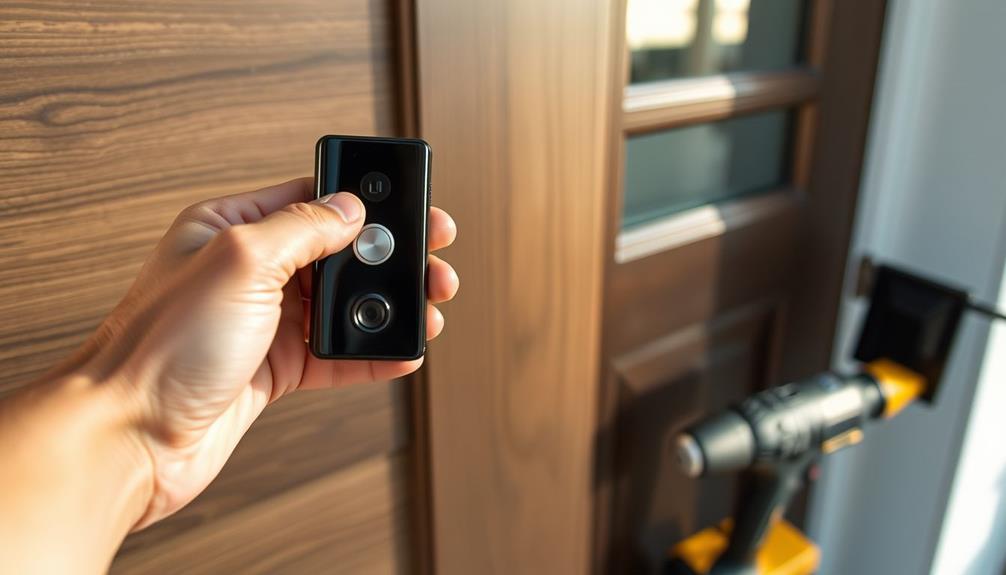
Connecting the Ring Doorbell

Start by confirming the power is off at the circuit breaker to safely connect your Ring Doorbell. This is essential for a smooth installation, as confirming proper electrical safety can prevent potential damage to your device. Here's how to get started:
- Bypass the Existing Doorbell: Use the included Jumper Cable to connect the Front and Trans terminals on your Ring Doorbell. This will bypass the existing chime and allow your Video Doorbell Wired to function properly.
- Make the Connection: Take the existing doorbell wires and loop them around the screws on the Ring Doorbell's terminal. Make sure to tighten them securely to guarantee a solid connection.
- Check the Power Supply: Confirm that your power supply meets the required specifications of 8-24 VAC for peak performance. If everything checks out, you're ready to restore power.
Once all connections are made, head back to the circuit breaker and restore power. Wait for the doorbell to power on, which is indicated by it lighting up and speaking. You're now ready to enjoy the benefits of your new Ring Doorbell!
Additionally, it's wise to be aware of plumbing issues from flushing non-flushable items that can lead to costly repairs in your home environment.
Mounting the Doorbell Securely

After verifying all connections are secure, it's time to mount the doorbell securely to your wall for best functionality. Start by marking the screw hole locations using the Ring doorbell as a template, verifying accurate placement. If you're working with hard surfaces like stucco or brick, drill holes and insert wall anchors to provide stability.
Next, connect the existing doorbell wires to the Video Doorbell terminals, wrapping the wires around each screw terminal to create a secure loop. Use the mounting screws from Bag A to attach the doorbell, but be cautious—over-tightening can damage the device.
Once the doorbell is firmly in place, reattach the faceplate. Don't forget to use the included security screw to secure the faceplate and deter tampering.
| Step | Action | Notes |
|---|---|---|
| 1. Mark Holes | Use the doorbell as a template | Verify accurate placement |
| 2. Drill Holes | For hard surfaces, use wall anchors | Adds stability |
| 3. Connect Wires | Secure loop around terminals | Prevents disconnection |
| 4. Attach Doorbell | Use mounting screws, avoid over-tightening | Protect your device |
Powering the Device

Powering your Ring Doorbell requires a compatible transformer that delivers the right voltage for ideal performance. Most battery doorbells need 8-24 VAC, while Pro models require 16-24 VAC. To enhance the audio experience, consider using a headphone amplifier if you're listening through headphones while monitoring your doorbell.
To guarantee a smooth setup, follow these steps:
- Bypass the existing chime: If you're connecting directly to the transformer, use the included jumper cable to bypass your existing chime.
- Securely connect wires: Attach the doorbell wires securely to the terminal screws on the Ring Doorbell, making sure each wire loops around its respective terminal.
- Restore power: After installation, head to your circuit breaker and restore power. Check for power indicators, such as lights or voice prompts, to confirm everything's working.
If hardwiring Ring isn't feasible, consider using the Ring Plug-In Adapter for a continuous power supply. This way, you can avoid any issues with battery life and make sure your doorbell stays powered.
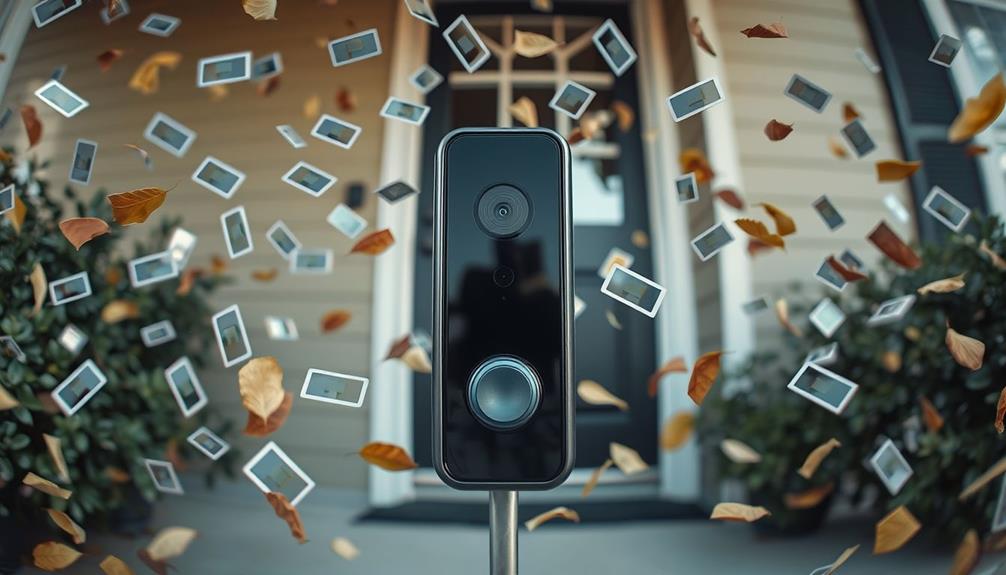
Configuring the Ring App

Now that your Ring Doorbell is powered on, it's time to configure the Ring app.
As you set up the app, consider the importance of AI advancements raise significant privacy concerns related to data usage.
You'll need to install the app, customize your notification settings, and set up live video access for maximum functionality.
Let's walk through these essential steps to get everything running smoothly.
App Installation Process
To get started with your Ring Doorbell, download the Ring app from the App Store or Google Play Store and create an account. This app is vital for managing your device and guaranteeing a smooth setup process. By effectively utilizing the app, you can enhance your overall user experience with the Ring Doorbell. Here's how to get everything rolling:
- Select Your Device Type: Once you open the Ring app, follow the on-screen prompts to select your specific Ring Doorbell model.
- Connect to Wi-Fi: You'll need to enter your Wi-Fi network password when prompted. This connection is essential for the doorbell to communicate effectively.
- Complete Installation: After connecting, confirm that your device is operational. The app may prompt you to perform any necessary firmware updates to enhance performance.
Once you've completed these steps, you can customize your notification settings to receive alerts for motion events and doorbell presses. This guarantees you stay informed about any activity at your door.
Notification Settings Customization
Customizing your notification settings in the Ring app lets you tailor alerts to fit your preferences and lifestyle.
Start by opening the Ring app and directing yourself to the device settings of your Ring doorbell. Here, you can adjust your notification preferences by selecting options like 'Motion Alerts', 'Live View Alerts', and 'Doorbell Press Alerts' based on your needs.
To minimize unnecessary interruptions, you can customize notifications further by adjusting the motion detection sensitivity using the sensitivity bar. This helps guarantee you only receive alerts that matter.
If you want to focus only on people, enable 'People Only Mode' to filter out notifications triggered by animals or vehicles.
Additionally, consider setting up 'Shared Users' in the app. This feature allows family members to receive notifications and access live feeds, enhancing your home security.
With these options, you can create a personalized experience that suits your lifestyle, making sure you stay informed while avoiding overwhelming notifications.
Live Video Access
Accessing live video from your Ring doorbell is easy once you've set up the Ring app on your smartphone. To get started, follow these steps:
- Download and Install: If you haven't already, download the Ring app and create an account or log in.
- Connect Your Doorbell: Confirm your Ring doorbell, like the Ring Video Doorbell Elite or the wired Video Doorbell Pro, is installed and powered on. Your existing doorbell chime must be compatible, and installation may be required to fully integrate it.
- Access Live Video Feeds: Open the Ring app, select your doorbell device from the dashboard, and enjoy live video streaming. You can also use the two-way talk feature to communicate with visitors.
To enhance your experience, make sure to customize notification settings so you receive alerts when motion is detected or someone rings the doorbell.
Additionally, if you encounter any issues, consider improving the Wi-Fi connection to guarantee smooth live video access.
Regularly check for app updates to secure the Video Doorbell and access the latest features.
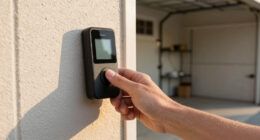
Troubleshooting Common Issues

When you encounter issues with your Ring doorbell, start by verifying the wiring compatibility to guarantee it matches your model's requirements.
Next, check the power supply to confirm it's delivering the right voltage.
Verify Wiring Compatibility
To guarantee your Ring doorbell works properly, you need to verify that your existing wiring meets the required voltage specifications. Start by checking if your current doorbell transformer provides the necessary voltage. Here are three key steps to follow:
- Use a Multimeter: Measure the voltage of your existing transformer to confirm it falls between the acceptable range for your specific Ring doorbell model—8-24 VAC for battery-powered models and 16-24 VAC for Pro models.
- Inspect Proper Wire Condition: Look for any signs of damage or corrosion in your low-voltage wiring. Poor wire condition can impede connectivity and performance, impacting the installation setup.
- Consider Replacement: If your existing wiring doesn't meet Ring specifications, it might be time to replace it with suitable low-voltage wiring for safe and effective operation.
If you run into any issues, don't hesitate to consult the Ring app or reach out to customer support. They can help you verify wiring compatibility and troubleshoot any problems before you proceed with your electrical work.
Check Power Supply
Checking the power supply is essential for guaranteeing your Ring doorbell operates smoothly and effectively. Start by verifying that your existing doorbell transformer outputs the correct voltage. For battery doorbells, it should be between 8-24 VAC, while Pro models need 16-24 VAC to avoid compatibility issues.
Use a multimeter to check the voltage at the doorbell wiring; it must align with the specifications for your specific Ring doorbell model. Additionally, inspect the doorbell wires for any signs of wear or damage. Frayed or broken wires can disrupt the power supply and lead to installation failures.
Don't forget to check the circuit breaker to guarantee the power is turned on after installation. A lack of power can prevent your doorbell from functioning. If you're using a Plug-In Adapter, confirm it's compatible with your model and delivers sufficient power.
Here's a quick reference table to help you:
| Step | Action | Tool Needed |
|---|---|---|
| Check Voltage | Verify output from transformer | Multimeter |
| Inspect Wiring | Look for damage or wear | Visual Inspection |
| Guarantee Power On | Check circuit breaker | None |
| Confirm Adapter Compatibility | Verify Plug-In Adapter specs | None |
| Test Functionality | Guarantee doorbell is operational | None |
Inspect Device Functionality
Inspecting your Ring doorbell's functionality is essential to guaranteeing it operates as intended after installation. By taking a moment to verify everything is in order, you can prevent potential issues down the line. Here are three key areas to check:
- Power Connections: Ensure the doorbell receives the correct power supply. Check the voltage from the transformer, which should be between 8-24 VAC for battery doorbells and 16-24 VAC for Pro models.
- Device Compatibility: If the doorbell isn't responding, confirm that your existing chime is compatible. If needed, securely bypass it to avoid any interruptions in functionality.
- Device Performance: Use the Ring app to inspect the device for connectivity issues or firmware updates that might affect its performance. Regularly check for physical damage or loose connections that could hinder its operation.
Utilizing Help Resources

Accessing a variety of help resources can make hardwiring your Ring doorbell a smoother process. Start by utilizing the Ring app, which provides step-by-step instructions and video tutorials tailored to your specific model and installation needs.
Make certain to understand the power supply requirements; your existing doorbell transformer should meet the necessary 8-24 VAC specifications for battery doorbells or 16-24 VAC for Pro models.
For detailed information, check the Ring Help Center. You'll find installation guidelines and troubleshooting tips that cover common issues you might face.
If you encounter challenges, don't hesitate to contact Ring customer support for personalized assistance regarding wiring compatibility and power supply options.
Additionally, consider participating in the Ring Community forums. Here, you can share your experiences and get advice from fellow users who've successfully hardwired their Ring doorbells.
Remember to stay informed about your local laws and building codes, especially if you're unsure about hiring a qualified electrician.
Utilizing these resources won't only enhance your understanding but also guarantee a successful installation.
Frequently Asked Questions
Do You Need an Electrician to Hardwire a Ring Doorbell?
You don't necessarily need an electrician to hardwire a Ring Doorbell, but it depends on your comfort level with electrical work.
If you're familiar with wiring and your existing doorbell setup meets the requirements, you might handle it yourself.
However, hiring an electrician can guarantee everything's up to code and safe, providing peace of mind.
If you choose to DIY, make sure you know how to safely disconnect power first.
How Do I Hardwire a Ring Doorbell?
To hardwire your Ring Doorbell, first, make sure you have a compatible transformer providing 8-24 VAC power.
Disconnect your existing doorbell, then connect the Ring's wires to the correct terminals, looping them securely. Make sure the wires are not frayed and are making firm contact with the terminals to ensure proper functionality. Once the wires are securely in place, use the included screws to mount the Ring doorbell onto the wall. If you’re unsure about the wiring process, consult a professional or refer to online guides on *how to connect Ring doorbell* units safely and correctly.
Mount the Ring Doorbell using the provided screws—don't over-tighten!
Restore power at the breaker and check if it lights up and speaks.
If you're using a chime, remember to bypass it with the jumper cable included.
How Do You Power a Wired Ring Doorbell?
To power a wired Ring Doorbell, you need to connect it to a compatible doorbell transformer that delivers 8-24 VAC.
Verify the transformer meets the doorbell's voltage requirements; for a Ring Video Doorbell Pro, it should provide 16-24 VAC with at least 10 VA.
If necessary, bypass the existing chime using a jumper cable.
Always check the transformer's functionality with a multimeter to confirm it's supplying the right voltage for peak performance.
Can a Ring Doorbell Be Hardwired to Power?
Yes, you can hardwire a Ring Doorbell to power. It needs a compatible transformer that provides 8-24 VAC for peak performance.
When you hardwire it, connect it to existing doorbell wiring or use a Ring Plug-In Adapter. Make sure you securely attach the doorbell's wires to the terminal screws.
Once you restore power at the breaker, check that the doorbell powers on with its lights and voice prompts.
Always follow safety guidelines!
Conclusion
To summarize, hardwiring your Ring Doorbell guarantees a reliable power source and eliminates the hassle of changing batteries.
Imagine never worrying about your doorbell dying while you're expecting guests!
By following the steps outlined, you've set up a smarter home security system.
If you encounter any issues, remember that help is just a click away in the Ring app.
Now, enjoy the peace of mind that comes with knowing who's at your door, anytime!