Fitting your Ring Doorbell is a simple process! Start by gathering the necessary tools such as a power drill and screws. If you are replacing an old doorbell, be sure to remove it carefully. Use the Ring app to connect your device to Wi-Fi and follow the instructions provided for setup. Attach the mounting bracket securely to your wall, then position the Ring Doorbell above it until it clicks into place. You can power it using existing wiring or by charging the built-in battery. After installation, you can personalize your notification settings for better monitoring. Stay tuned for more tips and tricks to ensure a smooth setup experience!
Key Takeaways
- Gather necessary tools and materials, including the installation kit, pliers, power drill, and a level tool for proper installation.
- Download the Ring app to connect the doorbell to Wi-Fi and create an account for setup.
- Remove any existing doorbell and secure the mounting bracket, ensuring it is level before drilling holes.
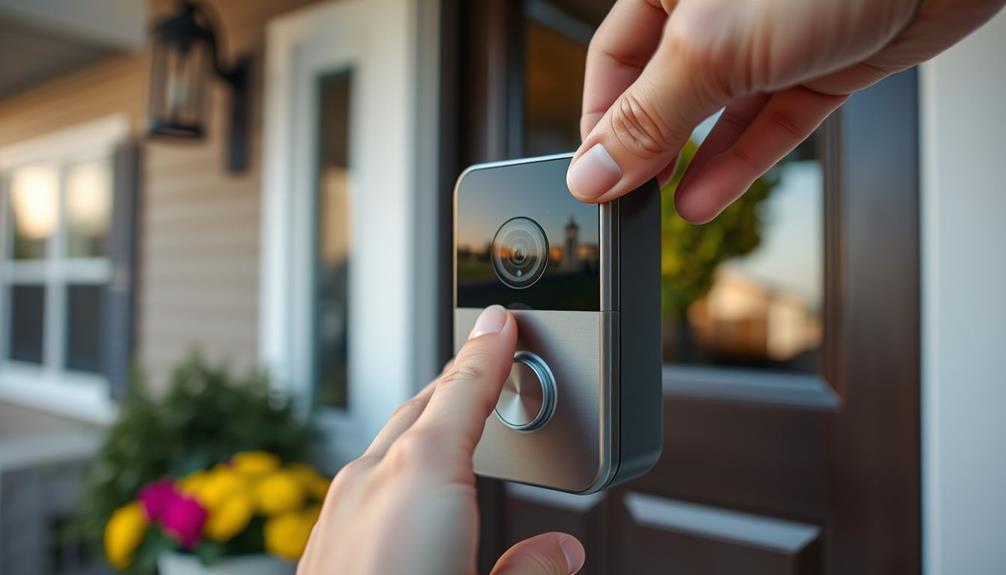
- Align the Ring Video Doorbell above the bracket and press until it clicks into place, ensuring it sits flush against the wall.

Ring Spare Parts Kit for Video Doorbell (2nd Generation)
Replace any lost or misplaced parts for your Ring Video Doorbell (2nd Generation).
As an affiliate, we earn on qualifying purchases.
As an affiliate, we earn on qualifying purchases.
Benefits of a Video Doorbell
Video doorbells, like the Ring Doorbell, often enhance your home security by allowing you to see and communicate with visitors from anywhere using your smartphone.
With remote viewing capabilities, you can monitor your front door in real time, ensuring you're always aware of who's at your home.
The motion-activated notifications alert you to deliveries, guests, or any suspicious activity, further enhancing your overall security.
Additionally, integrating smart home devices can create a more extensive security system, as you can combine features such as essential oils for relaxation to create a calming environment when you're at home.
These devices also offer two-way communication, letting you speak with visitors even when you're not home.
This feature can be particularly useful for managing deliveries or screening unexpected visitors.
The presence of a video doorbell acts as a strong deterrent to potential trespassers, reducing the risk of break-ins and vandalism.
Moreover, many models boast high-definition video quality and night vision capabilities, allowing you to capture clear footage both day and night.
The combination of these features provides peace of mind, knowing you can monitor your property at any time.

No-Drill Mount Compatible with Ring Battery Doorbell (2024 Release),Ring Doorbell Mounting Holder Bracket for Apartments Office Houses(1 Pack)
【Compatibility】Our No-Drill Mount is designed for Ring Battery Doorbell (2024 Release),For pleasant shopping experience, please confirm that your…
As an affiliate, we earn on qualifying purchases.
As an affiliate, we earn on qualifying purchases.
Installation Process Overview

To get started with installing your Ring doorbell, you'll need to gather the required tools and materials.
Make certain to check for any local regulations regarding doorbell installations and the necessary permits you might need.
Next, follow a step-by-step guide to guarantee everything goes smoothly.
Remember to keep safety precautions in mind throughout the process to protect yourself and your device, as well as to create a welcoming environment for potential visitors key factors in choosing a home cleaning service.
Required Tools and Materials
You'll need a few essential tools and materials to guarantee a smooth installation of your Ring doorbell. Start with the installation kit, which includes screws and a charger cord. Next, make sure you have a power drill and a level to ensure the doorbell is properly aligned and securely fastened. Additionally, consider any additional Ring doorbell options, such as a solar charger or a protective cover, to enhance the functionality and longevity of your device. These extra features can provide added convenience and protection for your Ring doorbell.
If you're working with an existing doorbell wiring setup, grab some pliers for secure wire connections. For battery-operated models, confirm the battery is fully charged before you begin. Additionally, it's wise to take into account the importance of surge protection, as power surges can damage your devices, including your new doorbell, so installing surge protectors might be beneficial.
You'll also want a power drill handy, especially if you're mounting on tough surfaces like brick or stucco, where a masonry bit may be necessary. A box cutter or flathead screwdriver will come in handy for removing the old doorbell.
To confirm everything aligns perfectly, a level tool is vital for proper bracket alignment during installation.
Don't forget to follow safety precautions, like turning off the power at the breaker box if you're connecting to existing wiring.
With these tools and materials in hand, you'll be well-prepared to install your Ring doorbell efficiently and effectively, making the process as straightforward as possible.
Step-by-Step Installation Guide
Start the installation process by confirming you've gathered all necessary tools and materials for a smooth setup. You'll need screws, a screwdriver, and a charging cord if you're using a battery-powered Ring Doorbell. If your model isn't hardwired, charge the battery fully, which typically takes around 4-6 hours. It's also crucial to verify the air quality in your installation area is good, as air purifiers improve indoor air quality considerably.
Next, download the Ring app to connect your Ring Doorbell to Wi-Fi. Position yourself near the installation site for the best signal, and complete the connection process in about 10 minutes. If you're replacing an existing doorbell, carefully remove it by unscrewing it and detaching the wiring, making sure you turn off power at the breaker box first.
Now, attach the mounting bracket to the wall. Use the live video feed from the Ring app to find the best angle for video quality, then secure the bracket with screws, making sure it's level.
Safety Precautions During Installation
Before diving into the installation, make certain to turn off the power at the breaker box to prevent any electrical hazards. This is vital for your safety while working with electrical wiring.
Additionally, consider enhancing your home security with modern technology, such as smart doorbells that offer remote access and other features smart features for remote access.
Here are some key precautions to keep in mind:
- Wear safety goggles and gloves: Protect your eyes and hands from potential injuries while handling tools and wires.
- Clear the area: Confirm that the installation area is well-lit and free of hazards. This will help you maintain focus and avoid accidents.
- Follow the manufacturer's instructions: Adhering closely to the guidelines will help you avoid electrical shocks and confirm proper installation of your doorbell.
- Handle existing wiring carefully: If you're removing an old doorbell, detach it gently to avoid damaging any power wires that you might need for the new installation.

RIOVO Adjustable 30 to 55 Degree Doorbell Angle Mount Compatible with Ring/Blink Video Doorbell/Battery Doorbell, Replacement Angle Adjustment Adapter Mounting Bracket Wedge Kit
Compatible Model: This angle mount compatible with RlNG Battery Doorbell (2024 Release) / Video Doorbell 2 / Video…
As an affiliate, we earn on qualifying purchases.
As an affiliate, we earn on qualifying purchases.
Required Tools and Materials

Gathering the right tools and materials is vital for a smooth Ring doorbell installation. You'll need a basic installation kit that comes with the Ring Doorbell, which includes screws and a small screwdriver. To make certain your battery is fully charged, a charging cord is also important.
Here's a quick reference table to help you gather everything you need:
| Tool/Material | Purpose |
|---|---|
| Installation kit | Contains screws and screwdriver |
| Charging cord | Charges the doorbell's battery |
| Power drill | Drills holes for installation |
| Masonry drill bit | Used for brick or stucco walls |
| Pliers | Connects wiring securely |
If you're replacing an existing doorbell, a box cutter or flathead screwdriver will be handy for removing it and accessing the wiring. Remember that proper alignment is key, so having a level tool and a pencil for marking screw holes will make your installation easier. With these tools, you're set for a successful installation of your Ring doorbell.

Replacement Fast Charging Charger Cable Power Cord Wire Compatible for Ring Enabled Video Doorbell (2020 Release) 2/3/3 Plus/4, Doorbell Pro/Plus and Camera Battery Charging Cable (3.3ft Orange)
1. [Compatibility] Professional USB charging cable compatible with video doorbell (2020 version) 2/3/3 Plus/4, doorbell Pro/Plus. (Note: Please…
As an affiliate, we earn on qualifying purchases.
As an affiliate, we earn on qualifying purchases.
Connecting to Wi-Fi

To connect your Ring doorbell to Wi-Fi, you'll first need to download the Ring app and create an account to initiate the setup process. Follow these steps to guarantee a smooth Wi-Fi connection:
- Check Your Network Settings: Make sure your Wi-Fi network supports either 2.4 GHz or 5 GHz for ideal performance. This is vital as AI advancements raise significant privacy concerns, particularly regarding data protection during device setup and usage. Understanding the importance of Cookies can help you manage your data preferences more effectively.
- Position Your Device: Stay within range of your Wi-Fi router to facilitate a strong connection signal when adding your doorbell.
- Scan the QR Code: The app will prompt you to scan the QR code on your Ring doorbell. This step links the device to your account and begins the Wi-Fi connection process.
- Address Connectivity Issues: If you run into any connectivity issues, consider using a Ring Chime Pro to extend your Wi-Fi signal and improve the connection to your doorbell.
Setting Up the Ring App

Now that you've connected your Ring doorbell to Wi-Fi, it's time to set up the Ring app.
Start by downloading the app from your device's app store, then follow the prompts to sync your doorbell.
Once you're connected, you can customize your notification settings to stay updated on any activity at your door.
Downloading the Ring App
Downloading the Ring app is your first step towards setting up your new Ring doorbell and enjoying its features. This app is essential for managing your device and enhances your overall user experience with options like live video streaming and motion alerts.
Here's how to get started:
- Download the app: Visit the App Store for iOS or Google Play Store for Android, then search for "Ring."
- Create an account: You'll need to input your email address and set a password to access your account.
- Connect to a stable Wi-Fi network: Confirm your smartphone is connected to a reliable Wi-Fi connection for the initial setup.
- Follow the installation process: Open the app and scan the QR code on your Ring doorbell for easy setup.
Once you've completed these steps, you can customize notification settings to suit your preferences.
With the Ring app, you'll be ready to monitor your home effectively and enjoy the peace of mind that comes with having a smart doorbell.
Happy installing!
Device Syncing Process
After setting up the Ring app, you'll need to sync your device for it to start functioning properly.
Begin by verifying your smartphone is connected to the same Wi-Fi network where you plan to install the Ring Doorbell. This connection is essential for a successful setup.
Next, use the app to sync the device by either scanning the QR code located on the Ring Doorbell or entering the device information manually.
Follow the step-by-step instructions provided by the Ring app. This process typically takes around 10 minutes. During this time, the app will guide you through connecting your Ring to your Wi-Fi network, making sure that everything is set up correctly.
Once you've successfully synced the device, you can customize your notification preferences within the app. This allows you to receive alerts for motion detection and doorbell presses, enhancing your security experience.
Notification Settings Customization
Customizing your notification settings in the Ring app lets you tailor alerts to fit your lifestyle and preferences. To get started, follow these steps:
- Open the Ring app and navigate to the "Device" section.
- Select your Ring doorbell to access its device settings.
- Adjust Motion Settings by tapping on it to modify detection sensitivity and enable or disable motion alerts.
- Go to Alert Settings to choose notifications for doorbell rings, motion alerts, and live view requests.
You can also customize the frequency of notifications. If you need some peace, set quiet hours during which you won't receive alerts.
It's essential to guarantee your smartphone's notification settings are enabled so the Ring app can send you real-time updates.
By taking the time to customize notifications, you can create a balance that suits your daily routine, ensuring you stay informed without being overwhelmed.
With these settings adjusted, you'll always know when your doorbell rings or when motion is detected, all while maintaining your comfort at home.
Mounting the Doorbell

To mount your Ring doorbell securely, start by positioning the mounting bracket over the existing hole and verifying it's level before marking the screw hole locations. This guarantees a clean and stable installation.
Next, drill the holes where you've marked and attach the mounting bracket using screws. Make sure it's fastened firmly to avoid any movement. If you're connecting to an existing doorbell chime, wrap the wires securely around the bracket, ensuring they don't touch to prevent short circuits.
After securing the bracket, align your Ring Video Doorbell above it and press down firmly until you hear it click into place. Verify that the doorbell sits flush against the wall for that polished look.
Here's a quick reference table to help visualize the process:
| Step | Action | Note |
|---|---|---|
| 1. Positioning | Place the bracket over the hole | Verify it's level |
| 2. Marking | Use a pencil to mark screw holes | For accurate drilling |
| 3. Attaching | Securely attach using screws | Avoid any movement |
| 4. Final Alignment | Align and click the doorbell in place | Verify it's flush |
Following these steps will help you mount your doorbell efficiently!
Powering Your Device

Whether you choose to charge the built-in battery or hardwire your Ring doorbell, powering your device is essential for peak performance. Here's what you need to take into account for each option:
- Battery Charging: If you're using a battery-powered model, charge the battery for about 4 to 6 hours before installation. Regular charging will keep your device running smoothly.
- Hardwiring: For a continuous power supply, hardwire the doorbell to your existing doorbell wiring. Make sure your existing system is compatible and provides a voltage between 8-24 VAC.
- Circuit Breaker: Always turn off the power at the circuit breaker before starting the hardwiring process. This step is vital to avoid electrical hazards during installation.
- Solar Charger: Think about adding a Ring Solar Charger to your setup. This handy accessory reduces the need for frequent battery charging by harnessing solar energy, making your battery-powered experience more convenient.
Maintenance and Troubleshooting Tips

Keeping your Ring doorbell powered is just the first step; regular maintenance and troubleshooting are key to guaranteeing it operates smoothly over time.
Start by checking the battery status regularly, especially for wireless models, to confirm it's fully charged before installation. This can prevent interruptions in performance.
To maintain clear video quality, clean the camera lens periodically. Dust and obstructions can markedly affect how well your doorbell captures footage.
Don't forget about software updates—keeping your device's firmware current through the app enhances security and introduces new features.
Additionally, perform an accessories inspection on items like the Chime and solar charger. Look for any wear and tear that could impact their functionality.
Monitoring your subscription status for the Ring Protect Plan is also essential. This guarantees you keep access to features like video recording and playback, while addressing any service interruptions quickly.
Frequently Asked Questions
Can You Fit a Ring Doorbell Yourself?
Yes, you can definitely fit a Ring doorbell yourself!
It doesn't require much—just some screws, a small screwdriver, and a charging cord from the installation kit.
If you're using a wireless model, charge the battery for about 4 to 6 hours.
You'll find a handy step-by-step guide in the Ring app to help sync your device.
Just remember to maintain it by cleaning the camera lens regularly for peak performance!
How Do I Put My Ring Doorbell on My Door?
Installing your Ring doorbell is like hanging a welcome sign on your home.
First, gather your tools—screws and a screwdriver are essential.
Charge the battery for 4-6 hours, then use the Ring app to find the perfect spot, about 48 inches high.
Secure the mounting bracket to the wall, connect any wires if needed, and finally, press the doorbell onto the bracket until it clicks.
You're ready to greet visitors!
How Do You Install a Wireless Ring Doorbell?
To install a wireless Ring doorbell, start by charging the battery for about 8 hours.
Next, download the Ring app on your smartphone to set it up and connect it to Wi-Fi.
Use a screwdriver to attach the mounting bracket to the wall, making certain it's level.
Align the doorbell with the bracket and press down until it clicks.
Do You Need Wiring to Install Ring Doorbell?
Imagine the convenience of seeing who's at your door without getting up.
You don't need wiring to install a Ring doorbell if you choose a battery-operated model. These portable devices allow you to enjoy smart home features anywhere you want.
If you opt for a wired version, existing doorbell wiring can provide continuous power.
Either way, you've got options to enhance your home's security and stay connected with visitors.
Conclusion
With your Ring Doorbell now securely in place, you've opened up a new level of home security, much like a modern-day guardian at your gate.
You can keep an eye on your visitors and your property, all while sipping coffee in your living room.
Remember, just like any hero's journey, some maintenance may be needed along the way.
Stay vigilant and enjoy the peace of mind that comes with knowing you're always connected to your doorstep.