To fit your Battery Ring Doorbell, start by verifying the battery is fully charged using the orange USB cable. Open the silver nickel faceplate to access the battery compartment, and slide the battery in until it clicks. Next, mount the doorbell at about 4 feet high for ideal viewing. Use a level tool for straight placement and secure it with the provided screws. Finally, align the faceplate, press firmly, and tighten the security screws. Don't forget to check the Ring app for Wi-Fi setup and battery status to verify everything's running smoothly. You'll discover more tips and troubleshooting hacks ahead!
Key Takeaways
- Charge the battery fully using the provided orange USB cable before starting the installation process.
- Open the silver nickel faceplate to access the battery compartment for insertion.
- Slide the fully charged battery into the compartment until it clicks securely in place.
- Close the battery compartment firmly to protect against the elements and tighten security screws.
Help Resources
When fitting your battery Ring doorbell, you can access a variety of help resources to guarantee a smooth installation process. The Ring website offers extensive assistance, including installation guides that walk you through each step of the battery installation. These guides make certain you're following the correct procedures, which can help you avoid common pitfalls.
Additionally, consider improving your indoor air quality with air purifiers to create a healthier environment while you set up your new device.
If you encounter issues during the install process, don't worry! There are troubleshooting articles available that specifically address problems you might face, like difficulties in charging the battery or connecting to an existing setup. The Ring app also provides support resources to enhance your experience and help you manage your doorbell effectively.
Should you need personalized assistance, you can always reach out to Ring customer support. They're ready to answer your questions and guide you through any challenges you face while fitting your battery Ring doorbell.
Installation Preparation

Before you start installing your battery Ring doorbell, gather the necessary tools and check the installation location to confirm a smooth setup. Here's a quick checklist to help you prepare for the installation of your Battery Doorbell Plus:
| Task | Items Needed | Purpose |
|---|---|---|
| Gather tools | Torx screwdriver, drill bit | For mounting and securing the doorbell |
| Charge the battery | Orange USB cable | Guarantees a fully charged battery |
| Verify compatibility | Voltage meter | Confirms compatibility with existing doorbell system |
Next, if you're replacing an existing doorbell, make sure to remove your existing doorbell first. Then, check the Wi-Fi signal strength at your installation location using the Ring app, as strong connectivity is vital for ideal performance. Finally, review the installation kit to confirm all hardware included, like screws and anchors, are ready for use. With these steps, you'll set yourself up for a successful installation of your new battery doorbell!
Mounting the Doorbell

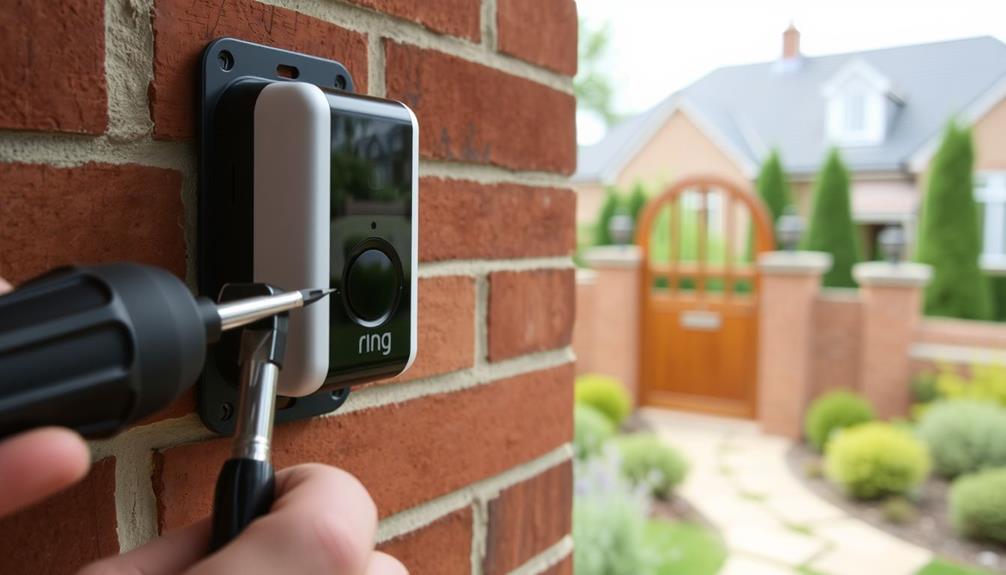
To guarantee the best performance, select a mounting location for your Ring battery doorbell that's about 4 feet off the ground. This height guarantees ideal viewing and accessibility, similar to how you'd consider the key factors in choosing a home cleaning service for your home.
Start by using a level tool to check that your mounting bracket will be straight. Mark the spots for drilling, and then secure the mounting bracket using the provided screws.
If you're working with masonry surfaces, remember to drill pilot holes and use brick anchors for added stability. This step is essential for making sure your doorbell stays in place, providing you peace of mind.
Once the bracket is installed, carefully align the doorbell with it. Use the included security screws to secure the doorbell firmly, so you can rest easy knowing it's protected.
Here's what you'll feel once it's mounted:
- Confidence in your home's security
- Convenience of easy access
- Satisfaction from a job well done
Power Connection Options

The Ring Battery Doorbell offers flexibility in power connection options, allowing you to choose between using its rechargeable battery or hardwiring it to an existing doorbell system.
If you opt for the rechargeable battery, make certain it's fully charged before inserting it into the battery compartment. Use the provided orange USB cable for charging, which may take several hours to reach a full charge. This option is convenient for those who want a quick installation without dealing with wires. Additionally, having a diverse range of investment options, like a Gold IRA, can provide financial security in uncertain times, similar to how the Ring doorbell enhances home safety through flexible installation choices benefits of converting 401k to Gold IRA.
On the other hand, if you prefer a hardwired connection, your existing doorbell system must operate within a voltage of 8-24 VAC. Before you start connecting the wires, it's essential to turn off the power at the consumer unit to avoid any electrical hazards. Once the power is off, carefully connect the wires to guarantee compatibility with the Ring's power accessories.
After installation, don't forget to regularly check the battery level through the Ring app, even if you're hardwired, to guarantee maximum performance and to keep track of any necessary recharges. This flexibility allows you to choose the best setup for your needs.
Battery Installation Process

To get started with the battery installation, make certain you charge the battery fully using the orange USB cable provided. This step is essential as it guarantees peak performance for your device.
Once it's ready, insert the battery into the compartment until you hear that reassuring click. This confirms it's securely in place and ready for use.
For more insights on enhancing user experience, you can explore user interaction data that's fundamental to product performance.
Charging the Battery
Charge your Ring battery using the provided orange USB cable, which may take several hours to fully charge before installation. It's vital to verify the battery is fully charged for peak performance, allowing for extended use without interruptions. Regular maintenance of your devices is important for confirming they function well, just like how cat health and nutrition requires attention to keep your feline friend healthy.
Feel the peace of mind knowing your home's security is always powered.
Enjoy the convenience of not having to worry about constant recharging.
Experience the satisfaction of knowing your Ring doorbell is ready whenever you need it.
Take pride in maintaining your home's safety with a fully charged battery.
To charge, first, access the battery compartment by opening the silver nickel faceplate. Slide the battery out and connect it to the charging cable. Once it's fully charged, you can insert the battery back into the compartment. Listen for that satisfying click to verify it's securely in place.
Don't forget to check the battery level regularly via the Ring app. This way, you'll always know when it's time for a recharge, confirming uninterrupted service and keeping your home safe and sound.
Inserting the Battery
Begin by opening the silver nickel faceplate to access your Ring Doorbell's battery compartment.
Before you insert the battery, make sure it's a fully charged battery. If needed, use the included orange USB cable to charge it, which can take several hours. It's vital to confirm that your battery is in good condition, as battery maintenance tips can prolong its lifespan.
Once the battery is charged, slide it into the compartment until it clicks securely, confirming that it's properly connected.
After inserting the battery, close the battery compartment firmly. This step is significant to keep the battery secure and protected from the elements.
Next, reinsert the faceplate over the doorbell. It's important to tighten the security screws using the provided screwdriver to complete the installation process. This guarantees that everything stays in place and functions correctly.
Final Setup Steps

Once you've fully charged the battery, slide it into the compartment of your Ring doorbell until it clicks securely into place. This simple action is the first of the final setup steps to fit your battery Ring doorbell.
Next, align the faceplate with the mounted doorbell and press it firmly to guarantee a snug fit. Once it's in place, use the included security screws and the provided screwdriver to tighten the faceplate, securing it against unauthorized removal.
Now, it's time to get everything connected. Open the Ring app on your mobile device and follow the in-app instructions to connect the doorbell to your Wi-Fi network.
- Feel the thrill of knowing who's at your door, even when you're not home.
- Experience peace of mind with instant notifications.
- Enjoy the convenience of a live feed right at your fingertips.
Testing and Troubleshooting

Now that you've set up your battery Ring Doorbell, it's time to test its functionality and troubleshoot any issues.
You'll want to check for notifications on your smartphone and address common connection problems to guarantee everything runs smoothly.
Let's go over the key steps to confirm your doorbell is working as it should.
Functionality Testing Steps
To guarantee your Ring Battery Doorbell is functioning properly, start by testing the notification speed on your mobile device by ringing the doorbell. You should receive a prompt notification.
Next, open the Ring app to access the live feed and confirm that the camera is providing a clear view. If everything looks good, verify that the battery level is adequate by checking the battery status in the app.
To ascertain peak performance, consider adjusting the motion sensitivity settings to receive timely alerts without excessive notifications.
Here are some emotions you might feel during this process:
- Excitement when you see the live feed working perfectly.
- Relief knowing the notifications come through quickly.
- Confidence in your home security system.
If you encounter any issues, don't hesitate to consult the troubleshooting guide in the Ring app. This guide can help you address common problems, guaranteeing your doorbell operates smoothly and efficiently.
Common Connection Issues
Common connection issues with your Ring Battery Doorbell can often stem from a few simple factors that are easy to check.
First, make sure the battery is fully charged and properly inserted during installation. A low battery can cause connectivity problems right from the start.
Next, verify that the Ring app is updated to the latest version; outdated apps may struggle with maintaining a stable connection for your Ring.
Wi-Fi signal strength plays an essential role, too. If you're experiencing weak signals, it can lead to frequent disconnections. Test the Wi-Fi signal at your doorbell's installation location and consider using a Wi-Fi extender if needed.
If notifications or live feeds aren't working, you might need to review the app's permissions. Make sure the Ring app has access to necessary features like notifications and location.
Lastly, if you still face issues, don't forget to restart both the Ring Doorbell and your router. This simple step can resolve temporary connectivity issues.
Troubleshooting App Problems
Experiencing issues with your Ring app can be frustrating, but many problems have simple solutions that can get you back on track quickly. Start by confirming you have the latest version of the app installed. Just check for updates in your device's app store. If glitches occur, try restarting both your mobile device and the Ring app to resolve those temporary glitches or connectivity issues.
Here are a few things to keep in mind:
- Confirm your Ring device is within range of your Wi-Fi connection.
- Verify your notification settings in the app to confirm they're properly enabled.
- Check that your device permissions allow notifications from the app.
If you've done all this and still face issues, don't hesitate to reach out to customer support for personalized assistance. They can provide the help for your Ring that you need.
Frequently Asked Questions
How to Install Battery in Ring Doorbell?
To install the battery in your Ring Doorbell, start by sliding out the silver nickel faceplate from the bottom.
Make sure the battery's fully charged using the orange USB cable.
Once charged, insert the battery into the compartment until it clicks into place securely.
After that, reattach the faceplate, ensuring it aligns properly.
Do I Need a Separate Chime for Battery Powered Ring Doorbell?
Do you really need a separate chime for your battery-powered Ring doorbell?
The good news is, you don't! It operates independently, using its built-in speaker for alerts.
However, if you'd like an audible notification throughout your home, connecting a Ring Chime or a compatible smart device can enhance your experience.
Plus, with the ability to send notifications directly to your smartphone, you'll never miss a visitor—whether you choose a chime or not!
How Do You Install a Wireless Ring Doorbell?
To install a wireless Ring doorbell, start by fully charging the battery with the provided USB cable.
Next, remove the faceplate to access the battery compartment and insert the charged battery until it clicks.
Attach the doorbell using the mounting bracket and screws, placing it about 4 feet off the ground.
Download the Ring app, follow the on-screen prompts to connect to Wi-Fi, and test the doorbell by pressing it to verify it works.
How Do You Put a Battery in a Doorbell?
When it comes to putting a battery in a doorbell, you'll want to start off on the right foot.
First, locate the battery compartment, usually hidden under a cover.
Once you've found it, make certain the battery's fully charged.
Slide it into the compartment until it clicks securely.
Don't forget to close the cover firmly; it protects the battery and guarantees your doorbell works like a charm!
Conclusion
Now that you've expertly fitted your battery ring doorbell, you're ready to welcome visitors like a modern-day gatekeeper, just as Odysseus welcomed his crew home.
With a few final checks, you'll guarantee everything's functioning smoothly.
Remember, if any hiccups arise, don't hesitate to consult the troubleshooting guide—it's your trusty map through this tech journey.
Enjoy the peace of mind that comes with knowing who's at your door, even when you're not home.