Connect with us

Ring Security Cameras

How to Cover Ring Doorbell Wires

Discover effective ways to conceal your Ring doorbell wires for a sleek look—find out how to ensure safety and aesthetics in your installation!

Published

on

covering ring doorbell wires

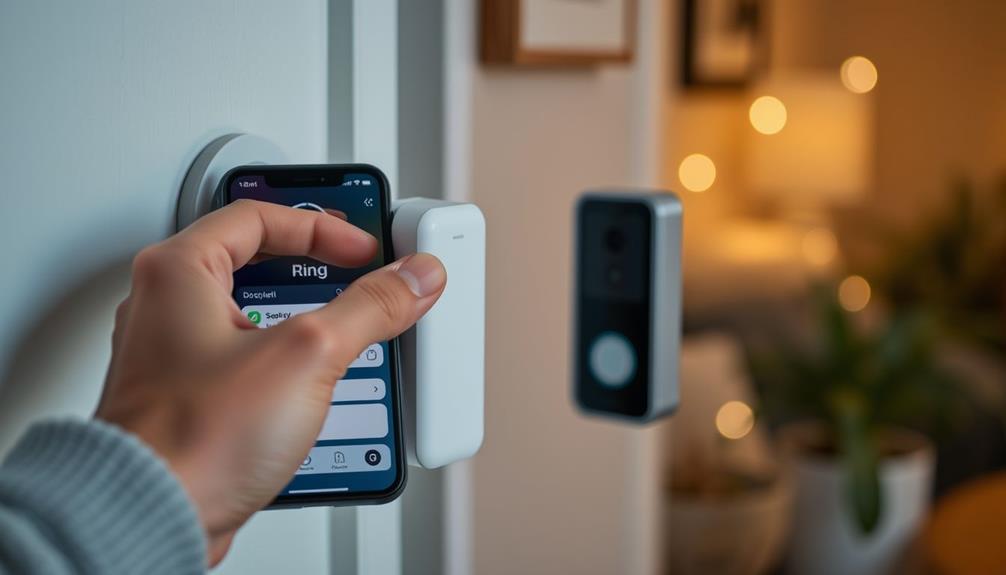
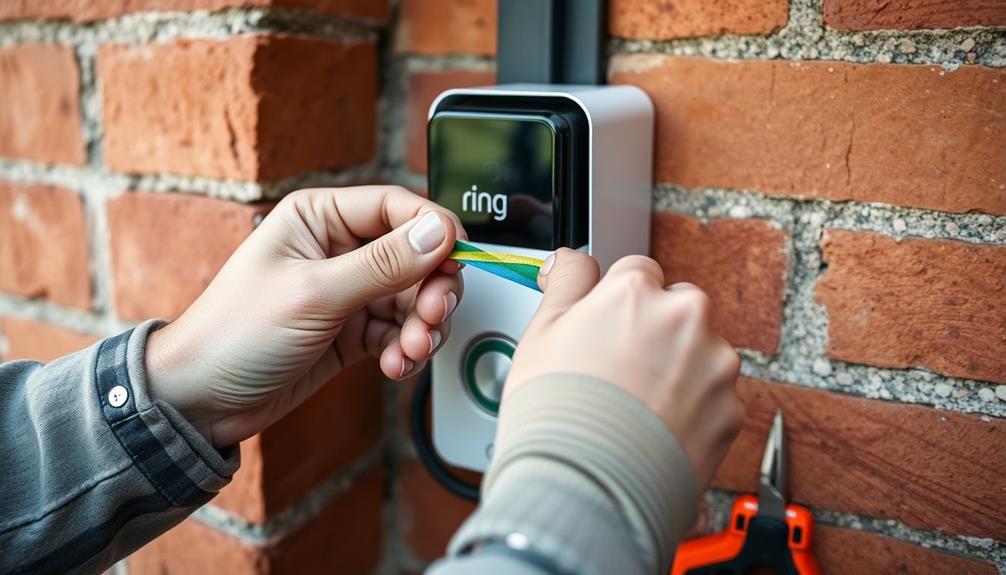
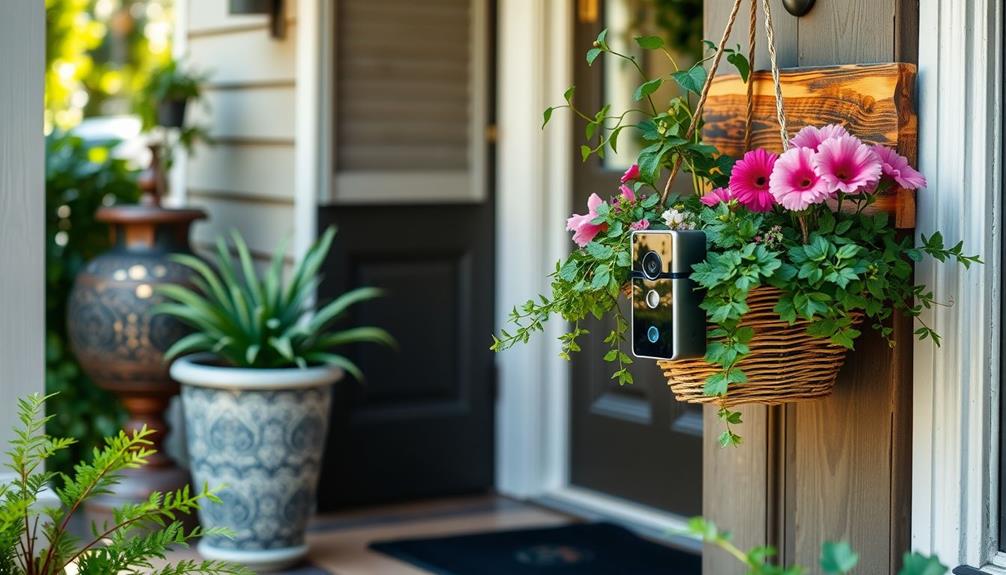
To cover your Ring doorbell wires, start by planning a direct route with minimal visual disruption. Use cable raceways, wire molding, or clips to secure and conceal the wires along walls or baseboards. If you prefer a cleaner look, paint the raceways to match your wall color. You can also consider using wall channels for seamless integration. Verify all connections are secure with wire nuts and electrical tape. Finally, check for wear or damage regularly to maintain safety. There are more tips and tricks on managing installations that can make your project even smoother. If you’re considering concealing a Ring doorbell on an exterior wall, weather-resistant materials are essential to ensure longevity. Additionally, you may want to use outdoor-rated raceways or conduit to protect the wiring from the elements. With careful planning and attention to detail, you can ensure both aesthetics and functionality while enhancing the security of your home.

Key Takeaways

  • Use wire molding or raceway to conceal exposed Ring doorbell wires along walls for a seamless appearance.
  • Paint wire covers to match the wall color, enhancing integration and minimizing visibility.
  • Secure wires with adhesive cable clips or low-profile raceways to prevent wear and tear.
  • Consider using a buried conduit for outdoor installations to protect the wires from environmental elements.

Planning Wire Routing

When planning wire routing for your Ring Doorbell, start by evaluating your home's layout to find the most direct and least intrusive path for the wiring.

Consider exploring options like utilizing existing wiring routes, such as along baseboards or through closets, to keep the installation clean and minimize visual disruptions. This not only simplifies the process but also guarantees you maintain an aesthetically pleasing environment.

Additionally, confirm your installation area is equipped with good lighting, as this can greatly aid in the routing process, making it easier to spot potential obstacles like furniture or walls that could impede your chosen path.

If you have homes with cathedral ceilings, pay special attention to the height and accessibility of your installation area. You want to make sure you can reach the wiring without too much hassle.

If you're running wires through walls or ceilings, use a long drill bit to create clean holes. This technique will help prevent damage to existing structures or finishes, keeping your home neat.

Advertisement

Additionally, think ahead about maintenance; keep wire connections accessible and avoid permanent fixtures that could block access to the wiring.

By planning your wire routing carefully, you'll set yourself up for a smooth installation and future maintenance.

For more home improvement tips, check out essential tools for installation

Tools and Materials Needed

Gathering the right tools and materials is essential for effectively covering your Ring doorbell wires. Start with wire nuts, which are important for securing connections and ensuring a safe, insulated wiring setup.

For those looking to enhance their home setup, consider the significance of having a clean and professional appearance, as highlighted in best practices for home maintenance. You'll also need a cable cover or raceway to conceal the wires along your walls. This not only provides a clean and professional appearance but also protects the wires from potential damage.

Advertisement

In addition to wire nuts and cable covers, make sure you have electrical tape on hand. This tape is essential for securing and insulating any exposed wire connections, helping to prevent moisture and corrosion.

A stud finder may be necessary to locate the studs in your wall, ensuring that your cable covers or raceways are securely installed.

Techniques for Concealing Wires

wire concealment techniques explained

Covering your Ring doorbell wires can greatly enhance the overall appearance of your home, and there are several effective techniques to achieve a neat and organized look.

Proper wire management not only improves aesthetics but also prevents potential damage to the wires, similar to how projector maintenance tips guarantee peak performance and longevity of your equipment.

Here are four methods you can use:

  1. Wire Molding: Use wire molding or raceway to conceal exposed wires along walls. This provides a professional finish and protects the wires from damage.
  2. Paint the Covers: To help your wire covers blend seamlessly into your decor, paint them to match your wall color. This minimizes visibility and enhances aesthetics.
  3. Cable Clips: Utilize cable clips or adhesive mounts to secure wires against surfaces. This keeps your wires tidy and prevents them from dangling or creating tripping hazards.
  4. Buried Conduit: For outdoor installations, consider using buried conduit to protect your wires from weather elements while maintaining a clean look. This is especially important if you're running wires to an existing doorbell chime.

Running Wires Along Baseboards

When you're running wires along baseboards, it's important to take into account both aesthetics and installation techniques.

Selecting the right best window treatments can complement your decor while ensuring that the wires are discreetly hidden.

Advertisement

You want your setup to look good while also being functional and safe.

Using wire clips or low-profile raceways can help you achieve a seamless look without compromising accessibility.

Aesthetic Considerations

Running wires along baseboards offers a clean and discreet solution for concealing your Ring doorbell wires while maintaining the aesthetic appeal of your home. By carefully planning the installation, you can enhance the overall look of your space. Additionally, a well-organized environment can contribute to reducing stress for both you and your pets, as indicated by studies on feline emotional connection.

Here are some aesthetic considerations to keep in mind:

  1. Choose the Right Wire Color: Opt for wire colors that match your baseboards. This helps the wires blend in and become less noticeable.
  2. Use Adhesive Cable Clips: Secure wires to the baseboards using adhesive cable clips. This keeps everything in place and reduces wear and tear on the wires.
  3. Consider Flexible Raceways: These can be painted to match your wall color, allowing for a seamless integration that's visually pleasing.
  4. Avoid High-Traffic Areas: Route your wires away from busy footpaths to minimize the risk of tripping hazards and potential damage.

Installation Techniques

Securing your Ring doorbell wires along baseboards not only enhances safety but also creates a tidy and organized appearance in your home. This installation technique is especially useful when traditional wiring routes are impractical. Here's a quick guide on how to effectively run your wires.

Step Action
1. Gather Supplies Get adhesive cable clips and low-profile covers.
2. Plan Your Route Identify the path from the existing doorbell button to the Ring doorbell.
3. Secure Wires Use cable clips to attach the wires along the baseboard.
4. Cover Wires Apply paintable conduits for a seamless look.
5. Check for Hazards Verify wires aren't pinched by furniture or foot traffic.

Using Wall Channels

utilizing wall mounted channels

Utilizing wall channels is an effective way to neatly conceal your Ring doorbell wires while enhancing your home's aesthetic appeal.

These channels not only provide a clean and organized look but also protect your wires from wear and tear. Additionally, guaranteeing that your indoor environment is well-maintained can contribute to better air quality, which is essential for overall comfort.

Advertisement

For those interested in improving air quality, consider air purifiers for improved health.

Here's how to effectively use wall channels for your installation:

  1. Choose the Right Size and Color: Wall channels come in various sizes and colors. Pick one that matches your wall finish for a seamless look.
  2. Measure and Cut: Measure the length needed and cut the wall channels accordingly. They can be easily trimmed to fit around corners or obstacles.
  3. Secure the Channels: Use adhesive backing or screws to attach the wall channels to the wall. This guarantees a secure fit without damaging the wiring inside.
  4. Insert the Wires: Carefully place your Ring doorbell wires into the channels, guaranteeing they're tucked away neatly.

Alternatives to Traditional Wiring

If you're looking to avoid traditional wiring for your Ring doorbell, you've got some great options.

Wireless models like the Ring 2 run on battery power, which provides flexibility in installation locations.

Additionally, you can also consider using a plug-in transformer for easy installation, allowing for a more straightforward setup without the need for extensive wiring.

These alternatives make it simple to set up your doorbell without the hassle of extensive wiring, making it similar to professional email etiquette in its efficiency and clarity.

Advertisement

Wireless Installation Options

Wireless installation options for Ring doorbells offer homeowners the freedom to place their devices anywhere without the constraints of traditional wiring. This flexibility makes them perfect for homes lacking existing electrical connections. The Ring Video Doorbell 2, for instance, features a battery-operated model that's easy to mount and requires minimal maintenance.

Additionally, understanding how to maintain a healthy environment for your pets is essential, as emotional attachment in cats can influence your home dynamics when introducing new technology.

Here are some key benefits of choosing wireless installation options:

  1. Easy Placement: You can mount your doorbell wherever it fits best without worrying about wires.
  2. Battery Life Extension: Using a solar charger accessory can greatly extend the battery life, meaning fewer changes for you.
  3. Feature-Rich: Wireless models come equipped with motion detection and two-way audio, providing the same functionality as hardwired options.
  4. Aesthetic Appeal: You can maintain a clean look by avoiding visible wires, keeping your entrance tidy and modern.

With these advantages, switching to a wireless Ring Video Doorbell can enhance both convenience and style in your home.

Plugin Transformer Solutions

Plugin transformers offer a hassle-free way to power your Ring doorbell without needing extensive wiring modifications. Instead of dealing with complex installations, you can easily plug in a transformer, connect it to your doorbell, and enjoy a reliable power source.

These transformers typically provide 16VAC to 24VAC output, making them compatible with most Ring models, including the Ring Pro, which requires a steady power supply.

Advertisement

For larger installation projects, consider the best practices for airless paint sprayers to guarantee a professional finish when painting around your doorbell setup.

If you don't have existing doorbell wiring, a plugin transformer is an excellent solution. You can run low-voltage wires from the transformer along baseboards or through walls, keeping your space looking tidy.

This option is particularly beneficial in homes where new wiring is impractical, such as those with unique architectural features or limited access to traditional wiring routes.

Securing and Finishing Touches

finalizing security enhancements now

Securing your Ring doorbell wires properly guarantees they stay protected and out of sight, giving your installation a polished look. To achieve this, follow these essential steps:

  1. Use wire clips or staples to secure the wiring along walls or baseboards. Make sure they're tightly fastened to prevent any movement or damage. Regular maintenance, like confirming your wires aren't exposed to weather elements, is vital for longevity, particularly if you're considering <a target="_blank" href="https://graceforlifedesigns.com">weather-resistant materials</a> for outdoor installations.
  2. Consider paintable wire covers or conduit to conceal the wires. This allows them to blend seamlessly with your home's decor, enhancing the aesthetics of your doorbell system.
  3. When running wires through exterior surfaces, opt for weatherproof conduit. This protects against moisture and extreme temperatures, maintaining the integrity of your wiring.
  4. Trim any excess wire, leaving a small length for adjustments. Confirm all connections are tightly secured and insulated to prevent any electrical issues.

After you've finished securing everything, regularly check for any signs of wear or damage on the wires and covers. Replace any components as necessary to maintain safety and functionality in your doorbell system. With these finishing touches, you'll confirm your installation not only looks great but operates reliably.

Troubleshooting Wiring Issues

Even with your wiring neatly secured and finished, you might encounter some issues that can affect your Ring doorbell's performance.

First, check the transformer to verify it's functioning correctly. Most Ring doorbells require a voltage between 16VAC and 24VAC, so confirm that yours meets this requirement. If you're experiencing power issues, this could be a key factor.

Advertisement

Next, inspect all wiring connections. Loose or corroded connections can lead to performance problems, so make certain everything is tight and in good condition. If you're using existing wiring from a previous doorbell, validate its compatibility and condition to avoid any malfunctions.

If you're still facing challenges, consider sharing photos of your wiring setup in community forums. You might find valuable troubleshooting tips from others who've experienced similar issues.

Seeking Professional Help

pursuing expert assistance now

If you're unsure about handling the wiring for your Ring doorbell, seeking professional help can make the process smoother and safer. Hiring a licensed electrician or professional installers can guarantee that your installation meets local building codes and safety standards.

Here are some benefits of engaging a professional:

  1. Expertise: Licensed electricians have the training and experience to tackle unique wiring challenges, guaranteeing a proper and secure installation.
  2. Efficiency: Professional installers can expedite the process, minimizing the risk of damage to your walls or existing structures while covering the wires.
  3. Aesthetic Solutions: They can provide valuable insights into the best methods for concealing wires, like using wire conduits or channels for a clean appearance.
  4. Peace of Mind: Many installation services offer warranties or guarantees on their work, giving you confidence in the safety and functionality of your covered wires.

Frequently Asked Questions

How Do You Cap off Doorbell Wires?

To cap off doorbell wires, first, turn off the power at the circuit breaker for safety.

Then, use wire nuts to cover each exposed wire, twisting them tightly to prevent any accidental contact.

If you're dealing with multiple wires, group them by color, capping each one individually.

Advertisement

For added safety, wrap electrical tape around the wire nuts and wires.

How Do You Cover a Ring Doorbell?

Imagine the cozy ambiance of home, yet those unsightly wires disrupt the scene.

To cover your Ring doorbell effectively, you can use wire molding or cable raceways that blend seamlessly with your walls.

If aesthetics matter, paintable wire covers can match your decor.

For outdoor setups, opt for weatherproof conduit to keep the wires safe.

Advertisement

Just make certain everything stays ventilated, so your doorbell remains functional and elegant.

It's all about a polished look!

What to Do if Doorbell Wire Breaks?

If your doorbell wire breaks, start by turning off the power at the circuit breaker to stay safe.

Inspect the damaged wire to see if you can reconnect it or if you need a replacement.

Strip any damaged insulation and use compatible wire, typically 18 AWG.

Advertisement

Splice in the new section with wire nuts or solder, then insulate the connections with electrical tape.

Can You Use Ring Without Doorbell Wires?

Yes, you can use a Ring Doorbell without doorbell wires!

You'll just need to choose a battery-operated model, like the Ring 2, which installs wirelessly. This gives you flexibility in placement, as you won't be tied to existing wiring.

Just keep in mind that you'll need to recharge or replace the battery periodically.

If you want to simplify maintenance, consider using a solar charging option to keep your device powered up.

Advertisement

Conclusion

As you wrap your Ring doorbell wires in a cozy cloak of concealment, think of it as tucking a delicate flower into a bouquet.

Just like that flower, your home deserves to showcase its beauty without the distraction of tangled cords.

With a little planning and creativity, you can create a seamless look that enhances your entrance.

If you encounter challenges, don't hesitate to seek professional help—sometimes a guiding hand is all you need to bloom.
Advertisement
Advertisement

Ring Security Cameras

How to Delete All Video on Ring Doorbell

Unlock the secrets to deleting all videos on your Ring Doorbell; discover the simple steps that ensure your privacy and storage management.

Published

on

delete all ring videos

To delete all videos from your Ring Doorbell, log into your account on the Ring app or website. Navigate to the Event History section where all recorded videos are stored. For the app, select videos by swiping right on Android or long-pressing on iOS. If you're using a desktop, you can click "Select All" for bulk deletion. Remember, you can only delete up to 94 videos at once. Confirm your choice to permanently remove them. Always download important footage first, as deleted videos can't be recovered. Discover more tips to manage your video recordings effectively.

Key Takeaways

  • Log into your Ring account on the desktop version for easier video management options.
  • Navigate to the Event History section to view all recorded videos.
  • Use the "Select All" option to choose multiple videos for deletion, up to 94 at once.
  • Click on the "Delete" button and confirm your choice to permanently remove selected videos.

Why Delete Ring Videos

You might want to delete Ring videos to free up space for new recordings and confirm you keep only the footage that matters most. With videos auto-deleting after 60 days, managing limited storage becomes vital.

By regularly deleting unimportant videos, you verify that you retain important footage and optimize available storage for future needs. Security systems play a significant role in maintaining your home's safety, and effective video management practices are key to harnessing their full potential. Keeping your recordings organized not only aids in security but also aligns with the value of home security systems, which emphasize the importance of monitoring safety.

Establishing effective video management practices is key. Make it a habit to conduct a video review every few days, which helps prevent the loss of critical recordings.

If you have private videos that you wish to keep longer, consider downloading important clips before you delete your Ring videos. This way, you can safeguard valuable content that may be necessary for future reference or security purposes.

Deleting unimportant videos not only frees up space but also enhances the overall performance of your smart home security system.

Advertisement

Who Can Delete Videos

Only the primary account holder of a Ring device can delete recordings, guaranteeing that video management remains secure and controlled. This means that if you're the primary account holder, you have the exclusive authority to manage and delete any videos recorded by your device.

To enhance your home security system, consider integrating it with a home theater setup for better monitoring and viewing experiences.

Shared users, on the other hand, have limited permissions. They can view existing videos but can't delete or modify any recordings. This helps maintain the privacy of your account and prevents unauthorized access to your private data.

Here's a quick overview:

  • Primary Account Holder: Has full control to delete recordings and manage shared users.
  • Shared Users: Can view videos but lack permissions to delete anything.

It's essential to effectively manage your shared users to enhance community safety while protecting your personal video data. By understanding who can delete videos and how permissions work, you can guarantee your Ring account remains secure and your recordings are handled appropriately.

How to Delete Videos on the App

delete videos from app

To delete videos on the Ring app, simply navigate to the Event History list where your recordings are stored. If you're using an Android device, swipe right on the events to reveal checkboxes that allow you to select multiple videos for deletion. For bulk deletion, tap the "Delete All" option at the bottom right of your screen. On an iOS device, long-press the events to show individual radio buttons for selection before deleting.

Here's a quick reference table to help you understand the deletion process:

Advertisement
Device Type Selection Method Bulk Deletion Option
Android Swipe right for checkboxes "Delete All" at bottom
iOS Long-press for radio buttons "Delete All" not available
Primary User Can delete recordings Yes
Shared Users Cannot delete recordings No
Event History Access recordings Yes

Methods for Deleting Videos

When it comes to deleting videos on your Ring Doorbell, you've got a couple of straightforward methods at your disposal.

Regular updates to your content, like deleting old videos, can improve your overall user experience and engagement user engagement metrics.

You can easily use the app for quick deletions or opt for the desktop version for more bulk options.

Let's explore how each method works so you can choose what suits you best.

App Deletion Methods

Deleting videos on the Ring app is a straightforward process, allowing you to manage your Event History with ease. Maintaining peak performance and ensuring that your device operates smoothly is essential, just like using air purifiers to improve indoor air quality improve indoor air quality.

Advertisement

You can choose to delete individual videos or use bulk deletion to remove multiple events at once. Here's how to efficiently delete videos in the app:

  • Navigate to the Event History list.
  • Swipe right on events to reveal checkboxes for selection.

If you prefer selecting individual videos, simply long-press the events in the Android app to bring up radio buttons for easy selection.

Remember to download any important videos before you delete them, as once they're gone, they're permanently removed from Ring servers.

Desktop Deletion Options

Managing your video library on the Ring website is simple, allowing you to delete unwanted recordings with just a few clicks. Start by logging into your account and accessing the Event History section. Here, you can view all the videos recorded by your Ring Doorbell.

It's essential to recognize that maintaining your video privacy is crucial, especially considering the ethical frameworks necessary for responsible AI deployment.

On your desktop, you have the option to select individual videos or use the "Select All" feature to quickly delete multiple videos at once. Just keep in mind that you can only delete up to 94 videos simultaneously; if you try to delete more than this, you'll see an error message.

Advertisement

Once you've selected the videos you wish to delete, verify the action. This will permanently remove the videos from Ring's servers, meaning you won't be able to recover them later.

Consequently, if there are any important recordings you want to keep, be sure to download those before you proceed with the deletion. This process guarantees your video library stays organized and free of clutter, making it easy to manage your Ring Doorbell recordings.

How to Delete Videos on Desktop

delete videos on desktop

To delete videos on your Ring doorbell using a desktop, you'll first need to log into your Ring account at Ring.com.

It's important to regularly manage your video storage to guarantee you have space for new footage, especially since video clips can accumulate quickly.

From there, navigate to the Event History section, where you can easily manage and delete individual videos or select multiple ones at once.

Just remember the limit of 94 videos for bulk deletion to avoid any errors, and consider the impact of cat health and nutrition when deciding what to keep or delete.

Advertisement

Accessing Video Management

Accessing your Ring account on the official website lets you easily delete unwanted videos from your doorbell's history. Follow these steps to manage your recorded events efficiently: Many retailers have a straightforward return process for various products, which can be helpful if you ever need to return your Ring device or accessories general return policies overview.

  • Log in to your Ring account using your credentials.
  • Navigate to the "History" tab, where you'll see all your recorded events.

Once you've selected the videos, click on the delete option. You'll need to confirm your choice to permanently remove them from your account. Remember, deleted videos are gone for good and can't be recovered, so make certain you've downloaded any important footage before hitting delete.

This process allows you to keep your video history organized and free of unwanted content. Whether you're clearing out old notifications or just managing your footage, accessing the History tab makes it straightforward. By regularly reviewing and deleting unnecessary videos, you can guarantee your Ring account remains tidy and efficient.

Bulk Deletion Process

Deleting multiple videos from your Ring doorbell is quick and easy when you use the desktop version of your Ring account. First, log into your Ring account on the website with your credentials.

Once you're in, navigate to the Event History section, where you'll see all the recorded videos associated with your device. Keeping your video storage organized is essential, especially in light of cybersecurity threats that can compromise your data.

To initiate the bulk deletion process, you'll need to select the videos you want to delete. You can do this by clicking the checkboxes next to each event. If you have many videos to remove, you can also use the "Select All" option for convenience.

Advertisement

Just remember, you can only delete a maximum of 94 videos at one time. If you try to delete more, you'll receive an error message.

After you've made your selections, simply click the "Delete" button. This action will permanently remove the chosen videos from your account, freeing up space and keeping your Event History organized.

Following these steps will guarantee that you efficiently manage your Ring doorbell videos without hassle.

Video Management Best Practices

Effective video management guarantees you maintain control over your Ring Doorbell footage while maximizing storage space. To make sure you don't lose important recordings, establish a routine for reviewing recordings every few days. Regularly deleting private videos that are no longer needed not only frees up valuable storage space but also guarantees that you maintain a clear and organized video library. Implementing best practices in software quality assurance can also enhance your overall management efficiency.

Here are some best practices to take into account:

Advertisement
  • Utilize the bulk deletion feature: This allows you to delete multiple videos at once, making your management process efficient.
  • Download essential videos: Before deleting any footage, download the important ones to retain them beyond the 60-day limit.

Community Feedback on Deletion

community input regarding deletion

User feedback highlights significant challenges in deleting videos from the Ring app, pointing to a need for a more user-friendly interface. Many of you have expressed frustration with the difficulty of locating the delete options, especially on the Android app. Some users only find dropdowns that lack a clear "Delete All" feature, complicating the video management process. This frustration is similar to what many experience when maneuvering through complex systems without clear instructions, much like understanding aromatherapy techniques can be intimidating without proper guidance.

Community feedback consistently suggests a strong preference for checkboxes over radio buttons when selecting videos for deletion. This shift towards more intuitive selection methods could greatly enhance your experience. Managing large volumes of recordings can be overwhelming, and having a straightforward way to delete unwanted videos is essential.

Advocates within the community are actively calling for a "Delete All" option in future app updates. This feature would simplify video management and alleviate the challenges many of you face when trying to clear out old footage. As users continue to voice their concerns, it's clear that improvements to the user interface and deletion functionalities are necessary to meet your needs effectively. By addressing these issues, the Ring app could become a more efficient tool for managing your recordings.

Understanding Video Retention Policies

Understanding how long your Ring videos are stored is vital for managing your footage effectively. Knowing the video retention policies can help you decide which videos to keep and which to delete.

In the U.S., videos are stored for a maximum of 60 days before they're automatically deleted to manage storage. Keep these key points in mind:

  • If you have a Ring Protect subscription, you may enjoy longer storage options.
  • Regularly review and delete unimportant stored videos to optimize storage.

It's important to actively manage your video storage. You should frequently check your footage, as the longer you wait, the more you'll risk losing important recordings to the automatic deletion process.

If you want to maintain a tidy library, be proactive in reviewing and deleting unnecessary videos. By doing this, you can guarantee that your Ring device operates efficiently and that you have space for the most relevant recordings.

Advertisement

Additional Video Management Options

enhanced video management features

Managing your Ring videos effectively goes beyond just deletion; there are several additional options to help you stay organized and make the most of your recordings.

You can manage your videos through both the Ring app and the Ring website, giving you flexibility for video management. The Ring app allows you to delete videos individually or in bulk, making it easier to keep your recordings tidy.

Before you delete any videos, consider downloading important footage to retain it beyond the automatic 60-day retention policy.

Regularly reviewing your videos and deleting those you no longer need helps maintain ideal performance and storage on your device. Plus, you can share relevant videos with neighbors via Neighbors by Ring, promoting community awareness and enhancing neighborhood safety.

Frequently Asked Questions

How Do I Delete All My Ring Videos at Once?

To delete all your Ring videos at once, you'll want to log in to the Ring website or use the mobile app.

On the website, find the "Delete All" option in your video management settings.

Advertisement

If you're using the app, go to Event History, swipe right on the videos, and select "Delete All" at the bottom.

Just remember to download any important videos first, since deleted ones can't be recovered!

How Do I Delete Recordings on My Ring Doorbell?

To delete recordings on your Ring Doorbell, start by opening the Ring app or visiting the Ring website.

Navigate to your Event History, where you can select individual videos or choose the "Delete All" option.

If you're using the website, remember you can delete up to 94 videos at once.

Advertisement

Always download any important videos before you delete them, as they're permanently removed once deleted.

Only the primary account holder can delete recordings.

How Do You Clear a Ring Doorbell Video?

Imagine the relief of clearing out clutter from your life.

To clear a Ring Doorbell video, you'll start by opening the Ring app.

Navigate to your Event History, where you can see all your recordings.

Advertisement

If you want to delete an individual video, swipe right to select it, then hit "Delete."

For bulk deletion, choose the "Delete All" option.

Just remember, once you delete, those videos are gone for good!

How Do I Delete Old Camera From Ring App?

To delete an old camera from your Ring app, open the app and navigate to the "Devices" section.

Select the camera you want to remove, then tap on it to access the settings.

Advertisement

Scroll down to "Device Settings" and choose "Remove This Device."

Confirm your action when prompted.

Keep in mind that deleting the camera will erase all associated recordings and settings, so make sure you really want to proceed before confirming.

Conclusion

In the end, managing your Ring videos helps keep your digital space clutter-free and under control.

Just like tending to a garden, regularly pruning away the unnecessary allows the essential to thrive.

Advertisement

By knowing who can delete videos and how to do it across different platforms, you're in charge of your privacy and peace of mind.

So, take a moment to review your footage and make room for new memories, ensuring your doorbell camera serves you best.

Continue Reading

Ring Security Cameras

How to Delete All on Ring Doorbell

Discover the simple steps to delete all videos on your Ring Doorbell, but don’t miss out on essential tips for managing your footage effectively!

Published

on

delete all ring data

To delete all videos on your Ring Doorbell, open the app and go to the Event History. Here, you can either long-press on Android or swipe right to select videos. Use the "Delete All" option for a bulk removal of recordings, but remember to download any important clips first, as they'll be permanently deleted. If you're using the desktop app, you can remove up to 94 videos at a time. For a smoother experience, stay updated on the app version and explore features that simplify your video management process. There's more to uncover about managing your footage effectively!

Key Takeaways

  • Access the Ring app, navigate to Event History, and select the "Delete All" option for bulk deletion of videos.
  • Use long-press on Android or swipe right for checkboxes to select videos for deletion.
  • Confirm deletion with a second prompt to ensure you want to remove the selected videos.
  • Important videos should be downloaded before deletion, as they are permanently removed from your account.

Deleting Videos on Ring App

To delete videos on the Ring app, simply navigate to the Event History list where you can easily select the events you want to remove.

Given the increasing scrutiny on cybersecurity measures, it's crucial to understand how to protect your privacy in digital spaces, such as the importance of email security threats.

On your Android device, you can long-press events to reveal individual radio buttons for selection, but many find it more intuitive to swipe right on events to display checkboxes.

Once you've selected the videos you want to delete, keep in mind that you should download any important videos first, as deleted videos are permanently removed from the Ring servers.

If you want to clear multiple videos at once, the Ring app offers a "Delete All" option at the bottom right of the Event History screen.

Advertisement

This feature allows you to delete several videos simultaneously, making it more efficient.

However, remember that if you're using the desktop version of the Ring website, you can delete up to 94 videos at a time.

Trying to delete more than that will result in an error message.

With these steps, managing your video storage is straightforward, ensuring you keep only what's necessary on your Ring app.

User Experiences With Deletion

You might find it frustrating to locate the delete options in the Ring app, especially on Android where a clear "Delete All" feature seems missing.

Advertisement

Many users have expressed similar sentiments, indicating a need for a more streamlined interface that enhances user experience, as seen in content updates likely ongoing.

Many users prefer checkboxes for easier selection, but the current interface can lead to confusion.

This feedback highlights a common desire for a more intuitive video management experience.

Difficulties Locating Delete Options

Many users struggle to track down the delete options in the Android Ring app, leading to confusion and frustration.

The interface can be unintuitive, making the video management experience less enjoyable. Additionally, issues with user interface design can often reflect broader trends in technology and user experience, such as the importance of cat health and nutrition in creating a seamless interaction with pet-related apps.

Advertisement

Here are some common difficulties users face:

  1. Limited Visibility: Some users only see dropdowns without a visible "Delete All" option, making it hard to delete multiple videos quickly.
  2. Selection Method: Long-pressing events may reveal individual radio buttons for selection, which many find less intuitive than checkboxes. This can complicate the deletion process.
  3. Feedback Loop: Community feedback consistently shows a strong preference for checkboxes, as they provide a clearer and more user-friendly deletion experience.
  4. Overall Experience: The varying visibility of icons and options can further detract from the user experience, leaving many feeling frustrated when trying to manage their video content.

If you're among those struggling with these delete options, you're not alone. The complexities of the Android Ring app's interface can create real difficulties, making it essential to understand how to navigate these features effectively.

Preferences for Checkbox Interface

Users overwhelmingly favor checkboxes for selecting multiple videos in the Ring app, finding them more intuitive and efficient for managing deletions.

The current interface can lead to frustration, as many struggle to locate delete options, particularly on Android devices. Checkboxes provide clear visibility for selection, allowing you to quickly choose which videos to delete without the hassle of tedious individual selections.

This user preference aligns with the concept of enhancing user experiences through social proof influences decision-making, as community feedback plays an essential role in shaping app interfaces.

Instead of relying on less user-friendly methods like long-pressing to reveal radio buttons, users want a straightforward checkbox approach. This design not only simplifies the deletion process but also enhances the overall experience in the Ring app.

Advertisement

Community feedback consistently highlights the need for a more accessible "Delete All" option, which is often hidden or hard to find.

Incorporating checkboxes for bulk deletion would streamline your interactions, making it easier to manage video storage.

You deserve an interface that caters to your needs, reducing frustration and improving usability.

Deletion Limitations

data erasure restrictions overview

When you're trying to manage your Ring Doorbell videos, you'll hit some limits that can be frustrating. You can only delete a maximum of 94 videos at a time, and this means you might've to navigate through multiple selections.

Additionally, understanding the credit card impacts on personal finances can help you decide if investing in a premium service for easier video management is worth it.

Plus, switching between cameras to delete more videos adds another layer of inconvenience to the process.

Advertisement

Bulk Deletion Restrictions

You can only delete up to 94 videos at a time on the desktop version of the Ring app, which can be frustrating if you have a large collection. This maximum limit makes bulk deletion a tedious process, requiring you to manage your videos carefully.

One common annoyance users face is that, similar to clogging remedies, the process can become cumbersome when trying to clear out excess videos. Here's what you need to know:

  1. Selected Camera: You can only delete videos from the selected camera, so if you want to delete more, you'll need to switch to another camera.
  2. User Frustration: Many users express frustration with this limitation, wishing for a more intuitive method to handle video deletions.
  3. Navigation Required: The process involves multiple selections, which can feel cumbersome when you're trying to clear out a significant number of videos.
  4. Faster Than Individual Deletion: While bulk deletion is faster than deleting videos one by one, it still requires attention to avoid exceeding the limit.

These bulk deletion restrictions in the Ring app can slow down your video management, but understanding them can help you navigate the process with less hassle.

Maximum Video Deletion Limit

Managing video deletions becomes even more complicated due to the maximum limit of 94 videos that can be removed at once on the Ring desktop site. If you try to delete more than this maximum deletion limit, you'll encounter an error message. To effectively manage your footage, you'll need to navigate through multiple selections or switch cameras for additional videos.

Here's a quick overview of the deletion process:

Action Description
Deleting 1-94 videos You can delete these videos simultaneously.
Deleting more than 94 An error message will appear.
Managing large volumes Switch cameras or select multiple videos.

While the deletion process can feel tedious, it's still quicker than deleting videos individually. Before you hit that deletion limit, make sure to review and download any important clips. This way, you won't lose valuable footage from your Ring account. By understanding these limits, you can better manage your videos and keep your account organized.

Advertisement

Community Feedback

Many users have voiced their frustration over the absence of a straightforward "Delete All" feature in the Ring app, making it difficult to manage video deletions efficiently. Community feedback indicates a strong desire for enhancements to the user interface, particularly regarding bulk deletion.

In addition to video management, users often seek insights on key factors in choosing a home cleaning service that can improve their overall home experience.

Here are some common suggestions:

  1. Introduce a Delete All Feature: Users want a single option to delete multiple recordings at once, simplifying the process.
  2. Improve Delete Options Visibility: Many report confusion about where to find delete options, urging clearer labeling and positioning.
  3. Implement Check Boxes: Users prefer check boxes for selection over radio buttons, which would make selecting multiple videos easier.
  4. Enhance App Functionality: There's a call for improvements that streamline deletion and enhance the overall video management experience.

Engagement discussions within the community have proven helpful in guiding users through the current deletion methods. However, the consensus remains clear: enhancing the app's functionality and user interface is essential for improving the video management experience.

Data Management Practices

effective data organization strategies

Effective data management practices are essential for guaranteeing you don't lose important footage while maintaining ideal storage on your Ring Doorbell. Understanding the retention policy is vital—videos are automatically deleted after 60 days in the U.S. and 30 days in some other countries. To manage your video storage effectively, regularly review and delete unimportant clips to avoid reaching storage limits.

Here's a quick guide to help you with your data management:

Action Description
Review Videos Check your footage regularly to identify unimportant clips.
Download Footage Save any important videos before you delete them.
Use the Ring App Utilize the app for easy management and deletion of videos.

The community emphasizes having straightforward options for managing personal video data. By following these best practices, you can guarantee that you don't accidentally delete important footage. Remember, once you delete videos from the Ring servers, they're permanently removed. Stay proactive in your video management to maintain a clutter-free storage experience and avoid losing valuable recordings.

Advertisement

Bulk Deletion Process

To delete multiple videos at once on your Ring app, start by accessing the menu icon and steering to the "Devices" section.

It's important to manage your recorded events mindfully, as balancing innovation and privacy rights remains a challenge in today's digital landscape.

Here's how you can initiate the bulk deletion process:

  1. Select your specific Ring device.
  2. Navigate to the "Event History" section to manage your recorded events.
  3. Look for the Pencil icon to begin selecting videos you wish to delete.
  4. After marking the videos, tap "Delete" at the top of the screen.

You'll need to confirm your selection. The app will prompt you for a second confirmation, ensuring you truly want to proceed with this action.

This step is vital, as any videos you delete will be permanently removed from the Ring servers.

Before you delete videos, remember to download any important videos you may want to keep.

Advertisement

If you decide to delete all, be certain you won't miss those recordings later on.

The bulk deletion feature in the Ring app streamlines managing your recordings while helping you maintain your privacy and storage efficiently.

Troubleshooting Tips

effective problem solving strategies

When facing difficulties with video deletion on your Ring app, troubleshooting steps can help restore functionality quickly.

First, make certain you have the latest version of the Ring app installed. This guarantees you can access all features, including the bulk delete option.

If you're having trouble with this feature, check your internet connectivity; a stable connection is essential for smooth operation.

Additionally, maintaining your device and verifying it's free from dust and allergens can improve overall performance, just like how air purifiers improve indoor air quality.

Advertisement

If the app becomes unresponsive or shows glitches, try restarting it. This simple step often resolves many issues.

Additionally, review your app settings to confirm that the necessary permissions for managing video data are enabled. Without these permissions, you might face limitations in deleting videos.

If you still encounter problems, don't hesitate to consult the FAQ section on the Ring website. It offers valuable troubleshooting tips specifically related to event history management.

By following these steps, you'll increase your chances of successfully deleting videos and enjoying a seamless experience with your Ring Doorbell.

Account Management

Managing your Ring account is essential for keeping your video recordings organized and guaranteeing you have control over who can access them. With effective account management, you can easily delete your Ring videos and maintain your privacy.

Advertisement

Additionally, investing in a home security system can complement your Ring Doorbell by enhancing overall safety and deterring potential intruders, as studies show that homes without security systems are considerably more likely to be burglarized increased safety and peace of mind.

Here are some key steps to reflect on:

  1. Log in to your Ring account to access your Event History and video management options.
  2. Delete a video by selecting it from your recordings and following the prompts for removal.
  3. Manage shared access to guarantee only you can delete recordings, while others can only view them.
  4. Engage in the Ring community to share insights and learn from other users' experiences.

Frequently Asked Questions

How Do I Delete My Ring Doorbell History All at Once?

To delete your Ring Doorbell history all at once, head to the Ring app and open the "Event History" section for your device.

Look for the pencil icon, which lets you initiate bulk deletion.

Select the videos you want to remove, then tap "Delete" at the top.

Confirm your choice again to finalize the process.

Advertisement

If you're using the Ring website, there's a "Delete All" option for easier management of your recordings.

How Do I Remove All Devices From My Ring?

Imagine your devices scattered across the Ring app, each one linked to your account. You want to remove them all, but the process feels overwhelming.

Start by opening the app and heading to the "Devices" section. You'll see each device listed. Select one, scroll down, and tap "Remove Device."

Repeat this for every device, as there's no bulk option. Remember, once removed, all videos and settings disappear forever.

Can I Delete Multiple Ring Videos at Once?

Yes, you can delete multiple Ring videos at once.

Advertisement

Using the Ring app, go to your "Event History," swipe right to select the videos you want, and tap the "Delete" option at the top.

If you're on a desktop, you can select up to 94 videos for deletion simultaneously.

Just remember to confirm your choice twice, and make sure to download any important videos beforehand since deleted ones can't be recovered.

How Do I Delete Recordings on My Ring Doorbell?

Think of your Ring recordings as a digital scrapbook; sometimes, you need to clear out old memories.

To delete recordings, open the Ring app and head to the "Event History" for your device.

Advertisement

Swipe right to select videos with checkboxes, then tap "Delete" at the top.

For bulk deletion, find "Delete All" in the bottom right corner.

Just remember, once deleted, those memories are gone for good—so download anything important first!

Conclusion

In summary, managing your Ring Doorbell videos doesn't have to be a hassle.

By understanding the deletion processes and limitations, you can keep your account clutter-free.

Advertisement

Remember, it's always a good idea to back up any important footage before hitting that delete button.

With a little know-how, you'll be able to keep your data in check and guarantee your privacy is intact.

So, don't let it get out of hand—stay on top of your video management!

Continue Reading

Ring Security Cameras

How to Delete All History on Ring Doorbell

Manage your Ring Doorbell history effortlessly; discover the simple steps to delete all recordings and ensure you don’t lose crucial footage.

Published

on

delete ring doorbell history

To delete all history on your Ring Doorbell, open the Ring app and tap the menu icon. Navigate to "Devices" and select your doorbell. Then go to "Event History" to view recorded videos. For bulk deletion, tap the pencil icon, select the videos you want to delete, and confirm your choices. If you want to delete everything, make sure you download any important footage first, as deleted videos can't be recovered. This process helps manage your storage effectively. Stick around to discover more tips on optimizing your Ring device settings!

Key Takeaways

  • Open the Ring app and tap the menu icon to access the "Devices" section for your Ring Doorbell.
  • Navigate to "Event History" to view all recorded videos associated with your device.
  • Use the pencil icon to initiate bulk deletion and select all videos you wish to remove.
  • Confirm your deletion choices by tapping the "Delete" button and following the second confirmation prompt.

Understanding Video Deletion

Understanding how to delete videos on your Ring Doorbell is vital for managing storage and guaranteeing you keep only the footage that matters to you.

As the primary account holder, you have the authority to delete videos whenever needed. Whether you want to delete all your recordings or just a few, the process is straightforward using the Ring app or website.

Additionally, maintaining clean air quality in your home can be enhanced by using air purifiers, which improve indoor air quality greatly.

It's essential to recognize that videos are automatically deleted after 60 days, but manually deleting unnecessary footage can free up valuable storage space sooner. You can delete videos individually or in bulk, giving you flexibility based on your storage needs.

Before you delete any important recordings, make sure to download them, as once you delete videos, they're permanently removed from Ring servers.

Advertisement

Regularly reviewing your footage helps maintain superior device performance and guarantees you don't lose vital videos. By actively managing your recordings, you can keep the footage that's significant to you while clearing out the rest.

Accessing the Ring App

To access the Ring app, you'll need to download it from the App Store or Google Play and log in with your credentials.

The app's user-friendly interface makes it easy to manage your home security system, similar to how island getaways provide a seamless experience for relaxation and adventure.

Once you're in, tap the menu icon to navigate through various sections, including your devices and event history.

Select your specific device to review and manage your recorded events easily.

Advertisement

Navigating the Menu

When you open the Ring app on your device, tap the menu icon (☰) in the upper left corner to get started. This will bring up the main menu, where you can navigate through various options related to your Ring devices.

Here, you'll want to select the "Devices" section to view all your connected Ring devices. Having a security system, like the Ring doorbell, can greatly enhance your home security and provide peace of mind, as noted by studies showing that homes with security systems are less likely to be targeted by burglars increased safety and peace of mind.

Once you've accessed the devices, choose the specific Ring device you wish to manage, such as your Ring doorbell. After selecting your device, navigate to the "Event History" section. This is where you can access all recorded videos and events associated with your Ring device.

If you're looking to delete some of this history, you'll need to tap the Pencil icon, which allows you to initiate bulk deletion. From there, you can select the videos you want to remove.

Selecting Your Device

Open the Ring app and tap on the "Devices" section to quickly access the settings for your specific Ring doorbell.

Advertisement

Once you're there, locate the menu icon in the upper left corner. This icon allows you to view all your connected devices.

As you manage your device, consider how transforming properties into retreats can enhance relaxation and security in your home.

Select the specific Ring device you want to manage. This takes you to its settings and features, where you can control various aspects of your doorbell.

To manage your recorded events, navigate to the "Event History." Here, you'll find all the videos associated with that device.

If you're looking to delete multiple videos at once, look for the Pencil icon, which initiates the bulk deletion process.

Advertisement

This feature makes it easy to clear out your Event History without having to delete each recording individually.

Event History Access

Accessing the Event History in the Ring app is a straightforward process that lets you manage your recorded events with ease. To get started, tap the menu icon (☰) at the top left corner of the home screen. From there, navigate to the "Devices" section and select the specific Ring device you want to manage.

Once you're in, scroll down and tap on "Event History" to view your event history list. It's important to regularly review your recordings to guarantee that your device is functioning at its best and to maintain your privacy, especially considering the impact of mental health support on overall well-being.

Here's what you can do in the Event History:

  • Review all your recordings associated with the selected device.
  • Delete specific recordings you no longer need.
  • Manage your settings for best functionality.

Make sure your Ring app is updated to the latest version to guarantee best functionality when accessing the Event History.

With these easy steps, you'll have complete control over your recordings and can easily delete any unwanted events. Enjoy the peace of mind that comes with effectively managing your Ring device's event history.

Advertisement

Bulk Deletion Process

mass data removal procedure

To efficiently delete multiple videos from your Ring doorbell's event history, start by tapping the menu icon in the top left corner of the app.

From there, navigate to the "Devices" section and select the specific Ring device you want to manage events for.

Once you've selected your device, go to the "Event History" section to view your recorded events. This process allows for better data protection regulations and guarantees your privacy is maintained during video deletion.

To begin the bulk deletion process, tap the Pencil icon to enter editing mode.

This will allow you to select multiple videos you wish to delete.

After carefully choosing the videos, look for the "Delete" option at the top of the screen.

Advertisement

Tap it to initiate the deletion process.

User Instructions for Deletion

To delete your Ring doorbell history, you'll want to follow a straightforward step-by-step guide.

Make certain to confirm your deletion selections to avoid accidentally losing important footage.

It's also essential to verify that you've backed up any important recordings, as deleting them is permanent.

Additionally, integrating practices like aromatherapy techniques can help enhance your relaxation while managing your smart home devices.

Advertisement

Don't forget to download any videos you want to keep before hitting that delete button.

Step-by-Step Deletion Guide

Start by opening the Ring app and tapping the menu icon (☰) to begin deleting your doorbell's history. It's important to be aware of cybersecurity measures when managing your device, as vulnerabilities can sometimes expose personal data.

Here's a quick guide to help you through the process:

  • Navigate to the "Devices" section to select your specific Ring Doorbell.
  • Go to "Event History" where you'll find all your recorded videos.
  • Use the Pencil icon to initiate bulk deletion and select the videos you want to delete.

Once you've made your selections, confirm your choice by tapping "Delete" at the top. You'll need a second confirmation to finalize the deletion process.

Remember, if there are any important videos you want to keep, it's a good idea to download them before you proceed. Deleted videos are permanently removed from Ring servers, so make sure you're ready to delete the history.

Following these steps guarantees your Ring Doorbell's Event History is cleared efficiently while keeping your important videos safe.

Advertisement

Confirming Deletion Selections

Confirm your deletion selections by tapping on the desired videos to mark them for removal before hitting the "Delete" button at the top of the screen. This action initiates the deletion process, guaranteeing that only the selected videos are targeted for removal. Once you've made your selections, a second confirmation prompt will appear. It's essential to confirm that you really want to delete the selected videos, as this action can't be undone.

If you prefer, you can also opt to delete all events at once through the Event History section. However, remember to download any important videos beforehand to avoid permanent loss.

Here's a quick summary of the deletion process:

Action Description Notes
Select Videos Tap on desired videos for deletion Guarantee correct selections
Confirm Selection Tap "Delete" to finalize deletion A second confirmation prompt
Delete All Option Choose "Delete All" in Event History Useful for bulk deletion

Make sure you're using the latest version of the Ring app and that the necessary permissions are granted for a smooth experience.

Downloading Important Videos

Before deleting any videos, make certain to download important footage to keep a copy for future reference, as deleted videos can't be recovered.

Advertisement

It's essential to manage your video storage effectively, especially since Ring devices have a 60-day auto-delete policy. Regularly reviewing your footage can help you maintain a healthy balance between video storage and important memories, similar to how healthy lifestyle blogs encourage regular engagement with wellness practices.

To download videos, follow these steps:

  • Access the Event History section of your Ring device.
  • Select the specific video you wish to save.
  • Tap the download icon to initiate the saving process.

Regularly review your footage to identify which clips are worth keeping. This practice not only helps you maintain important memories but also guarantees you're not caught off guard when the auto-delete feature kicks in.

Troubleshooting Common Issues

resolving frequent technical problems

Occasionally, you might run into issues when trying to delete history on your Ring Doorbell, but there are simple troubleshooting steps you can take to resolve them.

First, confirm you have the latest version of the Ring app installed. Updates can often fix bugs related to video deletion. If the bulk delete option isn't responding, simply restart the app or your device to refresh the connection. Additionally, confirming your devices are regularly maintained, like how self-cleaning mechanisms can enhance vacuum performance, can prevent software-related issues.

Next, check your internet connectivity. A poor connection can hinder your ability to delete videos from your Ring device. If you're still facing issues, review your app permissions. Make sure you've granted the necessary permissions for video management and deletion within your app settings.

If you encounter errors while trying to delete a large number of videos, remember that you can only bulk delete up to 94 videos at a time on desktop.

Advertisement

Community Insights and Feedback

Many users have shared their experiences and challenges with the deletion process on community forums, highlighting areas for improvement in the Ring app. One recurring theme is the need for a more intuitive interface, especially when it comes to finding delete options on the Android app.

Many folks expressed their frustration over the absence of a "delete all" feature, as bulk deletion can feel tedious and time-consuming.

Here are some insights from community discussions that resonate with many users:

  • The importance of downloading important videos before deletion to avoid losing valuable footage.
  • User concerns about the permanence of deleted videos from Ring's servers.
  • Appreciation for timely support from Ring representatives who clarify the deletion process.

Best Practices for Video Management

effective video management strategies

To keep your Ring video history organized and manageable, regularly review and delete unimportant footage. This practice helps you maintain ideal storage space on your device. Establish a routine, such as reviewing recordings every few days, to prevent unnecessary data from accumulating.

Before you delete any videos, make certain to download important videos that you want to keep, as once they're removed from Ring servers, they can't be recovered. Familiarize yourself with the bulk deletion feature, which allows you to efficiently remove multiple videos at once, making your video management process quicker and easier.

Be aware of Ring's video retention policy, which states that videos are automatically deleted after 60 days. This knowledge can help you plan your video management strategy and guarantee you keep only what matters most.

Advertisement

Frequently Asked Questions

How Do I Delete My Ring Doorbell History All at Once?

To delete your Ring Doorbell history all at once, open the Ring app and go to the "Devices" section.

Select your Ring device, then tap on "Event History."

Look for the Pencil icon to enter bulk deletion mode.

Choose the "Delete All" option at the bottom right of the screen.

You'll need to confirm your choice to finalize the deletion, so make sure to download any important videos before you proceed.

Advertisement

How Do I Delete My Doorbell History?

Did you know that around 40% of homeowners use smart doorbells like yours for enhanced security?

If you want to delete your doorbell history, start by accessing your device's app.

Navigate to the event history section, where you can select the videos you want to remove.

Tap the delete option and confirm your choice.

How Do I Delete Recordings on My Ring Doorbell?

To delete recordings on your Ring Doorbell, open the Ring app and tap the menu icon.

Advertisement

Navigate to the "Devices" section and select your specific device.

Access the "Event History," where you'll see a Pencil icon for bulk deletion.

You can select individual videos or hit "Delete All" at the bottom right.

Just remember, you'll need to confirm the deletion, so make sure to download any important videos first!

Can You Bulk Delete Ring Videos?

Yes, you can bulk delete Ring videos easily. Just tap the Pencil icon in the Event History, select the videos you want to remove, and confirm your choices.

Advertisement

You can delete up to 94 videos at once on desktop, making cleanup a breeze.

Remember, if you've got any important clips, download those first, since deleted videos are gone for good.

Streamlining your footage has never been simpler!

Conclusion

To sum up, deleting all history on your Ring Doorbell is a straightforward process that enhances your privacy.

Did you know that nearly 69% of users regularly manage their video storage to avoid overwhelming their device?

Advertisement

By following the steps outlined, you can easily keep your video history in check.

Remember to periodically review and delete old footage to maintain peak performance and peace of mind.

Happy managing!

Continue Reading
Advertisement

Affiliate Disclaimer
As an affiliate, we may earn a commission from qualifying purchases. We get commissions for purchases made through links on this website from Amazon and other third parties.

Advertisement

Title

delete all ring videos delete all ring videos
Ring Security Cameras11 hours ago

How to Delete All Video on Ring Doorbell

Unlock the secrets to deleting all videos on your Ring Doorbell; discover the simple steps that ensure your privacy and...

delete all ring data delete all ring data
Ring Security Cameras23 hours ago

How to Delete All on Ring Doorbell

Discover the simple steps to delete all videos on your Ring Doorbell, but don't miss out on essential tips for...

delete ring doorbell history delete ring doorbell history
Ring Security Cameras1 day ago

How to Delete All History on Ring Doorbell

Manage your Ring Doorbell history effortlessly; discover the simple steps to delete all recordings and ensure you don't lose crucial...

delete all ring events delete all ring events
Ring Security Cameras2 days ago

How to Delete All Events From Ring Doorbell

Learn the easy steps to delete all events from your Ring Doorbell and discover essential tips to ensure you don't...

delete ring doorbell device delete ring doorbell device
Ring Security Cameras2 days ago

How to Delete a Ring Doorbell Device

Just follow these simple steps to delete your Ring doorbell device, and uncover essential tips for troubleshooting and managing your...

bypass ring doorbell security bypass ring doorbell security
Ring Security Cameras3 days ago

How to Defeat Ring Doorbell

You might be surprised at how easy it can be to exploit a Ring Doorbell's vulnerabilities—discover effective strategies to enhance...

reduce ring doorbell sensitivity reduce ring doorbell sensitivity
Ring Security Cameras3 days ago

How to Decrease Motion Sensitivity on Ring Doorbell

Navigate through the Ring app to discover effective ways to decrease motion sensitivity on your Ring Doorbell for a more...

choosing the right ring choosing the right ring
Ring Security Cameras4 days ago

How to Decide Which Ring Doorbell to Buy

To choose the right Ring doorbell, consider key factors like resolution and installation options; discover how to make the best...

choosing the right doorbell choosing the right doorbell
Ring Security Cameras4 days ago

How to Decide Which Ring Doorbell

Pick the perfect Ring doorbell by evaluating video quality, installation options, and features—discover what suits your needs best!

remove ring doorbell securely remove ring doorbell securely
Ring Security Cameras5 days ago

How to Cut Ring Doorbell off

In this guide, discover simple methods to cut off your Ring Doorbell—but wait until you see the unexpected features you...

disabling ring doorbell device disabling ring doorbell device
Ring Security Cameras5 days ago

How to Cut off Ring Doorbell

Get essential tips on how to cut off your Ring Doorbell and discover the best methods to minimize disturbances while...

customize ring doorbell chime customize ring doorbell chime
Ring Security Cameras6 days ago

How to Customize Ring Doorbell Chime

Learn how to easily customize your Ring Doorbell chime with just a few taps, but what unique sounds could you...

Trending

Copyright © 2024 Security Zone Info Affiliate disclaimer As an affiliate, we may earn a commission from qualifying purchases. We get commissions for purchases made through links on this website from Amazon and other third parties.