Ring Security Cameras
How to Control Ring Doorbell With Alexa
Just follow these simple steps to seamlessly integrate your Ring doorbell with Alexa, and discover how to enhance your home security like never before.
To control your Ring doorbell with Alexa, start by ensuring both the Ring and Alexa apps are updated. Enable the Ring Skill in the Alexa app and log into your Ring account. Use the "Discover Devices" feature to connect everything. You can then issue voice commands like, "Alexa, show me the front door," for live view access or "Alexa, announce someone is at the door" to get alerts. Don't forget to also set up notifications for doorbell presses. If you want to troubleshoot any issues, tips are available that can help you optimize your setup.
Key Takeaways
- Install and update the Ring and Alexa apps on your device for optimal performance and compatibility.
- Enable the Ring Skill in the Alexa app and link your Ring account to connect the devices.
- Use voice commands like "Alexa, show me the front door" to access the live view from your Ring doorbell.
- Set up notifications and use the intercom feature for real-time communication with visitors at your door.
Overview of Integration
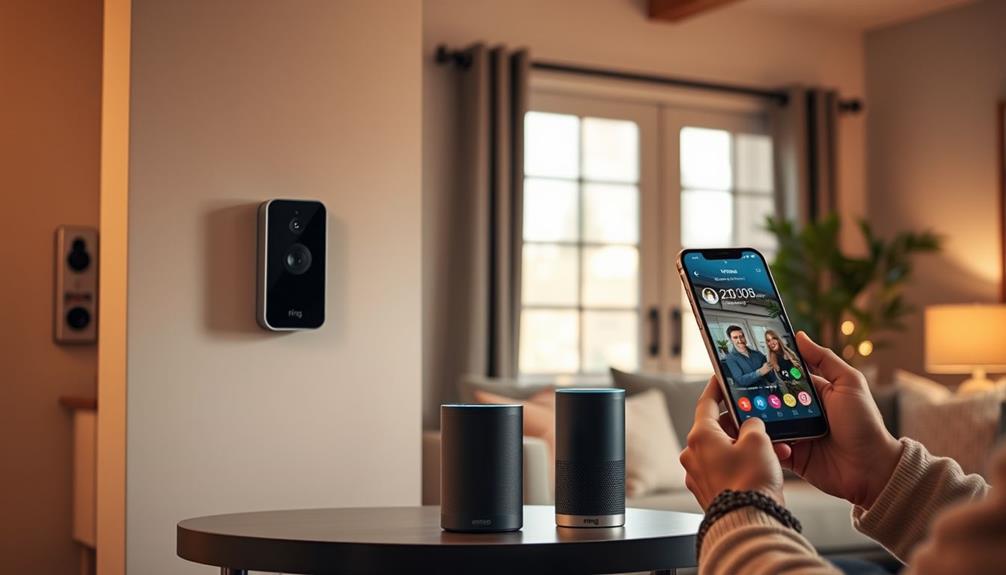
How can you enhance your home security with the integration of Ring doorbells and Amazon Alexa? By connecting these devices, you gain control over your security system using simple voice commands.
First, make certain you have the latest versions of the Ring and Alexa apps installed on your smartphone. This integration allows you to use the Ring Skill within the Alexa app to link your Ring account and discover all your connected Ring devices.
Additionally, considering the importance of creating a welcoming entryway, you can guarantee that your home not only feels safe but also exudes charm through rustic charm when visitors arrive.
Once integrated, you can easily access your video doorbell's live view by asking Alexa to show the feed on an Echo Show device. You'll also receive real-time notifications whenever someone approaches your door, making it easier to stay informed.
You can even instruct Alexa to announce when a visitor is at your door, allowing for immediate awareness without needing to check your phone.
Additionally, with two-way talk functionality through your Echo Show, you can communicate directly with anyone at your door, enhancing both convenience and security.
Setup and Connection
Setting up your Ring doorbell with Alexa is a straightforward process that enhances your home security and convenience. To get started, you’ll need to connect your Ring doorbell to Alexa through the Alexa app, which allows you to receive notifications and view live video feeds right from your Echo devices. Simply enable the Ring skill and follow the instructions to pair the devices. Once you connect Ring doorbell to Alexa, you can use voice commands to check who’s at the door or view recordings from your smart home hub.
First, make certain you've installed and updated both the Ring app and the Alexa app on your device. Open the Alexa app, tap the "More" icon in the bottom right corner, and navigate to "Skills & Games." Here, you'll search for and enable the Ring Skill. This integration reflects how connected devices can improve AI applications in various industries.
After enabling the Ring Skill, you'll need to log in to your Ring account within the Alexa app to link your devices together. This connection is essential for seamless integration. Once you've completed that, tap "Discover Devices" in the Alexa app. This will allow Alexa to find your Ring doorbell and any other Ring devices you may have.
After the setup, you can test the connection by using voice commands. For instance, saying "Alexa, show me the front door" will confirm that your Ring doorbell is properly controlled through Alexa. Following these steps will allow you to enjoy the convenience of managing your Ring doorbell with simple voice commands.
Voice Commands
Once your Ring doorbell is connected to Alexa, you can use a variety of voice commands to manage its features and enhance your home security. For instance, you can say, "Alexa, show me the front door" to access Live View from your Ring doorbell on devices like the Echo Show. This allows you to monitor your home in real-time.
Additionally, understanding the significance of cybersecurity measures is vital, especially with the increasing reliance on smart home devices; cybersecurity measures guarantee your devices remain protected from potential threats.
When someone rings your doorbell, you can activate the announcement feature by saying, "Alexa, announce someone is at the door." This will alert all your Echo devices, making sure everyone in your home knows someone's arrived.
You can also control smart lighting for added safety. Just say, "Alexa, turn on the porch light" to illuminate the area outside your door.
To manage privacy, if you need to disable specific camera functions, simply say, "Alexa, turn off the backyard camera."
If you want to arm and disarm your Ring security system, remember that you'll need a Ring Protect subscription for those voice commands to work seamlessly.
With these commands, you'll have greater control over your home security and convenience.
Notifications and Intercom
Receiving timely notifications and using the intercom feature enhances your ability to monitor visitors at your door with your Ring doorbell and Alexa integration. By incorporating a home security system's value, you can greatly increase your peace of mind while managing your home's entry points.
You can set up chime notifications through the Alexa app, allowing your Echo devices to alert you when someone presses your Ring doorbell. To activate this, just navigate to Devices in the app and turn on Doorbell Press Announcements for your doorbell.
Once you've set up notifications, you can utilize the intercom feature to communicate directly with visitors. This two-way audio experience lets you respond in real-time using supported Alexa devices. Just use voice commands to answer and speak to anyone at your door, making it feel like you're right there.
For added security, consider setting up a voice code for accessing the Ring Intercom. This extra layer of protection guarantees that only you can grant access through the intercom feature.
With these tools at your disposal, you can effectively manage your home's entry points while staying connected to your visitors, all with the convenience of your voice.
Troubleshooting Tips
To keep your Ring doorbell and Alexa working smoothly together, it's essential to follow some troubleshooting tips. First, make certain both the Ring and Alexa apps are updated to their latest versions. This helps avoid compatibility issues that could disrupt functionality.
Additionally, implementing effective keyword clustering can improve your overall smart home experience by confirming that your devices communicate more efficiently.
Next, verify that your Ring doorbell is connected to the same Wi-Fi network as your Alexa device. This step is vital for seamless communication.
If your voice commands are unresponsive, you might need to troubleshoot by re-linking your Ring account in the Alexa app. Simply disable and then re-enable the Ring Skill to refresh the connection.
Don't forget to check the battery status of your Ring doorbell; a low battery can lead to connectivity issues. Recharge or replace the batteries as necessary.
If you're still having trouble, try resetting both your Ring doorbell and your Alexa device. A quick restart can often resolve temporary glitches.
Frequently Asked Questions
How to Use Alexa With a Ring Doorbell?
To use Alexa with your Ring Doorbell, start by installing and updating both the Ring and Alexa apps on your mobile device.
Enable the Ring Skill in the Alexa app and link your Ring account by logging in.
Once connected, you can say commands like, "Alexa, show me the front door" to view live video.
You can also set up notifications and use two-way talk to communicate with visitors through your Echo device.
How Do I Get My Ring Doorbell to Sound on My Alexa?
Imagine your home as a vigilant castle, where every sound echoes through its halls.
To let your Alexa herald the arrival of visitors at your door, start by linking your Ring account in the Alexa app.
Then, navigate to Devices, select your Ring Doorbell, and enable "Doorbell Press Announcements."
This way, your loyal Alexa will sound alarms, ensuring you never miss a guest's arrival in your kingdom.
Now, your home's guardian is ready!
How to Arm and Disarm a Ring With Alexa?
To arm and disarm your Ring security system with Alexa, you'll first need to enable the Ring Skill in the Alexa app and link your Ring account.
Make sure you have a Ring Protect subscription to use voice commands.
Once that's set up, you can simply say, "Alexa, arm the security system" or "Alexa, disarm the security system."
For added security, create a passcode in the Ring app to use when disarming.
Why Is My Ring Doorbell Not Connecting to Alexa?
Ever wonder why your devices don't always play nice?
If your Ring doorbell isn't connecting to Alexa, check a few things.
Make sure both apps are updated and that they're on the same Wi-Fi network.
A low battery might be the culprit too.
If commands aren't working, unlink and relink your Ring account in the Alexa app.
Restarting both devices can also help clear up any temporary connectivity issues you might be facing.
Conclusion
Integrating your Ring Doorbell with Alexa is easier than you might think, and it opens up a world of convenience.
You might worry that setup is complicated, but with the right steps, you'll be up and running in no time.
Imagine answering your door with just your voice, no need to rush to the doorbell anymore.
Embrace the smart home experience and enjoy seamless control over your home security with just a few simple commands!
Ring Security Cameras
How to Delete Ring Doorbell From App
Just follow these simple steps to delete your Ring Doorbell from the app, but wait—there’s more important information you’ll want to know!
To delete your Ring Doorbell from the app, open the Ring app and tap the three lines in the top left for the Main Menu. Select 'Devices' and choose your doorbell. Scroll down to find 'Remove this Device.' A confirmation prompt will remind you that recorded data will be erased, so make sure you've backed up anything important. Confirm your choice by tapping 'Yes.' If you encounter any issues, try updating the app or checking your internet connection. Want more tips and insights on optimizing your Ring experience? You'll discover even more helpful information soon.
Key Takeaways
- Open the Ring app, access the Main Menu, and select 'Devices' to find your doorbell.
- Tap on the specific doorbell to enter its Device Settings and scroll to 'Remove this Device'.
- Confirm the deletion by tapping 'Yes' when prompted about erasing recorded data.
- Ensure you've backed up any necessary video footage before proceeding with the deletion.
Overview of Ring Doorbell
The Ring Doorbell is a smart security device that lets you monitor visitors and communicate with them remotely through the Ring app. With features like motion detection, two-way audio, and night vision, the Ring Doorbell enhances your home's security.
In fact, studies show that homes equipped with security systems, like the Ring Doorbell, are considerably less likely to be targeted by burglars, providing increased safety and peace of mind. You can instantly see who's at your door, whether it's day or night, providing peace of mind when you're away.
The Ring app serves as your control center, allowing you to manage multiple Ring devices seamlessly. You'll receive real-time notifications for motion alerts, ensuring you're always aware of activity around your home. If you have a subscription to their cloud storage service, accessing recorded footage becomes easy, giving you extra assurance.
The device comes in various models, including both battery-powered and hardwired options, so you can choose what fits your installation needs best. If you ever decide to remove devices, the Ring app simplifies this process, allowing you to manage your smart home setup efficiently.
Steps to Delete Doorbell
To delete your Ring doorbell, you'll need to access the Device Settings in the app.
Make sure to check the user reviews and guides for the best practices in managing your devices, as key factors in choosing a home cleaning service can also apply to maintaining your smart home systems.
Once you find the removal option, confirming the deletion is straightforward.
If you run into any issues, troubleshooting tips can help you resolve them quickly.
Accessing Device Settings
Open the Ring app and tap the three lines (≡) in the top left corner to access the Main Menu for device settings. From here, select 'Devices' to view all connected Ring devices linked to your Ring account, including your doorbell. It's crucial to manage your smart devices responsibly, as ethical considerations are essential in educational data mining and similar technologies.
Locate the specific doorbell you want to remove and tap on it to access its Device Settings. This section contains all the options related to your doorbell, so take a moment to familiarize yourself with the available settings.
Scroll down until you see the option labeled 'Remove this Device.' This is the step that initiates the deletion process.
Once you select this option, you'll be prompted with additional instructions to confirm your choice. Following these steps guarantees that you successfully remove the device from your account.
Confirming Device Removal
After locating the 'Remove this Device' option in the Device Settings, you'll need to confirm your decision to delete the doorbell from your Ring app. This step is essential to guarantee that you genuinely want to remove the device, especially if you have dogs at home and need to take into account their safety and security.
Once you tap 'Remove this Device,' a confirmation prompt will appear. You'll typically see a message reminding you that removing the device will erase all recorded data associated with it, including any alerts you may have set for dog health and nutrition.
Before proceeding, double-check that you're the device owner, as shared users don't have permission to remove devices. If you're ready to continue, confirm your choice by tapping 'Yes' or 'Confirm' on the prompt. This action finalizes the deletion process.
Once confirmed, your Ring doorbell will be removed from the app, and you won't be able to access its settings or recorded footage anymore. If you ever decide to reinstall the device, you'll need to go through the setup process again.
Troubleshooting Deletion Issues
Facing difficulties with deleting your Ring Doorbell from the app can be frustrating, but following a few straightforward steps can help you resolve the issue. If you're struggling with removing a device, try the following:
- Update the App: Make certain your Ring app is updated to the latest version. Sometimes, bugs in older versions can cause issues with device management. Additionally, keeping apps updated is essential for cybersecurity, as <a target="_blank" href="https://hacknjill.com">understanding cybersecurity measures</a> can help protect your devices from vulnerabilities.
- Restart the App: Close the app completely and reopen it. This can refresh the interface and resolve minor glitches that might be preventing you from deleting the doorbell.
- Check Your Internet Connection: A weak or unstable internet connection can hinder the app's functionality. Verify you have a strong connection before attempting to remove the device again.
- Contact Support: If you're still having trouble, it might be time to reach out to Ring support for additional assistance. They can help you remove the device and address any underlying issues.
Troubleshooting Deletion Issues
If you're having trouble deleting your Ring doorbell from the app, there are several steps you can take to resolve the issue.
First, make certain you're using the latest version of the Ring app. Outdated versions may cause problems when you try to delete the device.
Next, check that you're logged into the correct Ring account associated with the doorbell you want to remove. If you're a shared user, you won't have permission to delete the device.
For peak performance, confirm that your devices are maintained regularly, as suggested in air purifier maintenance.
If the doorbell doesn't appear in the expected location, verify its visibility in the app's Devices section. Also, confirm that your location settings are properly configured.
Sometimes, restarting the Ring app or your doorbell device can clear up temporary glitches that might be preventing successful deletion.
If you've gone through these troubleshooting steps and still can't delete the device, consider reaching out to Ring support for further assistance. They can help you with any account-related issues or other problems that may be hindering your ability to remove the doorbell.
Community Support Options
You can find valuable support through the Ring Community forums, where you can ask questions and share your experiences.
Engaging in discussions with other users often leads to helpful troubleshooting tips that make the deletion process smoother.
Additionally, understanding the importance of emotional support in various situations can enhance your experience in these forums, especially when seeking advice on technology mental health support is essential for those at risk of dementia.
Plus, your feedback can help improve the overall user experience for everyone.
Accessing Community Forums
Engaging with the Ring Community can help you find solutions and gain insights on how to delete your Ring Doorbell from the app. This platform allows you to connect with other users who may have faced similar challenges and share valuable experiences related to mission and values.
To get started, follow these steps:
- Create or log in to your Ring account to post your questions and join discussions.
- Browse existing topics to see if someone has already addressed your query about deleting a device.
- Tap "Device Settings" on your app for guidance on managing your devices, which can lead you to relevant community posts.
- Utilize FAQs and shared insights to clarify any confusion regarding the deletion process, as these resources can provide useful troubleshooting tips.
Sharing Troubleshooting Tips
The Ring Community provides valuable troubleshooting tips that can simplify the process of deleting your Ring Doorbell from the app. By tapping into this resource, you can find insights shared by other users who've faced similar challenges with their devices, including discussions on astrological compatibility and its effects on attraction. You'll likely come across various experiences that shed light on common issues and effective solutions.
If you're struggling with the deletion process, don't hesitate to post a question in the community forum. The collaborative nature of the community means that fellow users are enthusiastic to assist you based on their own experiences. You might discover step-by-step advice or alternative methods that could make your task easier.
Moreover, the feedback from the community can guide you toward improved strategies for device management. Engaging with others not only speeds up your problem resolution but also gives you access to a wealth of knowledge that you mightn't find in official resources. Remember, you're not alone in this process—many users have been where you're now and are willing to help you navigate the steps to successfully delete your Ring Doorbell from the app.
Engaging in Discussions
Connecting with others in the Ring Community can provide valuable support and insights for successfully deleting your Ring Doorbell from the app. Engaging in discussions allows you to share experiences and find answers to common challenges, which can be particularly beneficial given the ongoing updates and content shared on platforms like industry news.
Here are some options to reflect upon when you join the community:
- Visit the Community Forum: Browse through various threads dedicated to device management, including deleting your Ring Doorbell.
- Post Your Question: Don't hesitate to ask for help. Explain your situation clearly to get targeted assistance.
- Read Previous Discussions: Many users have faced similar issues. By reviewing past conversations, you might find solutions that apply to your case.
- Share Your Experience: Once you've successfully deleted your Doorbell, contribute back to the community by sharing what worked for you.
Active participation not only helps you find answers but also enhances the overall user experience for everyone. Remember, the insights you gather can contribute to ongoing improvements in Ring products and services. So engage fully, and you'll likely discover valuable tips and support from fellow users.
Important Considerations
Before deleting your Ring Doorbell from the app, consider the implications of losing access to recorded videos and event history. As the device owner, you're the only one who can delete the doorbell. Once you do, all recorded videos and event history linked to the device will be permanently lost. It's vital to download any important videos before proceeding with the deletion.
Here are some important considerations:
Consideration | Action Required |
---|---|
Verify Account | Confirm you're logged into the correct Ring account. |
Backup Videos | Download necessary recorded videos before deletion. |
Check Settings | Verify any ownership transfers or settings adjustments are completed. |
Additional Resources and Help
Often, you'll find helpful guides and support options available in the Ring Help Center to assist with deleting your Ring Doorbell from the app. Whether you need step-by-step instructions or have specific questions, there are several resources at your disposal.
- Ring Help Center: Browse detailed guides and articles specifically about managing your devices, including how to remove your Ring Doorbell.
- FAQs: Check the Frequently Asked Questions section for answers to common issues related to deleting devices from the app.
- Ring Support: If you require personalized assistance, you can contact Ring support via phone or online chat, guaranteeing you get the help you need promptly.
- Ring Community: Join the Ring Community forum to connect with other users. You can share experiences, find solutions, and learn from others who've gone through the deletion process.
Utilizing these resources can simplify your experience and guarantee you successfully manage your Ring devices. Don't hesitate to explore video tutorials and guides that can further assist you in the process.
Frequently Asked Questions
How Do I Remove the Doorbell From the Ring App?
To remove the doorbell from the Ring app, you'll need to follow a few simple steps.
First, open the app and tap the three lines in the top left corner to access the main menu.
From there, select 'Devices' to find your doorbell.
Tap the gear icon for 'Device Settings,' scroll down, and choose 'Remove this Device.'
Confirm your choice, and just like that, it'll be removed from your account.
How Do I Remove a Device From the Ring App?
When it comes to managing your devices, you've gotta know the ropes.
To remove a device from the Ring app, open the app and tap the three lines in the top corner.
Select 'Devices' to see all connected gadgets, then choose the one you want to remove.
Scroll to 'General Settings' and hit 'Remove this Device.'
Confirm your choice, and just like that, it's off your account—no more access to its history!
How Do I Unregister My Ring Doorbell?
To unregister your Ring Doorbell, you need to open the Ring app and tap the three lines in the upper left corner to access the Main Menu.
Select 'Devices' and choose your Ring Doorbell.
Tap the gear icon for 'Device Settings,' then scroll to 'General Settings.'
From there, tap 'Remove this Device' and confirm your choice.
Once you've done this, the doorbell will be unregistered, and you'll lose access to its video history.
How Do I Delete My Ring Doorbell Account?
To delete your Ring doorbell account, you'll start by opening the Ring app and tapping the three lines in the upper left corner to access the Main Menu.
From there, select 'Account' and then 'Account Settings.'
Scroll down to find 'Delete Account' and tap it to begin the process.
Conclusion
In the digital landscape, removing your Ring Doorbell is like closing a chapter in your home's story.
As you take this step, remember that every ending paves the way for new beginnings.
Whether you're upgrading your security or simply decluttering your app, you're not just deleting a device; you're reclaiming your space.
Don't hesitate to seek help if needed, and embrace the freedom that comes with every fresh start.
Your home's narrative continues, unwritten yet full of potential.
Ring Security Cameras
How to Delete Ring Doorbell From Account
How to easily delete your Ring Doorbell from your account—discover the simple steps that could save you time and frustration!
To delete your Ring Doorbell from your account, open the Ring app and tap the menu icon. Select 'Devices' to find your doorbell. Tap on it to enter 'Device Settings.' Scroll down to 'General Settings' and choose 'Remove this Device.' Confirm the action to finalize the deletion, ensuring you're logged into the correct account as only the owner can remove devices. If you encounter issues, check that your app is updated and the correct location is set. You might find more helpful tips and solutions to address specific problems along the way.
Key Takeaways
- Open the Ring app, access the Main Menu, and select 'Devices' to find your Ring Doorbell.
- Tap on the doorbell, go to 'Device Settings,' and scroll to 'General Settings.'
- Choose 'Remove this Device' to start the deletion process.
- Confirm the removal by following the prompts; only the account owner can finalize this action.
Understanding Device Ownership
To delete your Ring Doorbell, you need to be the verified owner, as shared users can't remove devices from accounts.
Understanding ownership is vital for managing your Ring device effectively, much like how comprehensive professional services are tailored to meet specific project needs. Each Ring device is linked to a specific account, and if there's any discrepancy in ownership, you won't be able to delete it.
Confirm that you're logged into the correct account associated with your Ring Doorbell. If you're sharing the device with others, only the verified owner can initiate the deletion process.
Additionally, location settings play a significant role in how devices appear in the app. If you're not viewing the right location associated with your Ring device, you might think it's missing or unmanageable.
Remember to check the Device Settings if you encounter any issues during the deletion process. Sometimes, glitches can occur, affecting your ability to delete the device.
If you're unsure about your ownership status or face challenges, consult the Help Center for detailed instructions. This confirms that you're following the right steps for ownership transfer or deletion, making the process smoother and more efficient.
Steps to Remove a Device
If you're the verified owner, removing your Ring Doorbell is a straightforward process that you can complete through the Ring app. Follow these simple steps to delete the device:
Step | Action | Note |
---|---|---|
1. Open the Ring app | Tap the three lines (≡) | Access the Main Menu |
2. Select 'Devices' | View your connected Ring devices | Locate your doorbell |
3. Tap on the doorbell | Access 'Device Settings' | Prepare to remove the device |
4. Scroll to 'General Settings' | Choose 'Remove this Device' | Start the deletion process |
5. Confirm removal | Follow prompts to finalize action | Verify you're the account owner |
Make certain you're the account owner, as shared users don't have permission to delete devices. By following these steps, you'll effectively remove the doorbell from your account. This process helps maintain a clean list of connected Ring devices, ensuring that your account stays organized and secure.
Troubleshooting Common Issues
Troubleshooting common issues can help guarantee a smooth process when trying to delete your Ring Doorbell from your account.
First, confirm you're logged into the correct Ring account to post changes. Only the account owner can remove devices, so double-check your login credentials. If you're having trouble, make sure you've updated the Ring app to the latest version. Outdated apps can lead to management issues, including device visibility. Additionally, understanding the importance of continuous learning in tech can help you stay informed about app updates and enhancements.
When you access the app, go to Settings, tap the three lines in the upper left corner, and select Devices. If your Ring Doorbell doesn't appear for deletion, verify that it's in the right area within the app—location settings can affect visibility.
If you still can't find it, try restarting the app or your device, as this can clear out temporary glitches.
If problems persist, don't hesitate to consult the Ring Help Center or contact Ring support for assistance. They can provide specific guidance tailored to your situation, confirming you can successfully remove your device without further complications.
Managing Shared Users
Managing shared users in the Ring app lets you control who's access to your devices, guaranteeing that only authorized individuals can view and manage them.
To manage shared users, simply access the "Shared Users" tab in the app or website. Here, you can view and edit permissions for each shared user, allowing you to tailor access according to your needs.
Additionally, maintaining control over your shared users is vital for enhancing your overall home security, similar to how essential items for a home cleaning kit can facilitate a thorough cleaning process.
If you need to delete a shared user, select their name from the list and confirm the deletion. This action guarantees that only those you trust retain access to your Ring devices.
Regularly reviewing shared user roles is important for maintaining security and clarity regarding permissions, especially if multiple individuals are involved.
One key point to remember is that shared users can't delete devices or modify account settings, which adds an extra layer of control and security to your Ring account.
Should you need to reinstate any shared users in the future, you can easily add them back at any time. This flexibility allows you to manage access effectively while keeping your Ring devices secure.
Additional Support Resources
Explore the various support resources available to help you delete your Ring Doorbell from your account seamlessly. Whether you're looking for guidance or personalized help, there are several options to choose from:
- Ring Help Center: This is your go-to resource for detailed guides and FAQs related to device management. You'll find step-by-step instructions on how to delete your Ring Doorbell from your account. Additionally, you can improve your overall experience by ensuring your indoor air quality is excellent, as <a target="_blank" href="https://aeroguardians.com">air purifiers reduce allergens</a>.
- Customer Support: If you need direct assistance, you can contact Ring's support team via phone or email. They're available to provide personalized help with any account-related issues you might encounter.
- Ring Community: Engage with other users in the Ring Community. Here, you can share experiences, ask questions, and find practical tips from those who've successfully deleted their devices.
Frequently Asked Questions
How Do I Delete My Ring and Start Over?
If you want to delete your Ring and start fresh, you'll need to remove the device from your account first.
Open the Ring app, tap on 'Devices,' select your doorbell, and follow the prompts to remove it.
After that, reset the doorbell by holding the setup button for about 15 seconds until the light flashes.
How Do I Unregister My Ring Doorbell?
To unregister your Ring Doorbell, you'll need to open the Ring app and tap the three lines in the upper left corner to access the Main Menu.
Select 'Devices' and choose the doorbell you want to remove.
Go into 'Device Settings,' scroll down, and tap 'Remove this Device.'
Confirm the action in 'General Settings.'
Make sure you're logged into the correct account, as only the owner can unregister the device.
How to Reset Ring Doorbell for New Owner?
To reset your Ring Doorbell for a new owner, find the setup button on the device and press it for at least 15 seconds until the LED light starts flashing.
Make sure the doorbell is powered on and connected to Wi-Fi during this process.
Once it resets to factory settings, the new owner can easily set it up by downloading the Ring app and following the prompts to add the device.
How Do I Change the Ownership of a Ring Doorbell?
Imagine you just bought a house, and the previous owner left their Ring Doorbell behind.
To change the ownership, you need the current owner to remove the device from their Ring account.
Once they've done that, you can set it up in your own account by following the instructions in the app.
Conclusion
To sum up, deleting your Ring Doorbell from your account is a simple process that can streamline your device management.
Whether you're upgrading to a new model, transferring ownership, or just decluttering your account, taking control is easy.
Remember to troubleshoot any issues, manage shared users effectively, and explore additional support resources when needed.
By understanding your device ownership, following the steps, and knowing where to find help, you can maintain a seamless smart home experience.
Ring Security Cameras
How to Delete All Videos on Ring Doorbell
To effortlessly delete all videos on your Ring Doorbell, follow these simple steps and discover more tips for streamlined video management.
To delete all videos on your Ring Doorbell, open the Ring app or website. In the app, go to "Event History," where you can select videos using checkboxes. Tap the "Delete All" option to remove them quickly. On the desktop, you can delete up to 94 videos at once with the "Delete All" feature. Remember, you should download any important videos first, as deleted footage can't be recovered. Make sure your app is updated to avoid issues during the process. Curious about simplifying your video management even further? There are more tips just ahead!
Key Takeaways
- Open the Ring app, navigate to "Devices," and select your Ring device to access "Event History" for video management.
- Use the "Delete All" option for bulk deletion directly in the app or the website's desktop interface.
- Select individual videos by swiping right for checkboxes, or use the Pencil icon to initiate bulk deletion.
- Download important videos before deletion to ensure they are not permanently lost after removal.
Overview of Video Deletion Process
When you need to delete videos from your Ring doorbell, the process is straightforward and can be done easily through the app or website. To get started, make certain you're logged into your Ring account.
If you're using the Ring app, navigate to the Event History section. Here, you can swipe right on individual events to reveal checkboxes that let you select the videos you want to delete. Once you've made your selections, look for the "Trash" icon at the bottom right of the screen to delete the videos permanently.
For efficient home management, consider how reputation and reviews from past clients can inform your service choices.
If you prefer to use the Ring website, you can delete all videos at once. Simply access the Event History and find the "Delete All" option. Keep in mind that while you can delete up to 94 videos at a time on the desktop interface, attempting to delete more will result in an error message.
Before you proceed, verify you've downloaded any important videos, as once deleted, they're removed permanently from Ring servers. Remember, taking these steps will help you manage your video storage effectively and keep your account organized.
Deleting Videos on the Ring App
When you want to delete videos on the Ring app, you've got several options at your fingertips.
However, you might run into some challenges managing the app, especially on Android where finding delete options can be tricky.
It's crucial to verify your app is updated for the best user experience, as breathtaking destinations can often have varying functionalities.
Let's break down the deletion methods and the user experience you can expect.
Deletion Options Overview
To delete videos on the Ring app, you can easily access the Event History list and select the videos you want to remove. The process is straightforward and user-friendly, featuring checkboxes that allow you to choose multiple videos at once.
If you're looking to clear out your Event History quickly, the "Delete All" option located at the bottom right of the screen makes bulk deletion a breeze.
Here are some helpful tips for managing your videos:
- Select Videos with Checkboxes: Just swipe right on events to reveal checkboxes and select the videos you want to delete.
- Download Before Deletion: Remember to download any videos you might want to keep because once they're removed, they're permanently deleted from Ring servers.
User Experience Challenges
Despite the straightforward deletion options available in the Ring app, users often encounter challenges that complicate the process. Many find it difficult to navigate the Android app, as they sometimes only see dropdowns without a clear "Delete All" feature.
Instead of an intuitive design, long-pressing events reveals individual radio buttons for selection, which can confuse those accustomed to using checkboxes. This situation mirrors the need for transparency and user-friendly interfaces often highlighted in discussions around AI advancements that prioritize user experience.
Feedback from users indicates a strong preference for checkboxes when deleting videos, making the current setup less effective. This preference highlights a significant user experience gap in the app's interface.
When you're trying to manage large volumes of videos, the tedious navigation through multiple selections can be frustrating, especially if you're aiming to delete over 94 at a time.
Community discussions emphasize the need for a more streamlined video management system within the app. Users want a simpler way to delete videos, which could enhance the overall experience.
Improving the selection process and offering a "Delete All" option wouldn't only save time but also cater to user expectations for a more efficient and intuitive design.
User Experiences With Deletion
Many users experience confusion and frustration while trying to locate the delete options in the Ring Android app. The deletion process can feel overly complicated, especially when you're faced with dropdown menus that lack a clear "Delete All" option. This often leads to a frustrating search for a straightforward way to manage your videos. The need for high production quality in user interfaces is evident, as many users desire a seamless and engaging experience when handling their video content.
Here are some common user experiences:
- Many prefer checkboxes, as they allow for easy selection of multiple videos for deletion.
- Long-pressing events reveals radio buttons, which many find less intuitive compared to checkboxes.
The overall user experience could greatly benefit from clearer delete options and more intuitive controls. If you find yourself struggling to delete videos, you're not alone. Many are calling for changes that would streamline the deletion process and reduce confusion.
Until then, you might've to navigate the current setup, but hopefully, future updates will address these concerns and make video management more user-friendly.
Limitations of Video Deletion
When you try to delete videos on your Ring Doorbell, you'll quickly notice some key limitations. You can only delete up to 94 videos at once, and steering through the process can feel tedious and confusing. This can make managing your video library more challenging than it should be.
Additionally, understanding the types of gold eligible for IRA can be just as intricate, requiring careful attention to guidelines and regulations.
Maximum Deletion Limitations
You can only delete a maximum of 94 videos at once on the Ring desktop website, which can be frustrating if you have a larger library.
This limitation can lead to confusion and make the process of managing your videos feel cumbersome. While deleting videos in bulk is faster than individually removing them, you still face challenges that can complicate your efforts.
Additionally, it's important to take into account how digital management tools, like those used in top robotic vacuums for pools, can streamline your experience.
Here are a few things to keep in mind regarding these maximum deletion limitations:
- Error Messages: If you try to delete more than 94 videos, you'll encounter an error message, halting your progress.
- App Navigation: The Ring app requires you to navigate through various selections to manage larger volumes, adding to the tediousness.
Understanding these limitations can save you time and reduce frustration as you work to delete unwanted videos from your library.
Whether you're using the desktop website or the Ring app, planning your deletions can help you navigate the process more efficiently.
Tedious Deletion Process
Deleting videos from your Ring Doorbell can feel cumbersome, especially since maneuvering through multiple selections and switching between cameras often complicates the process.
When you need to delete a large number of videos, the tedious nature of this task becomes even more apparent. You can delete a maximum of 94 videos at a time on the Ring desktop site, and if you try to manage more than that, you'll encounter an error message. This limitation can be frustrating, particularly when considering the increased scrutiny on user data and privacy management in the digital age, as seen in cybersecurity challenges.
To delete videos effectively, you'll have to switch between different cameras if you own multiple devices, as videos are organized by each camera.
Although the bulk deletion option speeds things up compared to deleting videos individually, it still involves long-pressing events or selecting radio buttons, which can confuse many users.
This method isn't as intuitive as it should be, and feedback from the community highlights a strong desire for a more streamlined process.
Community Feedback on Deletion
Numerous users have voiced their frustrations regarding the Ring app's video deletion process, highlighting challenges in finding the delete options and the absence of a simple "Delete All" feature.
Many have shared their experiences in community discussions, emphasizing the need for improved delete functionality within the app. Additionally, some users have suggested incorporating yoga techniques for relaxation to help alleviate the stress caused by managing video deletions.
Users often feel that the current user interface complicates video management, making it tedious to delete multiple videos. Here are some common points raised by the community:
- Checkboxes vs. Radio Buttons: Many users prefer checkboxes, which allow for easier selection of multiple videos to delete.
- Time-Consuming Deletion Process: The existing process is seen as time-consuming, often requiring users to delete videos one at a time.
Best Practices for Video Management
Regularly reviewing your video storage can help you efficiently manage your Ring doorbell's memory and keep only the most important footage.
Start by checking your Event History to identify clips that no longer serve your needs. It's crucial to recognize the significance of celebrating special occasions as you declutter your storage.
Before you delete anything, make sure to download any important videos you want to retain, as deleted videos are permanently removed from Ring servers.
Familiarize yourself with Ring's video retention policies, which generally allow private videos to be stored for 60 days in the U.S. and 30 days in other locations. This knowledge can guide you in deciding which videos to keep and which to delete.
To enhance your video management strategy, consider using the bulk deletion feature available on the Ring app or website. This allows you to delete up to 94 videos at once, streamlining the process and improving your efficiency.
Additionally, don't hesitate to engage with the Ring community for tips and feedback on effective video management practices. Sharing experiences can provide valuable insights, helping you refine your approach to keeping your storage organized and focused on what truly matters.
Bulk Deletion Steps
To begin the bulk deletion process on your Ring doorbell, open the Ring app and tap the menu icon (☰) to access the "Devices" section. From there, select your specific Ring device and navigate to "Event History" to manage your recorded videos. Understanding the significance of small mistakes in your digital management can help you avoid common pitfalls during this process.
You'll see a Pencil icon—tap it to initiate the bulk deletion process. This allows you to select multiple videos at once, saving you time and effort. Once you've marked the videos you want to delete, tap "Delete" at the top of the screen. You'll need to confirm your selection with a second confirmation to finalize the deletion.
Keep these tips in mind during the process:
- Download important videos: Make sure you've saved any vital recordings before you delete them, as this action is permanent.
- Review your selection: Double-check which videos you've marked for deletion to avoid removing something you might need later.
Now you're all set to clean up your Ring videos efficiently.
Troubleshooting Deletion Issues
If you're having trouble deleting videos on your Ring doorbell, you're not alone—many users face similar challenges. The Ring app, especially on Android devices, can be tricky when it comes to finding the delete option.
First, verify that your app is updated to the latest version, as outdated software can cause glitches. If the delete option is unresponsive, try restarting the app or checking your internet connection.
When managing your Event History, remember that you can only delete a maximum of 94 videos at one time on desktop. Attempting to delete more may lead to an error message. To make the process easier, you might prefer using checkboxes for selection instead of radio buttons, which many users find cumbersome.
If you're still having issues, consider the troubleshooting tips: double-check your connectivity and verify your device settings allow for necessary permissions.
Managing Your Ring Account
Managing your Ring account effectively not only enhances your security experience but also guarantees you have easy access to your video recordings and settings. Utilizing the Ring app, you can easily delete videos or manage your Event History. To streamline your video management, consider the following tips:
- Use checkboxes for quick deletions: Swipe right in the Ring app to reveal checkboxes for selecting multiple videos.
- Implement bulk deletion: The Pencil icon allows you to delete videos in bulk, saving you time when managing large quantities.
Keep in mind that user feedback suggests improvements for video management features. A more intuitive approach for bulk deletion and clearer delete options would enhance your overall experience.
Frequently Asked Questions
How Do I Delete My Ring Doorbell History All at Once?
To delete your Ring Doorbell history all at once, you need to access the Ring app or website.
In the app, head to the "Event History" section, tap the Pencil icon for bulk deletion, select the videos, and confirm by tapping "Delete."
If you're using the website, look for the "Delete All" option at the bottom right.
How Do I Delete Recordings on My Ring Doorbell?
Wondering how you can manage your Ring recordings?
To delete recordings on your Ring Doorbell, open the Ring app and head to the Event History section.
You can swipe right to select individual videos or tap the Pencil icon for bulk deletion.
Remember, it's essential to download any important clips before you delete, as the process is permanent.
How Do You Clear a Ring Doorbell Video?
To clear a Ring Doorbell video, you'll first need to access your Event History.
Open the Ring app or website, find the specific video you want to delete, and select it.
Look for the delete option, which usually appears as a trash can icon or a "Delete" button.
Confirm your choice, and the video will be removed.
Does Deleting Ring Videos Delete on All Devices?
Yes, deleting Ring videos does remove them from all devices linked to your account.
When you delete a video, it's permanently erased from Ring's servers, and you won't be able to recover it later.
This deletion also applies to any shared videos, so those links will no longer work.
Make sure to manage your video storage wisely, as once they're deleted, you'll lose access across all platforms associated with your account.
Conclusion
To sum up, managing your Ring doorbell videos doesn't have to be a hassle.
Remember, "a stitch in time saves nine"—deleting unwanted videos regularly can save you from clutter down the road.
By following the outlined steps, you can easily clear out what you don't need and keep your video library organized.
Don't hesitate to reach out for help if you run into issues.
Stay proactive, and enjoy the peace of mind that comes with a tidy account!
-
Vetted3 months ago
15 Best Home Security Cameras in Sydney for Ultimate Peace of Mind
-
Vetted3 months ago
15 Best Home Security Systems of 2024 – Protect Your Home With Confidence
-
Vetted3 months ago
5 Best Ring Doorbells for Townhouses – Security Solutions That Fit Your Home
-
Vetted3 months ago
15 Best Exterior Home Security Cameras of 2024 – Protect Your Property With Confidence
-
Vetted3 months ago
15 Best Fake Home Security Cameras to Deter Intruders on a Budget
-
Vetted3 months ago
15 Best DIY Home Security Systems With Cameras for Ultimate Peace of Mind in 2024
-
Home Security Systems2 months ago
How Wireless Home Security System?
-
Home Security Systems2 months ago
How Much to Replace Home Security Systems?