Setting up your Blink Home Security System is easy! First, download the Blink Home Monitor app from the App Store or Google Play. Confirm your Wi-Fi has at least 2 Mbps upload speed. Plug in the Sync Module and connect it through the app by scanning the QR code. Create your Blink account and verify your email and phone for added security. Install the cameras in suitable locations, making sure they're within a good range. Finally, configure motion settings and choose your video storage option. There's more to optimize your experience, so keep exploring the setup steps for advanced tips!
Key Takeaways
- Download the Blink Home Monitor app and ensure a Wi-Fi upload speed of at least 2 Mbps for optimal performance.
- Plug in the Sync Module, connect it via the app, and follow prompts to link it to your Wi-Fi network.
- Create your Blink account by entering your details and verifying your email and phone number for security.
- Install the Blink camera in an optimal location, ensuring it's within a 20-foot range for effective motion detection.

ANNKE 3K Lite Wired Security Camera System Outdoor, 8X 2MP Cameras, 1TB HDD
- AI Motion Detection 2.0: Human and vehicle detection with flexible areas
- Universal Compatibility: Works with TVI, AHD, CVI, CVBS, IP cameras
- Supports 1080P and 3K Cameras: Hook up with 1080P@30fps or 3K/5MP@20fps cameras
As an affiliate, we earn on qualifying purchases.
Getting Started With Blink
To kick off your Blink home security setup, download the Blink Home Monitor app and create your account with just your email and password.
Once you're in, verify your Wi-Fi network has a stable upload speed of at least 2 Mbps. This speed is vital for your camera operation, so check your connection before proceeding. For added peace of mind, consider improving your indoor air quality with an air purifier to help create a healthier environment while your security system monitors your home.
Next, add a Sync Module to your system. Plug it into a power outlet and connect it to your Wi-Fi through the app. Wait for the lights to indicate a successful connection. This module acts as a bridge between your cameras and the internet, allowing you to monitor your space effectively.
Now it's time to set up your Blink camera. Insert two AA lithium batteries into the camera and scan the QR code inside the battery compartment using the app. This step completes the camera setup.
Before finalizing the installation, choose the best camera placement for effective monitoring. Utilize the provided mounting hardware and test the camera's view for any necessary adjustments.
With these steps, you're well on your way to securing your home with Blink.

Ring Battery Doorbell (newest model) — Retinal 2K with wide-angle video, up to 6x Enhanced Zoom, Two-Way Talk, and Built-In Battery, Speckled Gray
- Video Resolution: Retinal 2K with wide-angle view
- Zoom Capability: Up to 6x Enhanced Zoom
- Two-Way Communication: Real-time audio and video
As an affiliate, we earn on qualifying purchases.
Creating a Blink Account

To create your Blink account, start by downloading the Blink app from the App Store or Google Play.
As you set up your account, consider enhancing your home security with essential kitchen gadgets that can improve your overall safety and efficiency. These gadgets not only streamline your daily tasks but can also work in tandem with your home security system to provide an extra layer of protection. For those concerned about the monthly cost of home security, investing in smart devices that monitor your home can be a cost-effective solution. With the right equipment in place, you’ll have peace of mind while ensuring both security and convenience in your home.
You'll need to follow the prompts to enter your email and password, and then complete the Multi-Factor Authentication process for added security.
Once that's done, you can even link your account to Amazon for extra features.
Account Creation Steps
Creating your Blink account starts by downloading the Blink Home Monitor app from the App Store or Google Play Store.
Once you've installed the app, open it to begin the account creation process. You'll need to enter your country or region, along with your email address and a secure password. Make sure your password is strong to enhance security. Implementing strong security measures is essential, as AI in Cybersecurity can help protect your personal data from potential threats.
After entering your details, you'll receive an email for verification. This email contains a PIN code that's valid for 40 minutes, so check your inbox promptly. Enter this code in the app to complete the verification process.
Additionally, you'll need to verify your phone number through an SMS or voice call, which adds another layer of security to your account.
Once you've completed these steps, you can choose to link your Blink account to an Amazon account for extra features and functionality. This optional step can enhance your experience by integrating your Blink system with other Amazon services.
Following these steps will guarantee that your Blink account is set up securely and efficiently, allowing you to start monitoring your home in no time.
Multi-Factor Authentication Process
Setting up multi-factor authentication for your Blink account provides an extra layer of security that helps protect your personal information.
To enhance your security measures, consider understanding the importance of voiceover techniques for clear communication.
To get started, you'll need to create a new Blink account and follow these essential steps:
- Enter your country, region, email address, and password in the Blink Home Monitor app.
- Check your email for a PIN code to verify your email address; remember, it's valid for only 40 minutes.
- When prompted, enter your phone number to receive a verification code via SMS or voice call.
- Input the code you receive to verify your phone number, completing the initial setup.

Ring Battery Doorbell (newest model), Matte Mocha with Indoor Cam Plus, Black
- Home Security Bundle: Battery Doorbell, Indoor Cam Plus, Matte Mocha, Black
- 2K Retinal Video: Clear, detailed footage with 6x zoom
- Color Night Vision: See in true color even in low light
As an affiliate, we earn on qualifying purchases.
Multi-Factor Authentication

Multi-Factor Authentication (MFA) considerably boosts your Blink account's security by requiring you to verify your email address with a PIN code. This practice is essential in software security as it minimizes the risk of unauthorized access, similar to the importance of Quality Assurance in Software Development for guaranteeing software integrity.
When you initiate MFA, a unique PIN code will be sent to your email, which you need to enter within 40 minutes to complete the verification process. If you don't receive the PIN code within 90 seconds, you can easily resend it to ascertain you can finalize your setup.
In addition to verifying your email, you can also opt for phone number verification during the MFA setup. This option allows you to receive the PIN code via SMS or voice call, providing you with an extra layer of security.
After you've successfully verified your email and phone number, you're prompted to link your Blink account to your Amazon account. While this step is optional, it's recommended for enhanced functionality and seamless integration.
Once you've completed these steps, a confirmation screen will appear, indicating that your MFA setup is successful. With MFA in place, your Blink account will be much more secure, protecting your home and personal information effectively.

Ring Wired Doorbell Pro (newest model), Home or business security, Retinal 4K with wide-angle video, 10x Enhanced Zoom, and Low-Light Sight, Deep Silver
- 4K Retinal Video: Ultra-clear 4K resolution for detailed footage
- 10x Enhanced Zoom: Magnify distant details up to 10 times
- Two-Way Audio: See, hear, and speak to visitors remotely
As an affiliate, we earn on qualifying purchases.
Setting Up the Sync Module

To get your Blink system up and running, start by opening the Blink Home Monitor app and tapping the plus sign to select "Blink Wireless Camera System."
Next, you'll need to set up the Sync Module. Here's how:
- Plug the Sync Module into a wall outlet using the provided USB cable.
- Scan the QR code on the device or enter its serial number manually.
- Name your Blink system during the setup process.
- Wait for the green light to turn on and the blue light to blink, indicating that the Sync Module is ready. If the lights don't function properly, reset the device.
After you complete these steps, allow time for the device update to finish before adding your cameras.
Make sure everything is functioning smoothly, and don't forget to check the battery compartment of the cameras when you get to that step.
With the Sync Module set up, you're one step closer to securing your home!
Installing the Blink Camera

When installing your Blink camera, choosing the right location is key for ideal coverage.
You'll want to mount it securely and ascertain it's positioned to capture motion effectively.
For instance, avoiding direct sunlight can help prevent glare and enhance the camera's performance, similar to how maintaining a clean airless paint sprayer ascertains optimal operation minimizing performance issues.
Let's go through the setup steps and some tips for perfect placement.
Camera Placement Tips
Selecting the right location for your Blink camera is vital for maximizing its effectiveness in monitoring your home. Proper camera placement tips can help you minimize false alerts and enhance security. Here are some key considerations to keep in mind:
- Clear View: Choose a spot that provides a clear view of the area you want to monitor, avoiding excessive movement in the background. For instance, maintaining good visibility can also be likened to the importance of appliance maintenance, where guaranteeing functionality plays a significant role in performance.
- Distance Matters: Position the camera within a 20-foot range for ideal motion detection settings, focusing on horizontal movement across its field of view.
- Test with Blink App: Use the Blink app to take snapshots of potential placements. This allows you to visualize the coverage and make adjustments before finalizing.
- Secure Mounting: Confirm the camera is securely mounted using the provided hardware. A firm attachment prevents dislodging by wind or tampering.
Mounting and Setup Instructions
Carefully follow these mounting and setup instructions to guarantee your Blink camera is installed correctly and functions effectively. Start by choosing a prime location that's within range of your Wi-Fi signal. Once you've selected the spot, remove the back cover of the Blink camera to access the battery compartment. Insert two AA lithium batteries, making sure the + and – are aligned correctly.
Next, use the Blink app to add the camera. Tap the plus sign, select your camera model, and scan the QR code located inside the battery compartment. After that, securely attach the provided mount to the installation surface with screws. Finally, attach the camera to the mount, positioning it for the best angle and coverage.
To confirm everything is working as it should, test the camera placement via the Blink app by taking snapshots and adjusting as needed for prime view and motion detection.
Here's a quick reference table to help you through the setup process:
| Step | Action | Notes |
|---|---|---|
| 1. Choose Location | Find a Wi-Fi range spot | Confirm desired coverage |
| 2. Insert Battery | Use two AA lithium batteries | Align + and – correctly |
| 3. Use Blink App | Add camera using QR code | Follow on-screen prompts |
| 4. Mount Camera | Securely attach and position | Test with snapshots |
Mounting Your Camera

To guarantee ideal performance, pick a location for your Blink camera that minimizes false alerts from excessive movement.
It's vital to ascertain that your camera's motion detection is effective, so consider the following tips:
- Use the provided camera mounts to securely attach your Blink to a stable surface.
- Make sure the mount is flush and stable, particularly if you're installing it outdoors where moisture can be an issue.
- After mounting, adjust the camera angle to capture the area you want to monitor.
- Utilize the Blink app to verify the camera view before finalizing the installation to confirm it's covering the right space.
Once you've mounted your Blink, test the placement by taking snapshots through the Blink app.
This step helps confirm the best view and coverage.
Configuring Camera Settings

Now that you've mounted your camera, it's time to configure the settings for ideal performance.
You can adjust motion detection settings, customize notification preferences, and even schedule recording times to fit your lifestyle.
These adjustments will help guarantee your Blink system works effectively and keeps you informed.
Adjust Motion Detection Settings
Adjusting the motion detection settings in your Blink Home Monitor app allows you to tailor your security system to best fit your needs. Here's how you can customize the settings for peak performance:
- Enable or disable motion detection: Use the Motion Detection slider to control when you want to receive alerts.
- Set motion zones: Specify areas where motion detection is active to minimize false alerts from non-essential movements.
- Adjust motion sensitivity: Fine-tune how sensitive your camera is to movement, ensuring it detects only relevant activity.
- Review settings regularly: Regularly check and modify your motion detection preferences based on your experiences to enhance your system's effectiveness.
Customize Notification Preferences
Customizing your notification preferences in the Blink Home Monitor app allows you to receive alerts tailored to your specific needs and reduces unnecessary interruptions.
To begin, open the app and navigate to the settings menu to access your camera's configuration options. In the "Notifications" section, you can customize alert types, such as motion alerts, clip alerts, and camera status updates, based on what matters most to you.
Next, adjust the motion sensitivity settings. This feature helps you control the threshold for triggering notifications, so you only receive alerts for significant movements.
If there are areas you want to monitor less frequently, configure motion detection zones within the app. This will help you disable alerts for specific regions, reducing false notifications from high-traffic areas.
Lastly, make certain to enable the Motion Detection slider. This guarantees you'll receive motion detection alerts whenever your Blink camera detects activity.
Schedule Recording Times
Scheduling recording times for your Blink camera guarantees that you capture important moments while aligning with your daily routine.
To get started, open the Blink app and follow these steps to configure your camera settings:
- Tap the gear icon next to the camera you want to set up.
- Select the "Schedule" option within the settings menu.
- Specify the desired recording times and days for your Blink camera.
- Make sure the "Arm" option is enabled for those time slots to activate motion detection.
Video Storage Options

When setting up your Blink Home Security System, you can choose between cloud storage and local storage options to keep your video clips safe. Both options have their advantages, so it's important to understand what works best for you.
| Storage Type | Features |
|---|---|
| Cloud Storage | Subscription plans available |
| Free trial upon initial setup | |
| Local Storage | Uses Sync Module |
| Save video clips on a USB drive |
With cloud storage, you can store your video clips securely online, making them accessible from anywhere using the Blink app. You'll also benefit from a free trial to test the service before committing. On the other hand, local storage allows you to save your clips directly on a USB drive connected to the Sync Module, giving you physical control over your data.
Regardless of your choice, it's important to regularly check your storage status in the Blink app. This way, you can make certain there's enough space for new recordings and keep your security system running smoothly.
Troubleshooting Common Issues

Even with the right video storage options in place, you might encounter issues with your Blink Home Security System that need troubleshooting. Here are some common problems and solutions to help you resolve them:
- Check your Wi-Fi connection: Verify your internet is working properly and the Sync Module is powered and connected.
- Restart the Blink camera and app: Sometimes a quick restart can resolve persistent connectivity issues or unresponsiveness.
- Optimize camera placement: Move your camera closer to the Sync Module if it's struggling to maintain a strong Wi-Fi signal.
- Consult the Blink app: The FAQ section can provide specific error codes and common troubleshooting steps tailored to your issue.
Accessing Customer Support

For quick resolutions to your Blink Home Security System issues, accessing customer support is just a few clicks away.
Start by visiting the Blink App or the official website, where you'll find a dedicated support home filled with troubleshooting guides and FAQs for common problems. These resources are designed to help you resolve issues efficiently.
If you can't find a solution, don't hesitate to contact Blink support directly. They offer personalized assistance tailored to your specific concerns, ensuring you get the help you need.
Additionally, you can explore community forums where users share experiences and solutions related to Blink products and setup processes. Engaging with fellow Blink users can provide valuable insights and tips.
For those setting up or optimizing their system, thorough setup guides are readily available online. These guides can walk you through the installation process and help you maximize your system's features.
By utilizing these resources, you can enhance your Blink experience and stay informed about the latest updates and improvements.
Frequently Asked Questions
How to Set up Blink Home Security?
To set up your Blink Home Security, download the app, create an account, plug in the Sync Module, connect it to Wi-Fi, add the camera, mount it, and customize your settings for ideal security.
How Do I Connect My Blink to My House?
To connect your Blink to your house, make certain your Wi-Fi is stable, download the Blink app, set up the Sync Module, and add your camera by scanning the QR code. Then, mount it securely.
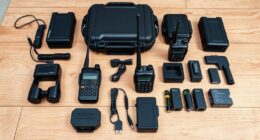
What Do I Need for a Blink Security System?
You're not just securing your home; you're investing in peace of mind. For a Blink security system, you'll need compatible devices, a stable Wi-Fi connection, Blink cameras, a Sync Module, and AA lithium batteries.
How Much Does Blink Cost per Month?
Blink's costs vary based on your needs. You can enjoy free cloud storage for 60 days, but if you want more, subscription plans start at $3 monthly for one camera or $10 for unlimited cameras.
Conclusion
As you wrap up setting up your Blink home security system, think of it as planting a protective tree in your yard. Each branch represents a layer of security, while the roots keep it firmly grounded.
With your cameras watching over you and your loved ones, you can feel a sense of peace, like a gentle breeze rustling through the leaves.
Embrace this newfound safety, and remember, you've created a sanctuary where your family can thrive.