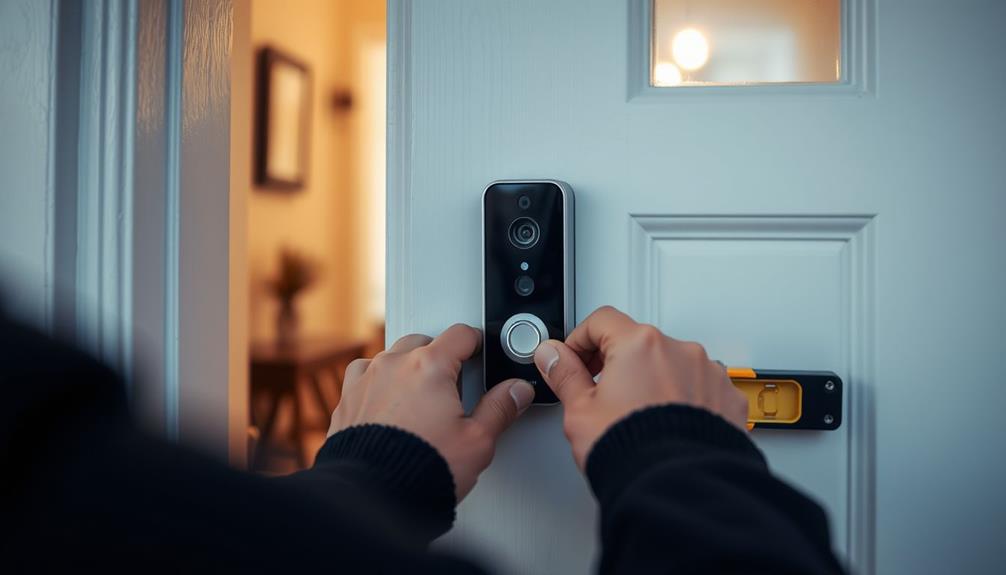
To uninstall your Ring Doorbell and access the orange button, first find the security screw at the bottom. Use a Torx T15 screwdriver to carefully remove it. Once the screw is out, lift the doorbell straight up to detach it from the wall mount. You should now see the orange button that is necessary for resetting or setting up your device. After you finish, you can reattach the doorbell by aligning it with the mount. For further instructions or advice, continue exploring for additional insights on how to manage your device.
Key Takeaways
- Locate the security screw at the bottom of the Ring Doorbell for removal.
- Use a Torx T15 security screwdriver to carefully unscrew and remove the security screw.
- Gently lift the doorbell straight up to detach it from the wall mount.
- Find the orange button on the device; press it to initiate a reset or setup.
Overview of Ring Doorbell
The Ring Doorbell, offering both wired and battery-operated models, is designed to enhance your home security with easy installation and advanced features like two-way audio and HD video.
When you decide to install a Ring Video Doorbell, you're choosing a device that lets you communicate with visitors remotely using the Ring app. This feature is especially useful when you're away from home, providing peace of mind and enhancing your overall security, similar to how home cinema systems prioritize immersive audio-visual experiences.
Setting up your Ring Doorbell is straightforward. You won't need advanced technical skills or a toolbox full of tools; just a few simple items are often enough. Once you've mounted the doorbell, you'll want to push the orange button on the device for setup. This initiates the connection to your home Wi-Fi and allows the doorbell to sync with your Ring app.
Physically installing the doorbell involves securing it with a security screw, which helps prevent tampering. Whether you opt for the wired version or the battery-operated model, you can easily enhance your home's security.
Required Tools for Removal

Before you start removing your Ring Doorbell, you'll need a few essential tools to make the process smooth.
Gathering the right tools guarantees that you can handle the task efficiently, similar to how what to look for in a home cleaning service can enhance your cleaning experience.
Gather a security screwdriver, preferably a T15 Torx bit, and a flathead screwdriver for any stubborn spots.
It's also smart to have a soft cloth handy to protect your doorbell during removal.
Necessary Tools Overview
Removing your Ring Doorbell requires a few vital tools to guarantee a smooth and safe process. First and foremost, you'll need a security screwdriver, specifically a Torx T15 screwdriver. This tool is essential for unscrewing the security screw located at the bottom of the device.
If your doorbell is hardwired, a wire stripper may be necessary to safely disconnect the wiring before you proceed. It's also wise to reflect on your home's overall decor when selecting tools, as opting for smart organization techniques can help keep your workspace tidy.
Additionally, having a flathead screwdriver can be helpful if you need to gently pry off the front cover, especially if it's securely attached without visible screws. A level and a pencil are also recommended for ensuring proper reinstallation after you press the button on the front.
Finally, don't forget a soft cloth or towel to protect the surface beneath the doorbell during the removal process.
With these tools on hand, you'll be well-prepared to remove your Ring Doorbell efficiently. Make sure to gather everything before you start to avoid unnecessary interruptions while working on your device.
Safety Precautions to Follow
Guaranteeing safety during the removal of your Ring Doorbell is vital to prevent accidents and damage. Before starting, you'll want to gather the necessary tools and follow a few safety precautions.
First, make sure to turn off the power at the circuit breaker. This step is significant in preventing electrical hazards while you work. Next, use a screwdriver compatible with the safety screw specific to your Ring model to avoid any damage. It's wise to have a small container handy for storing screws and other small parts you remove, so you don't lose them.
Additionally, place a soft cloth under the doorbell area to protect the surface from scratches during removal. Always refer to the manufacturer's instructions for your specific Ring Doorbell model, as adhering to their guidelines helps guarantee a safe and proper removal.
Here's a quick reference table to summarize the vital tools and precautions:
| Tool/Precaution | Purpose | Notes |
|---|---|---|
| Screwdriver | Remove safety screws | Guarantee compatibility |
| Circuit Breaker | Turn off power | Prevent electrical hazards |
| Small Container | Store removed parts | Avoid losing screws |
| Soft Cloth | Protect surface | Prevent scratches |
Step-by-Step Removal Guide
To successfully remove your Ring Doorbell, you'll need a security screwdriver that fits the specific screws on your model. Most likely, this will be a Torx or Pentalobe type.
Start by locating the security screw at the bottom of your doorbell; this is essential for the removal process. Use your security screwdriver to carefully remove this screw.
Once the security screw is out, gently lift the doorbell straight up to detach it from the wall mount. Be sure to have a soft cloth or padded surface ready to place the doorbell on, as this will help prevent any scratches while you access the orange button.
After you've pressed the orange button for your desired reset or setup, reattach the doorbell by aligning it back with the mounting bracket. Finally, secure it once again with the security screw. Make certain it's tightened properly to guarantee stability.
Following these steps will allow you to efficiently remove and reattach your Ring Doorbell without any hassle.
Accessing the Ring App

Open the Ring app on your smartphone to get started with managing your Ring Doorbell. Once you've launched the app, you'll see a list of all your connected devices. Select the specific Ring Doorbell you want to manage. This is essential for the next steps, especially if you're looking to remove this device or access its features.
After selecting your doorbell, tap the gear icon, which will take you to the Device Settings for your model. Here, you can customize various aspects of your device, including alerts and notifications.
If your goal is to proceed with removal, navigate to the "General Settings" option in the menu.
Once you're in General Settings, look for the choice labeled "Remove this Device." Selecting this option will prompt you to confirm your decision. Confirming will start the removal process, allowing you to disconnect your doorbell from the app.
If you need to access the orange button later for reconfiguration, you can follow the on-screen instructions provided after removal. This process guarantees you manage your Ring Doorbell effectively.
Navigating Device Settings

To navigate your Ring Doorbell's device settings, you'll first want to access the app on your phone.
From there, you can easily remove the device if needed and press the orange button for setup.
Understanding these steps will help you manage your device more effectively.
Accessing Device Settings
Access the Device Settings for your Ring Doorbell by launching the Ring app on your smartphone and selecting the desired device.
Once you have the device screen open, tap the gear icon located in the top right corner. This action takes you into the Device Settings menu, where you can manage various options related to your doorbell's functionality.
In the Device Settings, you'll find sections like General Settings that offer insights into the device's features. If you're planning to press the orange button for setup or reset, make certain to follow the necessary steps first. You might need to remove the faceplate by unscrewing any security screws, as the orange button is typically hidden underneath.
After you've pressed the orange button, return to the Ring app. Follow the on-screen instructions to reconfigure your device as needed. This process guarantees your Ring Doorbell is set up correctly and functioning at its best.
Removing the Device
Finding your way to the gear icon in the Ring app lets you start the process of removing your doorbell. Once you're there, follow these steps to guarantee a smooth removal of the device:
- Open the Ring app on your smartphone.
- Navigate to the settings for your specific Video Doorbell.
- Select "General Settings" from the Device Settings menu.
After you've removed the device from the app, it's time to physically detach your doorbell. Use the provided security screw to take the doorbell off its mounting bracket. Doing this will expose the orange button, which is essential for the next steps.
Make sure to follow any on-screen instructions that pop up after you remove the device, as they'll help you reconfigure the doorbell if needed.
Pressing the Orange Button
Press the orange button on your Ring Doorbell to initiate a factory reset or enter setup mode, which can help resolve connectivity issues.
Once you've removed the Ring Doorbell from its mounting bracket, locate the orange button, typically found on the front or side of the device. If you're unsure of its exact location, refer to your device manual for guidance.
After you've found the button, press it firmly. You'll see the front light flash, indicating that the device is in setup mode or that a factory reset is underway. This step is essential if you're experiencing issues connecting to your Wi-Fi or if you're changing your network settings.
Once you've pressed the orange button, head to the Ring app on your smartphone. The app will guide you through the setup process or any necessary reconfiguration. Make sure to follow the on-screen instructions closely to confirm your device is properly set up again.
Removing the Doorbell

To remove your Ring Doorbell, start by locating the security screw at the bottom of the device and using a screwdriver to unscrew it. Once the screw is removed, gently pull the doorbell away from the mounting bracket to detach it from the wall.
Here are some tips to make the process smoother:
- Use the right screwdriver: Confirm you have the correct size to avoid stripping the screw.
- Be gentle: When pulling the doorbell away, do it slowly to prevent damaging the mounting bracket or the device.
- Keep track of the screw: Place it in a safe spot so you don't lose it when reattaching the doorbell.
After you've accessed the orange button, be sure to securely reattach the doorbell to the mounting bracket. Align it properly before replacing the security screw.
Locating the Orange Button

Locating the orange button on your Ring Doorbell is essential for setup and resetting the device, but its position can vary across different models. Here's a quick guide to help you find that elusive button:
| Model | Orange Button Location | Notes |
|---|---|---|
| Ring Video Doorbell 1 | Front of the device | Easily visible |
| Ring Video Doorbell 2 | Underneath the faceplate | Remove the faceplate |
| Ring Video Doorbell Pro | Back of the device | Requires removal from mount |
| Ring Video Doorbell Elite | Back of the device | Similar to Pro model |
If you're having trouble locating the orange button, consult your user manual for a detailed diagram that shows the exact location for your model. Make sure the device is powered on and properly mounted, as this will help you find the orange button more easily. If you still can't find it, you might need to gently remove the device from its mounting bracket to gain access. Knowing where the orange button is will make your setup process much smoother!
Performing a Factory Reset

When you're ready to perform a factory reset on your Ring Doorbell, you'll want to follow a straightforward process.
It's essential to be aware of the safety considerations involved, as this action will erase all your previous settings.
Let's break down the reset process and highlight what you need to keep in mind.
Reset Process Overview
Performing a factory reset on your Ring Doorbell is straightforward and can help resolve various issues. To begin, you'll need to locate the orange setup button, which is either on the front or under the faceplate, depending on your model.
Here's a quick overview of the steps involved:
- Press and hold the orange button for about 15 seconds.
- Wait for the front light to start flashing, indicating that the reset process has begun.
- Release the button and observe the light until it stops flashing and returns to a steady pattern.
After resetting, you'll need to set up your Ring Doorbell again through the Ring app as a new device. Make sure your device is powered and connected to Wi-Fi for a successful setup.
Following these steps will help guarantee that your Ring Doorbell is working correctly and can help eliminate any lingering issues you might be experiencing.
Important Safety Considerations
Before diving into the factory reset process, make sure to power down your Ring Doorbell to avoid any electrical hazards. If your doorbell is hardwired, you need to turn off the power at the circuit breaker first. This step is essential for preventing electric shock while you handle the device.
When you're ready to remove the doorbell, don't forget to wear safety goggles and gloves. These will protect your eyes and hands from any debris or sharp edges that might come loose during the process. It's always better to be safe than sorry!
Ensure you have the right tools on hand, like a screwdriver, to avoid damaging the doorbell. Once you've powered down and taken the necessary precautions, carefully remove the doorbell from its mounting bracket. This will allow you to access the orange setup button without risking any electrical issues.
Reconfiguring the Device

To reconfigure your Ring doorbell, start by unscrewing the security screw at the bottom to detach the faceplate.
Once you've removed the faceplate, gently pull the doorbell unit away from the wall to access the orange setup button on the back of the device.
Pressing this orange button will assist you in initiating the reconfiguration process.
Here's a quick checklist to guide you through the steps:
- Unscrew the security screw to detach the faceplate.
- Pull the doorbell unit away from the wall to reach the orange button.
- Press the orange button to start the reconfiguration or reset.
After you've reattached everything, make sure to reinsert the security screw to keep the doorbell securely mounted.
Finally, check the Ring app to confirm that the device is functioning properly and has been reconfigured as needed.
Following these steps will guarantee your Ring doorbell works effectively after you remove and reset it.
Troubleshooting Common Issues

If you encounter issues with your Ring doorbell, troubleshooting common problems can help restore its functionality quickly. Start by confirming the device is powered down or disconnected before you attempt to remove it. If you can't locate the orange button for setup, check the back or under the faceplate, depending on your model.
Here's a quick troubleshooting guide:
| Issue | Solution |
|---|---|
| Can't find the orange button | Refer to your user manual for specific guidance. |
| Doorbell won't power on | Verify it's connected to the power source or try resetting it. |
| Difficulty removing the doorbell | Make certain the security screw is completely removed. |
| Poor Wi-Fi connection | Check your router and confirm the doorbell is within range. |
Additional Support Resources

You'll find a variety of additional support resources available to help you with your Ring doorbell removal and setup process. Whether you're having trouble with the security screw or locating the orange button, these resources can guide you through any challenges you face.
Here are some helpful options to evaluate:
- User Manual: Check the Ring Help Home for detailed instructions specific to your doorbell model.
- Video Tutorials: Watch step-by-step videos that demonstrate the removal process and button access.
- Community Forums: Engage with other Ring users to share experiences and get tips on overcoming obstacles.
Utilizing these support resources can make your experience smoother and more efficient. If you encounter any difficulties, don't hesitate to explore these options. They're designed to provide you with the help you need to successfully remove your Ring doorbell and access the orange button.
Frequently Asked Questions
How Do I Turn off the Orange Button on My Ring Doorbell?
To turn off the orange button on your Ring Doorbell, you'll need to reset the device.
First, detach the doorbell from its mounting bracket by unscrewing the security screw at the bottom.
Once it's off, press and hold the orange button for about 15 seconds. This action will disable the setup mode indicated by the circling light.
After that, reattach the doorbell securely to the bracket.
What Is the Orange Button Behind the Ring Doorbell?
Have you ever wondered what that orange button behind your Ring Doorbell does?
It's the setup button, essential for connecting your doorbell to Wi-Fi or performing a factory reset.
Depending on your model, you might find it under the faceplate or on the front.
Pressing it initiates LED signals to show the device's status.
Use it wisely, though—frequent resets can disrupt your doorbell's functionality and connectivity.
How Do You Reset the Orange Ring Button?
To reset your Ring Doorbell, you'll need to locate the orange setup button.
Once you find it, press and hold the button for about 15 seconds.
After you release it, watch for the front light to start spinning, which indicates the device is resetting.
Make sure your doorbell has enough power, either from a battery or hardwiring, to complete the process.
Once done, you can reconnect it to your Wi-Fi using the Ring app.
How Do I Get Out of Setup Mode on My Ring Doorbell?
If your Ring Doorbell feels a bit lost in setup mode, don't worry! You can guide it back to normalcy.
Just press and hold the orange button for about 20 seconds. You'll see the front light start to dance in circles, signaling a reset.
Once it settles down and goes dark, your doorbell will reboot and exit setup mode.
Make sure your Ring app's updated for a smooth changeover!
Conclusion
In summary, removing your Ring Doorbell to press the orange button isn't as intimidating as it seems.
Just gather the right tools, follow the steps in the app, and you'll be back on track in no time.
Remember, every cloud has a silver lining—once you reset and reconfigure your device, it'll work like a charm again.
If you run into any bumps along the way, don't hesitate to reach out for help.