
To get the back plate off your Ring Doorbell, first gather a star-shaped screwdriver and a flat tool, like a paint scraper. Locate the security screw at the bottom of the faceplate and turn it counterclockwise to loosen it. Firmly grip the faceplate and gently lift it upwards to detach it. Once it's off, you may need to use the flat tool to carefully pry the back plate away if it's stuck. Always handle everything with care to avoid damage. Want to know more about battery access and reattaching the faceplate? There's more helpful information ahead!
Key Takeaways
- Locate and unscrew the security screw at the bottom of the faceplate using a star-shaped screwdriver.
- Firmly grip the faceplate while gently pushing upwards to break the seal.
- If the backplate is stuck, use a flat tool like a paint scraper to pry it off carefully.
- Ensure the plastic hook aligns with the hole when reattaching the faceplate.

Philips Wi-Fi Door Lock, WiFi Smart Lock Keyless Entry Deadbolt for Front Door, Compatible with Alexa & Google Assistant, Remote Control, Built-in WiFi, APP Fingerprint Passcode Unlock, Auto Locking
𝐅𝐥𝐞𝐱𝐢𝐛𝐥𝐞 𝐖𝐚𝐲𝐬 𝐭𝐨 𝐔𝐧𝐥𝐨𝐜𝐤: Unlock the way you want: app, passcode, fingerprint, physical key, or voice via Alexa/Google...
As an affiliate, we earn on qualifying purchases.
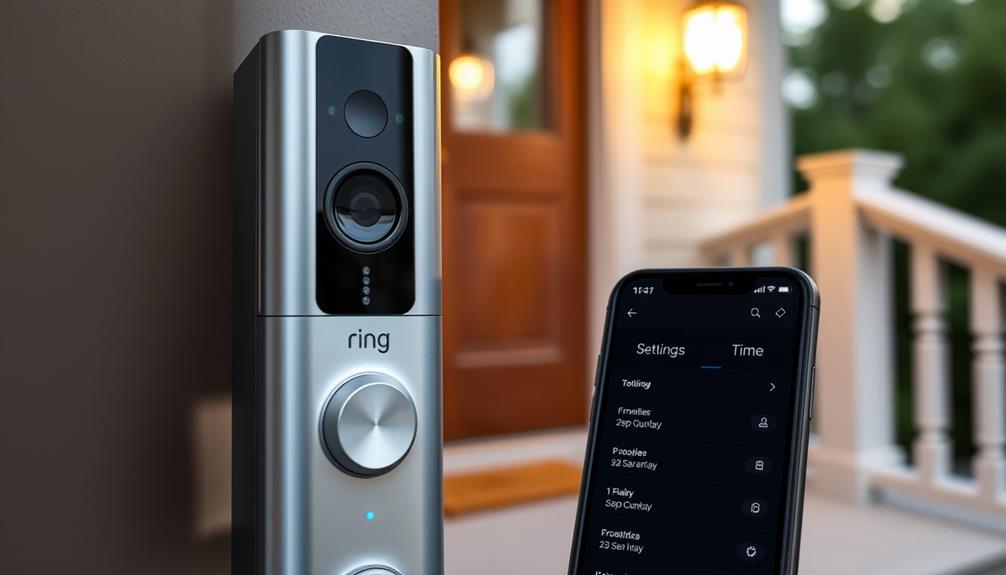
Ring Doorbell Overview
The Ring Video Doorbell is a popular choice for homeowners looking to enhance their security with its easy installation and advanced features.
Its sleek design and modern technology make it a stylish addition to any home's entrance, complementing a variety of architectural styles, including Mid-Century Modern Design.
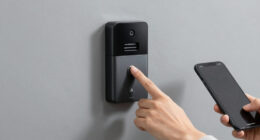
Whether you opt for the wired or battery-operated model, you'll appreciate how it integrates seamlessly with your smartphone. This means you can monitor your home from anywhere, receiving real-time alerts whenever motion is detected.
With high-definition video quality and two-way audio, the Ring Doorbell allows you to interact with visitors, adding an extra layer of convenience.
The device also works flawlessly with other Ring products, creating an all-encompassing home security system that you can control from a single app.
When installing your Ring Doorbell, keep in mind that the Ring 1 model comes with a backplate featuring screw terminals for power connection. Make sure to use the provided security screws to secure the backplate properly. This guarantees that your doorbell remains in place and functions effectively.

Keypad Smart Door Knob Lock, Yamiry Keyless Entry Digital Lock with Handle, Electronic Code Knob for Front Door, Easy Installation
Security Lock: The lock is made of aluminum alloy to ensure the security of your home and offers...
As an affiliate, we earn on qualifying purchases.
Common Installation Issues

Removing the backplate of your Ring Doorbell can present several common installation challenges that many users encounter. These issues can be frustrating, especially when you're trying to guarantee your home's security is first-rate. Here are some common problems you might face:
- Latching Mechanism: The backplate often has a latching mechanism that complicates detachment, making it tricky to remove. For those who seek a thorough cleaning approach, understanding <a target="_blank" href="https://bestvacuumexpert.com">key factors in choosing a home cleaning service</a> can enhance your overall home maintenance strategy.
- Security Screws: Many models use security screws that require special tools, adding another layer of complexity to the process.
- Potential Damage: Attempting to remove the backplate without proper techniques can lead to damage, leaving you worried about the integrity of your doorbell.
- Mounting Surface Variations: The ease of removal can vary based on the mounting surface and installation conditions, leading to inconsistent experiences.
To tackle these issues, grip the doorbell firmly and consider using tools like a paint scraper. Sometimes, a little patience and force are all you need to successfully detach the backplate without causing any harm. Remember, you're not alone in facing these challenges.

Fingerprint Smart Door Lock with Handle & Keypad – Bluetooth Keyless Entry for Front Door, Home, Kids, Guests, Airbnb & Rental, App + Code Access, Compatible with Alexa & Google, Easy DIY Install
【Bluetooth Smart Control】Unlock and manage your door using Bluetooth connection directly from your phone. Ideal for homeowners and...
As an affiliate, we earn on qualifying purchases.
Tools Needed for Removal

To get the back plate off your Ring doorbell, you'll need a few essential tools.
First, grab the special star-shaped screwdriver that came with your device, or a T6 torx-head screwdriver if it's missing.
This process is similar to making simple changes that can elevate overall aesthetics in your home, as seen in living room transformation projects.
Having a flat tool and safety glasses handy will also make the process smoother and safer.
Essential Tools Required
Getting the backplate off your Ring Doorbell requires a few essential tools for a smooth removal process. Having the right tools at your fingertips not only makes the job easier but also guarantees you won't damage your device.
Additionally, it's important to approach the task with care to maintain the integrity of your doorbell, similar to the way one cherishes special moments like beautiful biblical birthday wishes that celebrate loved ones.
Here's what you'll need:
- Star-shaped screwdriver: Use the special screwdriver that came with your Ring or a T6 torx-head screwdriver as a backup.
- Flat, skinny tool: A butter knife or paint scraper can help you pry off the backplate if it's stuck.
- Safety glasses: Protect your eyes during the removal process, especially if you're applying some force.
- Clean cloth: Keep a cloth handy to avoid scratching the doorbell while you work.
With these tools in hand, you'll be ready to tackle the removal of the backplate with confidence.
Proper Screwdriver Usage
Using the right screwdriver is vital for safely and effectively removing the backplate of your Ring Doorbell. Typically, a special star-shaped screwdriver comes included with your device. This screwdriver is essential for loosening the security screws that hold the backplate in place. If you've misplaced the original screwdriver, don't worry—just grab a T6 torx-head screwdriver as an alternative option.
In addition to the right tools, making sure your workspace is free from allergens is important, as air purifiers improve indoor air quality considerably, creating a cleaner environment for your project.
When you're ready to begin, verify you're equipped with a flat, skinny tool like a butter knife or paint scraper. This will help you pry the backplate off if it becomes stuck during the removal process. Remember, safety is key, so wearing safety glasses will protect your eyes from any debris or accidental slips.
As you work, it's a good idea to keep a clean cloth handy. This will help prevent scratches on the doorbell while you're removing and reinstalling the backplate. By using the correct screwdriver and taking these precautions, you'll make the entire process smoother and safer.
Follow these steps, and you'll have that backplate off in no time.

Smart Lock with Handle Set, Biometric Fingerprint Keyless Entry Deadbolt, Electronic Digital Keypad with App Control & Auto-Lock for Front Door, Home, Airbnb & Rental, Satin Nickel
8-in-1 Biometric Entry & Keyless :Unlock your door in just 0.3 seconds with the advanced 360° biometric fingerprint...
As an affiliate, we earn on qualifying purchases.
Step-by-Step Removal Process

Now that you have your tools ready, let's go through the step-by-step removal process for your Ring doorbell.
It's important to approach this task with care to avoid any damages, as minor errors in handling can lead to significant consequences in your setup.
We'll cover the necessary techniques for safe removal and troubleshoot any common issues you might encounter.
Required Tools Overview
To successfully remove the back plate of your Ring Doorbell, you'll need a star-shaped screwdriver, preferably the one included with your device, or a T6 torx-head screwdriver if the original is missing. This is vital for loosening the screw from the bottom of the faceplate.
Before you begin, it's helpful to understand the importance of keeping your tools organized, much like how proper essential oil storage is important for maintaining their potency.
Here's a quick list of what you'll need:
- Star-shaped screwdriver – The key tool for this process!
- Clean cloth – To prevent scratches and keep your doorbell looking sharp.
- Safety glasses – Protect your eyes while you work.
- Flat, skinny tool (like a butter knife) – For prying, if the faceplate is stuck.
Once you have these tools, you're ready to jump in!
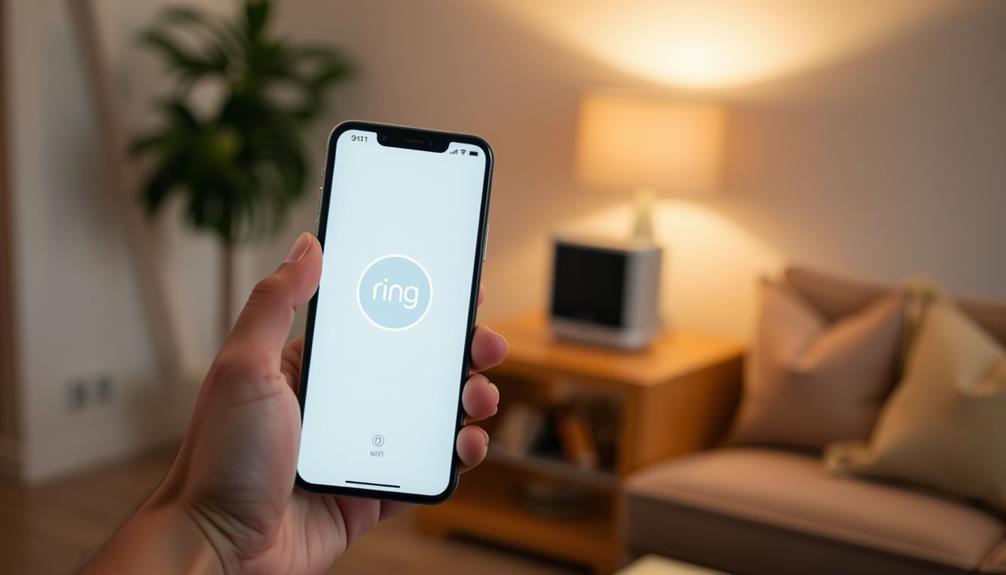
Remember, if you haven't done so already, create your Ring account to manage all your settings smoothly.
By gathering these items ahead of time, you'll guarantee a smoother removal process. Keep everything organized, and you'll be one step closer to accessing your Ring Doorbell's features.
Happy tinkering!
Safe Removal Techniques
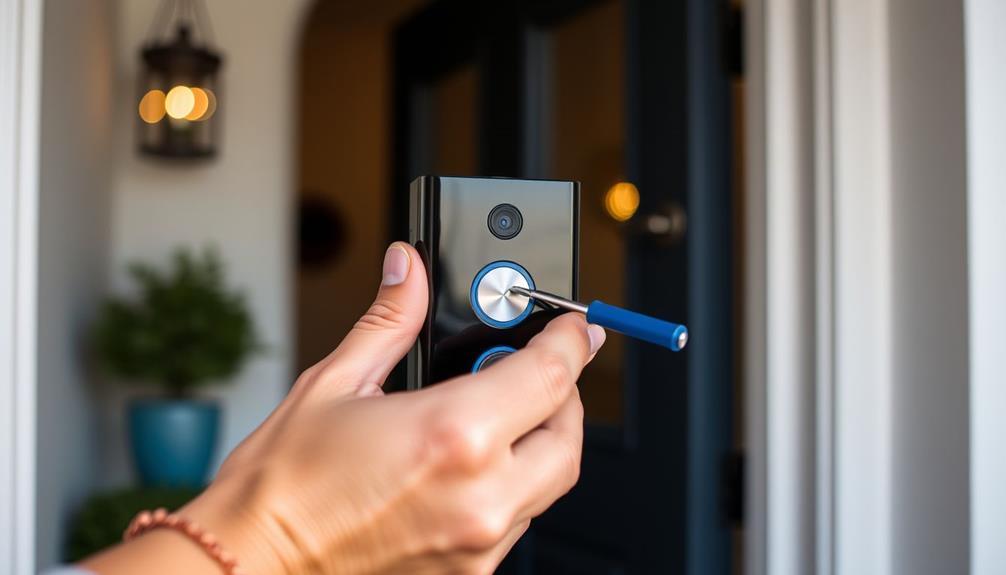
Before you start, make certain to locate the security screw at the bottom of the faceplate, as this is your first step in safely removing it. Use the provided star-shaped screwdriver to turn the screw counterclockwise and remove it.
Once the screw is out, grip the faceplate firmly with your thumbs at the bottom. Use your index and middle fingers to support the front while pushing the faceplate upwards. Carefully lift the faceplate away from the body, making sure a smooth motion to avoid damaging any components.
Now that you've removed the faceplate, you can access the backplate. If it's difficult to detach, use a flat, skinny tool like a paint scraper to gently pry it away from the mounting bracket. Be cautious during this step to prevent any damage.
When you're ready to reattach the faceplate, align the plastic hook at the top with the corresponding hole. Snap it back into place and secure it with the security screw to confirm it's fastened properly. Following these steps will help you safely remove and reattach the backplate without any issues.
Troubleshooting Common Issues
Identifying common issues during the removal process can save you time and frustration when trying to detach the backplate of your Ring Doorbell. Here are some troubleshooting tips to help you through the removal:
- Missing Tools: If you can't find the star-shaped screwdriver, it'll delay your progress. Keep all tools handy before starting.
- Stuck Faceplate: If the faceplate won't budge, check if you've unscrewed the security screw fully. Verify it's completely removed.
- Backplate Sticking: If the backplate is stuck, don't force it! Instead, use a flat, skinny tool like a paint scraper to gently pry it away.
- Screws Disappearing: If you lose screws during the removal, it can be a headache! Use a small container to keep track of them.
If you encounter any of these issues, don't hesitate to pause and reassess your approach. Always ask yourself the right question: "Am I following the removal steps correctly?" By addressing these common challenges, you'll guarantee a smoother experience while detaching the backplate of your Ring Doorbell.
Replacing the Faceplate

Replacing the faceplate on your Ring Video Doorbell is a straightforward process that enhances both its functionality and appearance.
To get started, locate the security screw at the bottom of the faceplate. Use a screwdriver to turn it counterclockwise and loosen it. Once the screw is removed, position your thumbs at the bottom of the faceplate, using your index and middle fingers to support the front. Push upwards gently to break the seal and carefully lift the faceplate away from the body.
When it's time to attach the new faceplate, align the plastic hook at the top with the corresponding hole. Hold the cover at a 45-degree angle and gently snap the bottom back into place. This guarantees a secure fit and proper alignment.
After the faceplate is in position, don't forget to replace the security screw. Tighten it completely to guarantee the faceplate is firmly attached before using your doorbell again.
Following these steps won't only keep your Ring Video Doorbell looking great but also maintain its effectiveness in securing your home.
Battery Access and Charging

To access the battery compartment on your Ring Doorbell, start by removing the faceplate by unscrewing the security screw at the bottom and sliding it upward.
Once the faceplate is off, you'll see the battery compartment. If your model has a removable battery, simply press down on the black tab while sliding the battery out for charging or replacement.
Here are some tips to keep your battery in prime condition:
- Check the Indicator Light: Make sure the battery's fully charged by checking the indicator light on the battery itself.
- Charge Regularly: Don't wait until the battery's dead—charge it regularly to guarantee peak performance.
- Monitor Battery Life: Use the Ring app to keep an eye on your battery life. This can prevent unexpected shutdowns.
- Backup Battery: Consider investing in a backup battery for uninterrupted operation, especially if you rely heavily on your doorbell.
After charging, slide the battery back into the compartment until the black tab snaps securely into place.
Now you're all set to keep an eye on your home!
Tips for Successful Removal

When you're ready to remove the back plate of your Ring Doorbell, start by locating the security screw at the bottom and turning it counterclockwise with the provided star-shaped screwdriver. Next, firmly grip both the bracket and the doorbell to maintain stability while you apply pressure to detach the back plate from the mounting surface.
If the back plate feels stuck, don't panic! You can use a flat, skinny tool like a paint scraper or butter knife to gently pry it loose without causing damage. Remember, patience is key—sometimes, a bit of force is necessary, especially if the back plate has been mounted for a long time.
Here are some quick tips to take into account:
| Tip | Details |
|---|---|
| Use the Right Tool | Always use the star-shaped screwdriver provided. |
| Grip Firmly | Hold both the doorbell and bracket securely. |
| Check Instructions | Refer to the specific manual for your model. |
Frequently Asked Questions
How Do You Remove the Backing Plate on a Ring Doorbell?
To remove the backing plate on your Ring Doorbell, first locate the security screw at the bottom.
Use a star-shaped screwdriver to unscrew it counterclockwise.
Once that's done, grip the bottom of the plate and gently pull it away from the wall.
If it's stuck, a flat tool like a paint scraper can help.
Just make sure the doorbell's powered down before you start to avoid any electrical issues.
How Do I Get the Mounting Plate off of My Ring Doorbell?
Getting the mounting plate off your Ring Doorbell can feel frustrating, but it's simpler than you think.
First, locate the security screw at the bottom; you'll need a special screwdriver to remove it.
Once that's done, use your thumbs to gently push the faceplate up while supporting it with your fingers.
If it's stubborn, a flat tool can help pry it loose.
Just be careful not to damage anything during the process!
How to Get Faceplate off Ring Doorbell?
To get the faceplate off your Ring Doorbell, start by locating the security screw at the bottom. Unscrew it counterclockwise.
Once it's removed, use your thumbs to push the faceplate upwards while supporting the front with your fingers. Lift it away smoothly to avoid any damage.
Make sure to set the faceplate aside carefully.
When you're ready to replace it, align and snap it back into place securely.
How Do You Remove a Ring Base Plate?
To remove the base plate of your Ring doorbell, start by locating the security screw at the bottom.
Use the special star-shaped screwdriver that came with your device to unscrew it.
Once that's done, push the faceplate upwards with your thumbs, supporting it with your index and middle fingers.
If you hit resistance, gently use a flat tool like a paint scraper to help detach it.
Check for any other screws before fully removing the plate.
Conclusion
With the right tools and a little patience, removing your Ring doorbell's faceplate can be as easy as pie.
Just remember, it's all about taking it step by step—like peeling an onion, revealing the layers beneath.
Once you've got it off, you'll feel like a tech wizard, ready to tackle any challenge it throws your way.
So go ahead, take that leap, and enjoy the satisfaction of mastering your home's security!