To install your Ring Doorbell on an existing doorbell system, start by turning off the power at the circuit breaker. Verify your current system's voltage is compatible. Connect the jumper cable to the Front and Trans terminals on the mounting bracket, then securely attach the existing doorbell wires. Use the provided template to mark and mount the bracket to the wall. Once everything's connected, restore power and check the device in the Ring app to confirm it's functioning. With these steps, you're almost ready—continue to explore more tips for a seamless installation experience. Before finalizing the setup, ensure that the doorbell is receiving sufficient power and securely fastened to avoid any issues later. If you’re installing a used Ring Doorbell, make sure to reset the device to its factory settings, allowing you to sync it to your Ring account properly. Lastly, customize any desired settings in the app, such as motion detection zones or notification preferences, for optimal performance.
Key Takeaways
- Turn off power at the circuit breaker before starting the installation to ensure safety.
- Use the template to mark screw holes accurately and secure the mounting bracket to the wall.
- Connect existing doorbell wires to the mounting bracket, ensuring no wires touch each other.
- Attach the Ring Doorbell to the bracket and tighten the security screw to prevent removal.

eufy Security Video Doorbell E340,No Subscription,Dual Cameras, 2K FHD,Head-to-Toe View, Doorbell Camera Wireless & Wired, Color Night Vision, Two-Way Talk, AI Motion/Package Detection, Built-in 8GB
𝐃𝐮𝐚𝐥 𝐂𝐚𝐦𝐞𝐫𝐚𝐬, 𝐃𝐨𝐮𝐛𝐥𝐞 𝐒𝐞𝐜𝐮𝐫𝐢𝐭𝐲 | Dual cameras work seamlessly together. The front camera captures visitors head-to-toe, while the...
As an affiliate, we earn on qualifying purchases.
Installation Preparation
Before you start installing your Ring Doorbell, make certain you've set up the Ring app and created your account. Proper installation preparation is vital for a smooth process.
First, verify compatibility by checking the type of existing doorbell wires. This will help you determine which Ring model fits your setup. Additionally, maintaining good indoor air quality is important, especially during installation when dust and allergens may be present; consider using an air purifier to improve air quality in your workspace.
Next, turn off power at the circuit breaker to avoid any electrical hazards during installation. Once the power is off, you can safely remove the existing doorbell button. As you disconnect the wires, track the configuration to guarantee you can reattach them correctly later.
It's also essential to familiarize yourself with local laws and building codes regarding electrical work. Complying with these regulations won't only keep you safe but also prevent potential issues down the line.
Additionally, if you're unsure about any step, refer to the Ring app for guidance or consult a professional. Taking these steps will set you up for a successful installation and guarantee that your Ring Doorbell functions properly once everything is connected.
eufy Security Floodlight Camera E30, Security Camera Outdoor, 360° Pan and Tilt, AI Detection and Tracking, 2K Video, 2.4GHz Wi-Fi, 2,000 Lumens, Built-in Siren, 24/7 Recording,No Monthly Fee
360° Surveillance, Your All-Seeing Guardian: Enjoy complete 360° coverage of your property. Set the camera to patrol automatically...
As an affiliate, we earn on qualifying purchases.
Jumper Cable Connection

When you're ready to connect the Jumper Cable, it's essential to understand how to use it properly. Proper installation can help guarantee that your new device operates efficiently, similar to how energy-efficient appliances reduce energy consumption.
You'll need to connect one end to the Front terminal and the other to the Trans terminal on the mounting bracket.
Don't forget to follow safety precautions to guarantee a smooth installation process.
Jumper Cable Usage
To connect the Jumper Cable, simply attach its ends to the Front and Trans terminals on the mounting bracket to bypass your existing doorbell chime.
Before you start, make certain your existing doorbell system is compatible with the Jumper Cable, typically requiring a voltage of 10-24 volts AC. It's essential to follow safety precautions to avoid electrical hazards, so turn off the power at the circuit breaker before proceeding.
Additionally, confirm that your installation setup is conducive to a tranquil workspace, as having a serene environment can enhance focus and productivity, similar to the principles of Cottagecore home office inspiration.
Once the power is off, connect the cable ends to the appropriate terminals and verify a secure connection by tightening the terminal screws.
This step is crucial for the proper operation of your Ring Video Doorbell, as a loose connection could lead to performance issues.
After securing the jumper cable, double-check that everything is in place before restoring power to the circuit.
Terminal Connections Explained
Understanding the terminal connections is crucial for successfully installing your Ring Video Doorbell with a Jumper Cable, as it guarantees a reliable power supply. Proper installation techniques can enhance the efficiency of your device, much like how heat pump technology advancements improve energy management. Here's how to make those connections:
- Turn off power at the circuit breaker to avoid any electrical hazards during installation.
- Connect the Jumper Cable by attaching one end to the "Front" terminal and the other to the "Trans" terminal. This bypasses the existing doorbell chime.
- Check the voltage range of your existing doorbell system, confirming it operates between 10-24 volts AC for compatibility with your Jumper Cable connection.
- Tighten terminal screws securely to prevent loose connections that could disrupt the power supply.
After making these connections, double-check to guarantee no wires touch each other, preventing potential short circuits.
Once you're confident everything is secure, you can restore power at the circuit breaker.
Properly understanding and executing these terminal connections is crucial for a seamless installation of your Ring Video Doorbell, guaranteeing it functions effectively and reliably.
Safety Precautions Required
Guaranteeing your safety during the Jumper Cable connection is essential to prevent electrical hazards and assure a smooth installation. Before you start any electrical work, always turn off the power at the circuit breaker. This simple step can help you avoid the electric shock hazard that comes with working on live wires.
Additionally, assuring that you have the right tools and knowledge about essential items for a home cleaning kit can be beneficial for any project, including installations.
When using the Jumper Cable, make sure it's compatible with your existing doorbell system, which should operate within 10-24 volts AC. Connect the Jumper Cable securely to the Front and Trans terminals, assuring that you tighten the terminal screws firmly. This prevents any loose connections that could lead to malfunction down the line.
Don't forget to follow all safety precautions. Wear insulated gloves to protect yourself from accidental contact with live wires, and use insulated tools to further minimize risk.
Taking these steps not only keeps you safe but also assures the successful installation of your Ring Doorbell. By prioritizing safety, you can focus on completing your project without worry.

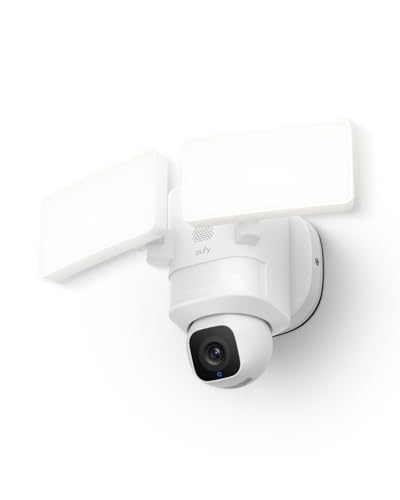
Ring Floodlight Cam Wired Plus (newest model), Outdoor home or business security with motion-activated 1080p HD video and floodlights, White
*Powerful protection for any property* — 1080p HD security camera for your home or business with motion-activated LED...
As an affiliate, we earn on qualifying purchases.
Mounting the Doorbell

Mounting the doorbell requires careful alignment and secure connections to confirm it operates effectively. It's important to verify that the installation is compatible with your home's existing wiring, just like how garage door openers enhance home security with modern technology.
Follow these steps for a successful installation:
- Use the template: Position the included template against your wall to mark screw hole locations accurately, verifying alignment with the existing doorbell wires.
- Install wall anchors: If you're mounting on drywall or masonry, add wall anchors for extra stability. This step is vital for a secure installation.
- Attach the bracket: Secure the mounting bracket to the wall using screws, making sure it's level. Avoid over-tightening to prevent damaging the bracket.
- Reattach the doorbell: Once the bracket is in place, attach the Ring Video Doorbell to it. Use the provided screws to secure it, and don't forget the security screw to prevent unauthorized removal.
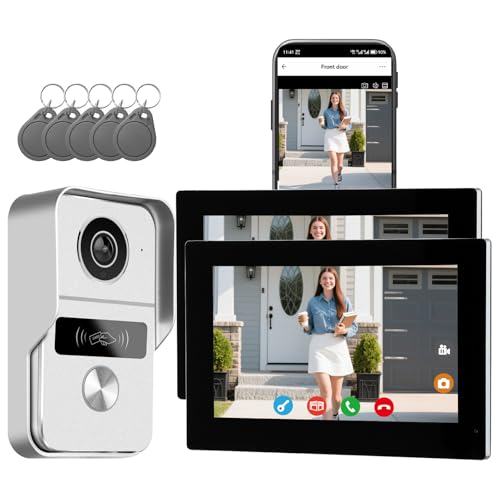
Wired Video Doorbell Apartment Intercom System, 1080P Doorbell Camera, 7-inch Touch Screen, Night Vision, Remote Unlock, Two-Way Intercom for Villa, Home, Office, with 1 Camera and 2 Monitors
2-Wire Installation & 2-Monitor Video Intercom system for home -The outdoor doorbell camera connects via a two-wire cable...
As an affiliate, we earn on qualifying purchases.
Connecting Wires

With the mounting bracket securely in place, it's time to connect the existing doorbell wires to confirm your Ring Doorbell functions correctly. First, verify that the power is turned off at the circuit breaker to keep everything safe during the installation process.
Then, take the existing doorbell wires and attach them to the screws on the mounting bracket. Remember, the order of connection doesn't matter, but you need to make certain that the two wires don't touch each other; this step is essential to avoid any short circuits.
If you're installing a digital doorbell, don't forget to use the included diode. Follow the specific instructions for the diode to confirm your Ring Doorbell operates properly.
Once you've made the connections, double-check to make certain all wires are secure. Any loose connections could lead to connectivity issues later on.
Securing the Doorbell

To secure your Ring Doorbell, start by aligning the mounting bracket properly to ascertain a snug fit.
Once it's in place, use the security screwdriver to tighten the screws, making it harder for anyone to tamper with your doorbell.
Aligning Mounting Bracket Properly
Making sure the mounting bracket is level is vital for a proper installation of your Ring Doorbell. Misalignment can lead to functionality issues, so take the time to get it right. Follow these steps for aligning the mounting bracket properly:
- Use the level tool: Place the level tool against the mounting bracket to confirm it's straight. Adjust as needed.
- Align the tabs and slots: Position the tabs on the bottom of the Ring Doorbell over the corresponding slots on the mounting bracket to create a secure fit.
- Apply firm pressure: Gently push the doorbell toward the mounting bracket. This guarantees it snaps into place correctly, securing it firmly.
- Tighten screws: Once the doorbell is in place, use the provided security screwdriver to tighten the screws at the bottom. This step is essential for keeping the doorbell properly secured.
After completing these steps, gently tug the doorbell to confirm it's stable. A level and secure installation will enhance the performance and longevity of your Ring Doorbell, keeping your home safe and monitored.
Using Security Screwdriver
The security screwdriver provided with your Ring Doorbell is essential for securely fastening the device to the mounting bracket.
To start, insert the security screwdriver into the designated screw holes at the bottom of the Ring Doorbell. Apply firm pressure as you tighten screws to guarantee the doorbell remains securely attached and doesn't wobble. It's important to tighten each screw until snug, but be careful not to over-tighten, as this could damage the doorbell or strip the screws.
After you've tightened the screws, take a moment to confirm stability. The doorbell should feel solid and shouldn't move when you gently push on it.
Keeping the security screwdriver in a safe place after installation is wise, as you'll need it for future maintenance or battery replacements. This guarantees you're always prepared for any necessary adjustments down the line.
With these steps, your Ring Doorbell will be securely mounted and ready to function effectively. Enjoy the peace of mind that comes with knowing your doorbell is properly installed and stable!
Checking for Stability
After mounting your Ring Doorbell, it's vital to check its stability to make certain it's securely fastened and ready for use. A stable doorbell guarantees peak functionality, so you'll want to follow these steps for a thorough inspection:
- Check Installation: Verify the mounting bracket's tabs align correctly with the doorbell slots for a proper fit.
- Apply Firm Pressure: While pushing the doorbell onto the bracket, apply firm pressure to achieve a stable connection.
- Tighten Screws: Use the included security screwdriver to tighten the screws at the bottom of the doorbell, confirming it's securely attached.
- Conduct a Visual Inspection: Look for any loose parts or misalignments that could compromise the doorbell's stability.
During this process, check for wobbling or shifting. If the doorbell remains steady without movement, you've achieved a stable connection.
Power Restoration

Restoring power to the doorbell circuit is essential for getting your Ring doorbell up and running. After you've completed your installation, head to the circuit breaker and restore power to the doorbell circuit. Give it a few moments to boot up and connect to your home wifi network. This step is significant for guaranteeing your device operates smoothly.
Once you've restored power, check the status of your Ring doorbell via the Ring app. This will confirm it's online and functioning properly. If the doorbell doesn't power on, take a moment to double-check all wire connections. Confirming these are secure and correctly installed is critical for a successful setup.
Additionally, you'll want to monitor the battery level through the Ring app after installation. Keeping an eye on the battery level guarantees that your doorbell maintains sufficient power for reliable operation.
A secure installation and proper power restoration will set the stage for your Ring doorbell to work effectively. Follow these steps, and you'll be well on your way to enjoying the benefits of your new device!
Testing Functionality

Now that power's been restored, it's time to test your Ring doorbell's functionality to verify everything's working as it should. Follow these steps to ascertain everything's functioning properly:
- Press the doorbell button: Check if it sends a notification to the Ring app on your smartphone.
- Access the live video feed: Open the Ring app to confirm that the video feed from the doorbell is working.
- Check the LED light: Look for a white light on the doorbell—this indicates the device is powered on and functioning correctly.
- Monitor the battery level: In the Ring app, verify that the battery is charging (if applicable) and confirm that your installation was successful.
Frequently Asked Questions
Can You Connect a Ring Doorbell to an Existing Doorbell?
Yes, you can connect a Ring Doorbell to an existing doorbell system, as long as it operates within a voltage range of 8-24 volts AC.
You'll need to confirm the wiring is compatible and turn off the power at the circuit breaker before making any connections.
It may involve bypassing the existing chime with a jumper cable, but once set up correctly, your Ring Doorbell should function seamlessly alongside your current system.
How Do I Get My Ring Doorbell to Work With an Existing Chime?
You're enthusiastic to hear that delightful chime when someone rings your doorbell, but will it work?
First, check if your chime runs on 10-24 volts AC—it's vital.
If it does, grab the Jumper Cable and connect it to the Front and Trans terminals, bypassing the chime.
Secure the wires, restore power, and hold your breath.
Now, open the Ring app to see if your doorbell chimes beautifully!
What Wiring Is Required for a Ring Doorbell?
For a Ring Doorbell, you'll need existing doorbell wiring that operates between 8-24 volts AC.
If you're replacing an old doorbell, use the same wires, making sure they're securely connected to the Ring's terminals.
Keep the connections separate to avoid short circuits.
If you have a digital doorbell, remember to install the included diode for compatibility.
Always turn off the power at the circuit breaker before working on any wiring for safety.
How Hard Is It to Install a Ring Doorbell?
Installing a Ring Doorbell is easier than pie!
You'll find it's a straightforward process that takes about 20 to 30 minutes.
With just basic tools like a screwdriver and a level, you can tackle it yourself.
As long as you've got a compatible doorbell system and follow the instructions, you're good to go.
Plus, the user-friendly app will guide you through setup, making the whole experience a breeze.
Conclusion
Now that you've transformed your existing doorbell into a smart security feature, imagine the peace of mind you'll enjoy as you monitor your front door from anywhere.
With your Ring Doorbell installed, you've bridged the gap between traditional home security and modern technology.
While the old doorbell served its purpose, your new setup now offers real-time alerts and video access, combining convenience and safety in one sleek device.
Welcome to a new era of home protection!