You can easily install the Ring Doorbell 3 using your existing doorbell system. First, fully charge the battery and shut off power at the circuit breaker. Then, check that your doorbell transformer provides 8-24 VAC. Connect the existing wall wires to the Ring Doorbell 3's screws. If needed, use wire extensions for a secure connection. Secure the doorbell to the wall, attaching the faceplate, and make sure a solid white light appears, indicating correct wiring. Finally, finish the setup in the Ring app to connect to Wi-Fi and customize notifications. There's more you might want to know!
Key Takeaways
- Fully charge the Ring Video Doorbell 3 battery before installation and ensure the indicator light shows green.
- Shut off power at the circuit breaker to prevent electrical hazards while connecting to existing doorbell wiring.
- Verify the existing doorbell transformer provides 8-24 VAC, 40VA max, for compatible operation with the Ring Doorbell 3.
- Connect the wall wires to the appropriate screws on the Ring Doorbell 3 and check for a solid white light to confirm correct wiring.
Preparation for Installation
Before you start installing your Ring Video Doorbell 3, make certain to fully charge its battery using the provided orange USB cable until the indicator light shows green. This guarantees you have enough power for a seamless installation.
It's also a good idea to improve the air quality in your home during this time, as air purifiers reduce allergens that could cause discomfort while you work.
Next, shut off the power at the circuit breaker to prevent any electrical hazards while working with your existing doorbell wiring.
You should also verify that your existing doorbell transformer is compatible, providing 8-24 VAC, 40VA max, and 50/60Hz. This step is vital for your Ring Video Doorbell 3 to function correctly.
Once you've confirmed compatibility, it's time to prepare the mounting process.
Using the included level tool, align the doorbell at a height of approximately 48 inches from the ground. This height offers ideal performance and visibility.
After aligning, mark the mounting holes with a pencil. This guarantees accurate drilling and secure installation.
Proper preparation is key to a successful installation, so take your time with these initial steps.
Once you've completed these preparations, you'll be ready to proceed to the wiring and connection steps.
Wiring and Connection Steps

Begin by connecting the existing wall wires to the appropriate screws on the Ring Doorbell 3.
It's important to verify that your existing doorbell transformer operates within the required voltage range of 8-24 VAC, as this guarantees proper functionality.
If the wall wires are too short, don't worry—use wire extensions and wire nuts to create a secure connection.
For those interested in maintaining a clean environment while working on installations, having the right essential items for a home cleaning kit can be beneficial.
Attach the wires to the screws on the Ring Doorbell 3, confirming that the order of connection doesn't impact its functionality.
You'll find that the screws are designed to accept the wires easily, making the installation straightforward.
Once you've connected the wires, double-check your work.
A solid white light on the front of the device will indicate that the wiring has been completed correctly.
This light is vital as it confirms that your connection is secure and functioning as intended.
Finalizing the Setup

After securing the Ring Video Doorbell 3 to the wall, you'll want to install the faceplate to confirm it's firmly attached. Slot the faceplate in at the top and press down until it clicks into place.
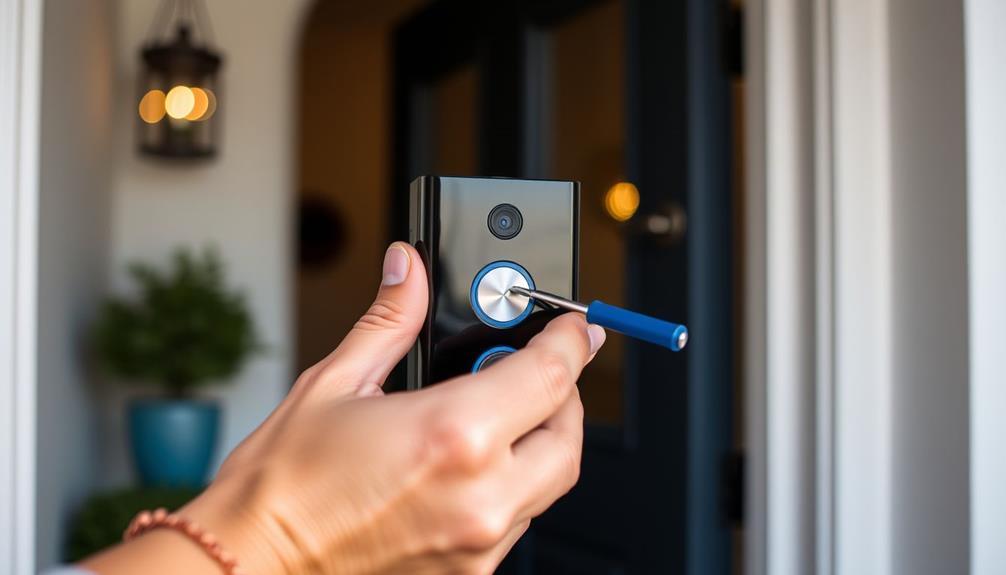
To make sure it stays put, use the provided security screw and the star-shaped screwdriver bit to tighten the faceplate. This step prevents unauthorized removal and keeps your doorbell secure. Additionally, confirming the security of your device helps mitigate potential vulnerabilities, especially as AI enhances threat detection in modern home devices.
Next, verify that the wiring is correct by checking for a solid white light on the front of the device. This light indicates a successful power connection.
Now, it's time to complete the setup process in the Ring app. Open the app, connect the doorbell to your Wi-Fi network, and configure your notification settings according to your preferences.
Frequently Asked Questions
Does Ring Doorbell 3 Work With Existing Doorbell?
Yes, the Ring Doorbell 3 works with existing doorbell systems that use a compatible transformer, specifically one with a voltage of 8-24 VAC and a maximum of 40VA.
When connected, it can utilize your current chime for alerts inside your home.
Just make sure to check that your existing transformer meets these requirements.
If it doesn't, you can still use the Ring Doorbell 3 wirelessly with its rechargeable battery.
Do You Install Ring Doorbell Over Existing Doorbell?
Did you know that 70% of home burglaries happen in residential areas?
You can install the Ring Doorbell 3 over an existing doorbell, which makes it a convenient security upgrade. Just verify your current doorbell transformer is compatible. Remember to shut off the power before you start.
Once the existing doorbell's removed, connect the wall wires directly to the Ring. After installation, set it up through the app to enhance your home's security. Make sure to adjust the settings according to your preferences, such as motion detection and notification alerts, to stay informed of any activity. If you plan to install Ring doorbell over existing wiring, ensure the power supply is compatible and the voltage is within the required range. With proper installation, you’ll experience a significant upgrade in convenience and security for your home.
How to Set up a Ring Doorbell That Has Already Been Installed?
To set up a Ring Doorbell that's already been installed, first verify it's powered on and the battery's charged.
Open the Ring app and select "Set Up a Device." Follow the on-screen instructions to connect to your Wi-Fi network.
Customize your notification preferences and test the doorbell's functionality.
If you run into issues, you can reset the device by holding the setup button for 15 seconds, then try setting it up again.
Does Ring Doorbell 3 Need to Be Hardwired?
No, the Ring Doorbell 3 doesn't need to be hardwired, but it's highly recommended.
If you hardwire it, you'll guarantee the battery charges continuously, so you won't have to worry about frequent recharging.
Plus, hardwiring connects the doorbell to your in-home chime, letting you hear notifications inside.
While it can run on battery alone, hardwiring offers better performance and convenience, making your experience smoother overall.
Conclusion
Now that you've successfully installed your Ring Doorbell 3, you can enjoy the peace of mind that comes with it.
Remember, "an ounce of prevention is worth a pound of cure," so take a moment to double-check your connections and settings.
With your new doorbell in place, you're all set to monitor your home with ease.
Don't forget to explore the app features for added security and convenience!
Happy monitoring!