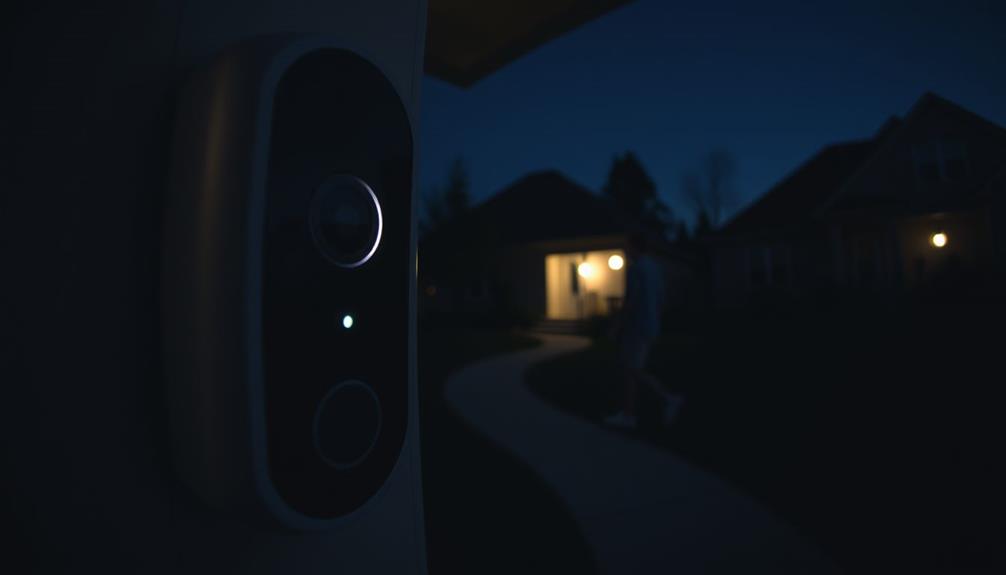
To install your Ring Doorbell 2, first charge the battery fully using the provided orange cable. Next, turn off the power at the breaker to avoid hazards. Remove your existing doorbell and verify the mounting surface is clean. Position the Ring Doorbell about 4 feet off the ground and use a level to mark your drill holes. Secure the doorbell with screws and connect the wires if hardwiring. Finally, set up the Ring app to link your device and customize settings. For a smoother installation experience, you'll want to check out additional tips and insights. Once installed, ensure the device is properly aligned and functional by testing it through the Ring app. If you’re considering upgrading or installing Ring Doorbell 3, the process is quite similar, with just a few improvements in setup and features. Don’t forget to regularly check for firmware updates to keep your device secure and running smoothly.
Key Takeaways
- Charge the Ring Doorbell 2 battery fully using the provided orange cable before installation.
- Choose an installation height of 1.2 meters (4 feet) for optimal camera angle.
- Securely mount the doorbell using a power drill, level tool, and screws provided.
- Connect wires to the Ring Doorbell 2, ensuring compatibility with a transformer rated between 8 to 24 VAC.

TERUNSOUl 4K+4K Dash Cam, 5.8GHz WiFi Dash Camera for Cars, G-Sensor, 3" IPS Screen, 24H Parking Mode
4K + 4K Recording: The Terunsoul dash cam supports dual-channel simultaneous recording, capturing both front and rear footage....
As an affiliate, we earn on qualifying purchases.
Preparing for Installation
Before you start installing your Ring Doorbell 2, make sure you've charged the battery fully and gathered all the necessary tools. Use the provided orange cable to charge the battery until the green light indicates a full charge.
It's vital to shut off power at the breaker to avoid any electrical hazards while you work with the existing doorbell wiring. Additionally, consider enhancing your home security with modern technology, including options like garage door openers that offer smart features for remote access.
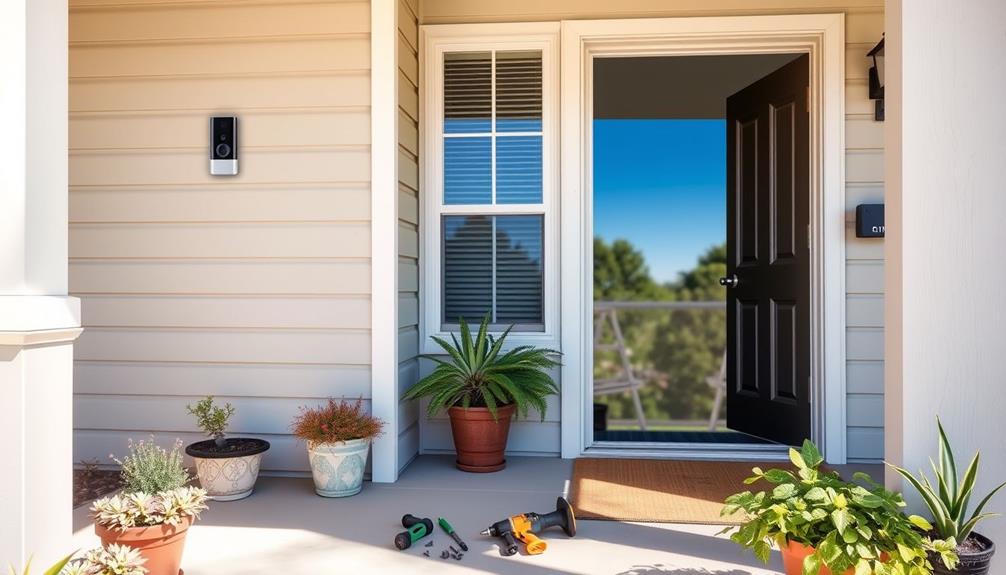
Next, choose an installation location. Aim for about 1.2 meters (approximately 4 feet) from the ground to achieve the ideal camera angle. This height guarantees the best performance for motion detection and video quality.
Familiarize yourself with the Ring app before you begin mounting. The app will guide you through the digital setup process, making it easier to connect your device once it's physically installed.
Gather essential tools like a drill, level tool, and screwdriver. If your mounting surface is brick or stucco, make sure you have the appropriate adapters ready.

ROVE R2-4K DUAL Dash Cam Front and Rear, STARVIS 2 Sensor, FREE 128GB Card Included, 5G WiFi - up to 20MB/s Fastest Download Speed with App, 4K 2160P/FHD Dash Camera for Cars, 3" IPS, 24H Parking Mode
4K FRONT + 1080P REAR RECORDING – ROVE R2-4K DUAL dash cam offers dual-channel recording capabilities, capturing footage...
As an affiliate, we earn on qualifying purchases.
Required Tools and Materials

Before you start installing your Ring Doorbell 2, you'll need to gather some essential tools and materials.
It's also wise to familiarize yourself with the key factors in choosing a home cleaning service to guarantee your space is clean and ready for installation.
This includes a power drill, screwdriver, and the provided charging cable, among others.
Don't forget to check your safety equipment to guarantee a smooth installation process.
Essential Tools Needed
To successfully install the Ring Doorbell 2, you'll need several essential tools and materials at your disposal. Having the right tools makes the process smoother and guarantees a safe installation.
It's also important to make sure that your home is equipped with proper surge protection to safeguard your new doorbell from potential power surges that could occur during installation or operation.
Here's what you should gather: appliance surge protection.
- Power Drill and Drill Bits: You'll need a power drill equipped with appropriate drill bits for your wall type, whether it's wood, brick, or stucco. This is vital for creating holes for the mounting screws and wall anchors.
- Level Tool: A level tool is essential to confirm that your doorbell is mounted straight. This not only improves its appearance but also enhances its functionality.
- Phillips Screwdriver and Wire Nuts: A Phillips screwdriver will help you secure the doorbell to the wall. If you're hardwiring the device, wire nuts are necessary for making safe electrical connections.
Additionally, don't forget a voltage tester to confirm that power is off before you start working on any electrical connections.
With these essential tools, you'll be ready to tackle your Ring Doorbell 2 installation confidently.
Required Installation Materials
Gathering the right installation materials is just as important as having the necessary tools for your Ring Doorbell 2 setup.
First, make certain you have the provided orange charging cable to fully charge the battery before installation. You'll know it's ready when the light turns green. If you're replacing an existing doorbell, you'll need wire nuts and possibly wire extensions to connect the new device, particularly if the previous wiring is hard to access.
Additionally, consider the importance of air purifiers for maintaining good indoor air quality during your installation process, as this can enhance your overall comfort.
A compatible hardwired transformer rated between 8 to 24 VAC is crucial, as Ring Doorbell 2 doesn't work with DC or halogen transformers. When securing the doorbell, don't forget to gather plastic anchors if you're mounting it on brick, concrete, or stucco surfaces.
You should also have a power drill, a level tool, and a screwdriver handy for the installation process. These installation materials will guarantee you mount the device securely and correctly.
Taking the time to gather everything in advance will make the installation smoother and more efficient, so you can enjoy your new Ring Doorbell 2 without any hassles.
Safety Equipment Checklist
A safety equipment checklist is vital for guaranteeing a smooth and secure installation of your Ring Doorbell 2. By preparing the right tools and materials, you'll make the process safer and more efficient. Here are three key items you'll want to have on hand:
Additionally, having the right equipment can help prevent accidents and guarantee a successful installation, much like using the right tools for an optimal painting experience.
- Safety Goggles: Always wear safety goggles while drilling and installing. Protecting your eyes is essential, especially when working with hard surfaces.
- Power Drill and Screwdriver: You'll need a power drill to make holes for the plastic anchors, and a screwdriver for securing the doorbell. These tools will help you achieve a secure mount on the wall.
- Wire Nuts and Optional Wire Extensions: If you're making electrical connections, having wire nuts and wire extensions ready guarantees safe and proper functionality.
Before starting the installation, don't forget to charge the battery using the provided orange charging cable. Make sure the green light confirms it's fully charged.
With these items on your safety equipment checklist, you're set for a successful installation of your Ring Doorbell 2.

REDTIGER 4K Dash Cam Front Rear, STARVIS 2 Sensor, Free Card Included, 5.8GHz WiFi-20MB/s Fast Download, Dash Camera for Cars with GPS, WDR Night Vision, 170°Wide Angle, 24H Parking Mode(F7NP)
[4K+1080P Front & Rear Recording] REDTIGER F7NP dash cam captures every detail with stunning 4K front and 1080P...
As an affiliate, we earn on qualifying purchases.
Charging the Battery

Charging the Ring Doorbell 2 battery is simple; just use the provided orange charging cable and plug it into a standard power outlet. Before you start charging, make sure to remove the battery from the device. This step is vital as it helps prevent any potential damage to your doorbell while recharging.
Additionally, keeping your home secure is important, so verify your doorbell is in ideal condition by following proper maintenance tips, such as regularly checking its battery status through the Ring app, which can be vital for dog health and nutrition.
Once you connect the battery to the power outlet, it typically takes about 5 to 10 hours to fully charge, depending on the remaining charge level. You'll know when the battery is fully charged because a solid green light will appear, indicating it's ready for use.
For ideal performance, it's important to regularly check the battery status through the Ring app. This way, you can keep track of when the battery needs recharging, verifying your doorbell remains functional.

70mai 4K Dash Cam Front and Rear Inside, 3 Channel Car Dash Camera for Cars, Dashcam with GPS, Wi-Fi 6, Voice Control, Parking Monitor, Night Vision, Loop Recording, 64GB SD Card Included (T800E)
【4K Ultra HD 3 Channel Dash Cam Front and Rear Inside】The 70mai dash cam T800E is a 3-channel...
As an affiliate, we earn on qualifying purchases.
Removing the Existing Doorbell

Before you start the installation process, make certain to turn off the power at the circuit breaker to avoid any risk of electrical shock.
Once you've done that, you can begin removing the existing doorbell. Here's how to do it safely and effectively:
- Remove screws: Use a screwdriver to take out the screws that secure the existing doorbell to the wall.
- Disconnect wires: Gently pull the doorbell away from the mounting surface, and unscrew the wire connections to disconnect the wires. Be sure to note their positions for the installation of your new Ring Doorbell 2.
- Check the chime: If your existing doorbell has a chime, consult the manufacturer's instructions for proper disconnection.
Once the old doorbell is removed, inspect the mounting surface to verify it's clean and ready for the installation of the Ring Doorbell 2.
Taking these steps will help set you up for a smooth and successful installation, guaranteeing that everything is done safely and correctly.
Mounting the Ring Doorbell

Carefully position the Ring Doorbell 2 at a height of 1.2 meters from the ground for ideal performance. This guarantees that the device captures the best view of visitors and delivers accurate motion alerts. Use the included level tool to mark your positioning accurately.
Next, drill holes at your marked positions. If you're mounting on a brick, concrete, or stucco wall, use plastic anchors for secure installation. Here's a quick table to help you with the steps:
| Step | Action | Tools Needed |
|---|---|---|
| Measure & Mark | Position at 1.2 meters | Level tool, marker |
| Drill Holes | Create openings for screws | Drill, drill bits |
| Attach Doorbell | Securely install the Ring Doorbell 2 | Screws, screwdriver |
Once the holes are drilled, feed the wires from your existing doorbell into the wall. Securely attach the Ring Doorbell 2 using all four screws. Finally, install the faceplate by slotting it in at the top and clicking it into place to complete the mounting process. You're all set to enjoy your new Ring Doorbell!
Wiring Configuration

To guarantee your Ring Doorbell 2 operates effectively, you'll need to set up the proper wiring configuration. First, confirm you have a compatible transformer rated between 8 to 24 VAC, 50/60Hz, with a power output of 5VA to 40VA. If you're connecting to existing doorbell wiring, this is vital for functionality.
Here are some key steps to follow:
- Connect Wires: Both wires can connect to either screw on the Ring Doorbell 2, thanks to its non-polar connections. This gives you flexibility during installation.
- Use a Resistor: If you're wiring directly to a transformer without an existing doorbell setup, make certain to include a resistor to avoid damage.
- Diode Considerations: If you're replacing a digital doorbell, you'll need to install a diode for proper operation. Mechanical doorbells don't require this.
Additionally, optional wire extensions and wire nuts can help facilitate connections in challenging scenarios. Properly configuring your wiring is essential for confirming your Ring Doorbell 2 functions smoothly and reliably.
Setting Up in the Ring App

Setting up your Ring Doorbell 2 in the Ring app is a straightforward process that connects your device to your Wi-Fi network and allows you to customize your settings.
First, download the Ring app from the App Store or Google Play, and create an account if you haven't done so already. Make certain your smartphone is connected to the Wi-Fi network you want the Doorbell to use during the setup.
In the app, select "Set Up a Device," then choose "Doorbell" to begin the configuration process. You'll be prompted to scan the QR code located on your Ring Doorbell 2. This step links the device to your account and guarantees it's properly configured.
Once connected, you can customize various settings such as notifications and motion alerts within the app. This way, you can adjust how and when you receive alerts on your smartphone.
Troubleshooting Common Issues

Troubleshooting common issues with your Ring Doorbell 2 can save you time and frustration, guaranteeing your device operates smoothly. If you encounter problems, follow these steps:
- Check Power Supply: Make sure your transformer is compatible, rated between 8 to 24 VAC. If it's not, you'll face power issues. Also, verify that your circuit's breaker is functioning.
- Inspect Wiring Connections: Loose or damaged wiring can disrupt power. Double-check all connections to verify they're secure. If you're connecting to a digital doorbell system, make sure diodes are installed correctly, as they're essential for proper functionality.
- Use the Ring App: The Ring app is a valuable tool for troubleshooting. Check the battery status and look for any alerts that might indicate power-related issues.
Frequently Asked Questions
Does Ring Doorbell 2 Require Wiring?
No, the Ring Doorbell 2 doesn't strictly require wiring.
You can choose to install it in battery-operated mode, eliminating the need for any electrical connections.
However, if you prefer the hardwired option for continuous power, you'll need to connect it to a transformer rated between 8 to 24 VAC.
Just remember, if you're using existing doorbell wiring, you can connect either wire to either screw on the device.
How Do You Install a Ring Doorbell 2 Door?
You might think installing a doorbell is complicated, but it's actually pretty straightforward!
First, make sure your doorbell's charged and power's off.
Then, position it about 1.2 meters up and mark your drill spots.
After drilling, use plastic anchors for a solid hold on tougher surfaces.
Secure the doorbell with screws, connect any wires if needed, and finish by clicking on the faceplate.
You'll have it up in no time!
How to Connect Ring Doorbell 2 to Wifi?
To connect your Ring Doorbell 2 to wifi, first, make certain it's charged and powered on.
Download the Ring app on your smartphone and log into your account.
Follow the in-app instructions to select your home wifi network and enter the password.
Position your doorbell within a reasonable distance from your router for a stable connection.
If you run into issues, consider using a Ring Chime Pro to boost the wifi signal.
How Do I Set up My Ring Doorbell 2nd Generation?
To set up your Ring Doorbell 2nd generation, start by downloading the Ring app and following the in-app instructions to connect to your Wi-Fi network.
Position the device approximately 1.2 meters (4 feet) above the ground for the best view.
Securely attach your existing doorbell wires, ensuring the power's off.
Finally, install the faceplate, and charge the battery with the provided cable until the green light shows it's fully charged.
You're all set!
Conclusion
Now that you've transformed your doorway with the Ring Doorbell 2, it's like you've added a vigilant guardian to your home.
With every chime, you've connected to the world outside, keeping watch like an old oak tree standing tall against the winds of change.
If any hiccups arise, don't fret; you've got the tools and knowledge to troubleshoot.
Embrace your new digital doorkeeper, and let it keep you safe while you enjoy the peace of mind it brings.