Ring Security Cameras
How to Clean Ring Doorbell Lens
The ultimate guide to keeping your Ring doorbell lens crystal clear awaits—discover essential tips for optimal video clarity!
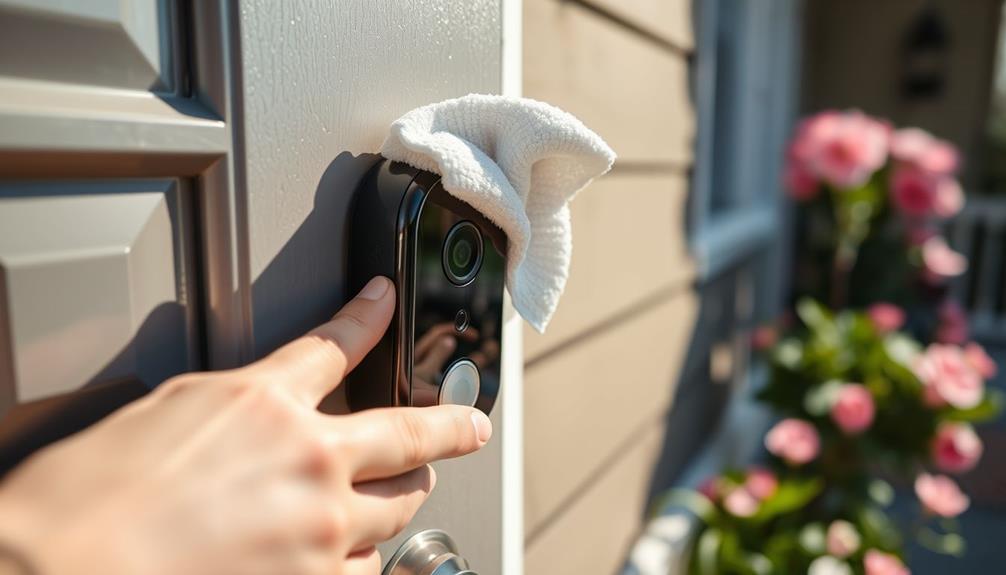
To clean your Ring doorbell lens, start by powering it off for safety. Use a soft microfiber cloth slightly dampened with water or a lens cleaning solution, and gently wipe the lens without applying too much pressure to prevent streaks. Make sure you avoid abrasive materials and harsh chemicals that could damage the lens. Thoroughly dry it with a separate, dry microfiber cloth. Aim to clean the lens every few weeks or after bad weather to keep video clarity sharp. There are additional tips to enhance your cleaning routine and maintenance effectiveness that you'll find helpful. For added protection, consider using a lens cover to shield it from debris and scratches. Additionally, when cleaning a Ring doorbell camera, inspect the surrounding area for dirt or dust buildup that could further affect video quality. Regularly maintaining both the lens and the area around it will help ensure optimal device performance.
Key Takeaways
- Turn off the Ring doorbell before cleaning to ensure safety during the process.
- Use a slightly dampened microfiber cloth or lens cleaning wipes to gently clean the lens.
- Avoid abrasive materials and harsh chemicals to prevent scratches and damage to the lens.
- Dry the lens thoroughly with a separate dry microfiber cloth to eliminate streaks.
Importance of Lens Cleaning
Cleaning your Ring doorbell lens is vital for guaranteeing clear video quality and dependable security monitoring. Over time, dust, moisture, and fingerprints can accumulate on the lens, leading to blurry images that hinder your ability to see who's at your door. If you neglect to clean the lens regularly, you risk diminishing the doorbell's effectiveness as a security device.
The presence of a clear and unobstructed lens is important, as studies show that homes with security systems, including video doorbells, are considerably less likely to be targeted by burglars increased safety and peace of mind.
Maintaining a clean lens not only improves video clarity but also enhances the motion detection capabilities of your doorbell. Obstructions on the lens can interfere with how well the device picks up movement, which could leave you vulnerable to potential threats. By taking the time to clean the lens, you're actively working to guarantee your home remains secure.
Additionally, a clean lens means fewer interruptions in your video feed, allowing for smooth and dependable monitoring. Regular maintenance is key, so make it a habit to check and clean the lens frequently.
Adopting this simple practice can lead to better performance and peace of mind, knowing that your Ring doorbell is functioning at its best.
Recommended Cleaning Materials
To keep your Ring doorbell lens in top condition, you'll need a few essential cleaning materials. Start with a soft microfiber cloth, which is perfect for gently cleaning the lens without scratching it. You can dampen the cloth with water for the best results.
If you encounter stubborn dirt or grime, consider using a mild detergent like Dawn mixed with water. Just be sure to use the solution with a soft cloth to avoid any damage. Additionally, maintaining a regular cleaning schedule can help prevent buildup and guarantee your doorbell functions properly, much like how understanding home cleaning service costs can influence your cleaning practices.
Another handy option is lens cleaning wipes specifically designed for electronics. These are effective and convenient for maintaining lens clarity, especially when you're on the go. Remember, the right cleaning materials are essential for keeping your device functional.
It's important to avoid using any abrasive materials or harsh chemicals, as these can scratch the lens or damage the protective coatings. Regular cleaning with the appropriate materials guarantees consistent video clarity and extends the longevity of your Ring doorbell's performance.
Step-by-Step Cleaning Process
Start by turning off your Ring doorbell to guarantee safety while you clean the lens. Once it's off, grab a soft microfiber cloth. Slightly dampen it with water or a lens cleaning solution. Gently wipe the lens, making sure to avoid using any abrasive materials that might scratch it. If you notice stubborn dirt or grime, apply a mild detergent like Dawn to the cloth for effective cleaning without damaging the lens.
Regularly cleaning your doorbell lens will help guarantee peak performance, similar to how ozone air purifiers maintain good air quality by eliminating pollutants.
After you've cleaned the lens, take a separate dry microfiber cloth and thoroughly dry the lens to prevent any streaks or moisture accumulation. This step is essential for maintaining the clarity of your video feed.
To keep your Ring doorbell in top shape, make it a habit to clean the lens every few weeks or after severe weather. This regular cleaning guarantees that you always have peak video clarity and performance.
Common Cleaning Mistakes
Many homeowners unknowingly make common mistakes when cleaning their Ring doorbell lens, which can lead to poor video quality and damage. To guarantee effective maintenance, steer clear of these pitfalls:
- Using abrasive materials: Paper towels or rough cloths can scratch the lens, impairing image clarity.
- Applying harsh chemicals: Solvents may damage the lens coating or camera housing, risking malfunction.
- Neglecting to wet the microfiber cloth: Cleaning without moisture can leave smudges that won't come off easily.
- Failing to dry the lens: Not drying the lens after cleaning can leave streaks or moisture, affecting video clarity.
Additionally, it's important to reflect on how cybersecurity measures can protect your smart home devices, including your Ring doorbell. This awareness can complement the physical upkeep of your device by guaranteeing it remains secure from potential threats.
Troubleshooting Lens Clarity Issues
If you're noticing blurry images from your Ring doorbell, it's crucial to check for common lens obstructions like smudges or debris.
Regular maintenance, similar to how you'd maintain garage door openers for peak performance, can help prevent such issues.
Environmental problems, such as moisture or spider webs, can also lead to foggy visuals.
Additionally, repositioning your camera might improve image clarity if the current angle isn't ideal.
Common Lens Obstructions
Common obstructions like smudges, dirt, and spider webs can blur your Ring doorbell's lens, impacting video clarity and motion detection performance.
It's essential to regularly check for these obstructions to guarantee your device works effectively. Studies indicate that maintaining a clean and unobstructed environment can help enhance the functionality of your devices, similar to how a cat's health can be affected by its surroundings environmental factors affecting cats.
Here are some common culprits that might be hindering your lens clarity:
- Smudges from fingerprints or oils
- Dirt accumulation from the environment
- Spider webs that can easily form in corners
- Leaves and debris blown in by the wind
When you spot these obstructions, make sure to clean the lens gently and thoroughly. Use a soft cloth and a mild cleaner to avoid damaging the surface.
Additionally, verify the doorbell is positioned correctly, as an improper angle can also affect image quality.
If you find that cleaning doesn't resolve the clarity issues, it may be time to seek professional help.
Regular inspections help maintain peak performance, so make it a habit to check your Ring doorbell frequently to prevent any lens obstructions.
Moisture and Fogging
Moisture and fogging can greatly impact your Ring doorbell's lens clarity, often resulting from temperature changes and humidity levels. When moisture accumulates inside the doorbell, it leads to lens fogging, obstructing your video feed.
To help reduce moisture build-up, make certain your camera is installed in a well-ventilated area, away from direct sources of humidity like sprinklers or heavy rain. Additionally, confirming that your installation site is free of potential water hazards can enhance overall performance, much like maintaining cleanliness in all waterparks contributes to a better experience.
If you notice fogging, allow the camera to acclimate to room temperature. This adjustment can help dissipate the moisture naturally. Sometimes, a simple cleaning can also make a difference. Use a soft microfiber cloth to gently clean the lens, confirming it's free from any debris that could trap moisture.
However, if fogging continues despite your efforts, it might indicate a seal failure or internal damage. In such cases, it's best to contact Ring support for further assistance.
Addressing moisture and fogging issues promptly not only helps maintain your doorbell's functionality but also guarantees that you can monitor your home with clear video quality.
Camera Positioning Impact
Properly positioning your Ring doorbell is essential for achieving clear and reliable video footage. If the camera isn't set up correctly, you might experience blurry or obstructed images.
To enhance efficiency, consider how environmental factors, such as extreme temperatures, can impact the performance of your device heat pump performance.
Here are some tips to improve your camera positioning for better image clarity:
- Mount the camera at eye level for the best perspective.
- Avoid tilting the camera more than 15 degrees to prevent distortion.
- Regularly inspect for any overhanging branches or lights that could block the view.
- Adjust the position to minimize direct exposure to rain or snow, reducing moisture buildup on the lens.
Environmental Factors Affecting Lens
Environmental factors can greatly impact your Ring doorbell lens's performance.
Weather conditions like rain and dust, along with debris like spider webs and insects, can obstruct the view and reduce clarity. Regular cleaning is essential to maintain peak function, as well as using a protective cover to shield against elements.
Additionally, prolonged UV exposure can degrade the lens cover, affecting video quality over time.
well-draining soil enhances the longevity of outdoor devices by preventing moisture accumulation.
Weather Conditions Impacting Clarity
Weather can really take a toll on the clarity of your Ring doorbell lens, leading to foggy footage and decreased visibility. Various weather conditions contribute to moisture buildup, and if you don't keep an eye on it, you might miss important moments.
Additionally, factors such as the impact of butter on cholesterol levels can also highlight the importance of maintaining clear visuals for safety and security purposes.
Here are some key factors to take into account:
- Rain and Snow: These can create a film of moisture on the lens, distorting the camera's view.
- High Humidity: Increased humidity levels can lead to condensation, making it hard to get clear images.
- Extreme Temperatures: Prolonged heat or cold can damage the lens materials, leading to deterioration over time.
- UV Exposure: Direct sunlight can cause lens materials to decay, resulting in a cloudy appearance.
To maintain peak performance, regularly inspect and clean your Ring doorbell lens. Addressing these weather-related issues will help guarantee that your camera captures clear and reliable footage, regardless of the conditions outside.
Debris and Obstructions
Debris like dust, dirt, and pollen can quickly build up on your Ring doorbell lens, greatly reducing image clarity and resulting in blurry footage. This accumulation can obstruct your camera's view, making it challenging to capture clear images of visitors or potential intruders.
Regularly check for any debris that may have settled on the lens, especially after windy days or during pollen season. Moisture from rain or humidity can also create fogging or condensation inside the camera, further impacting visibility. Make certain to wipe away any moisture that may form on the lens.
Additionally, spider webs can become obstructions that distort images or completely block the camera's view. Positioning your Ring doorbell too low can expose it to more environmental contaminants, increasing the chances of debris accumulation.
To maintain peak functionality, incorporate regular lens cleaning into your routine. By addressing these obstructions promptly, you'll guarantee your Ring doorbell continues to perform effectively, providing you with the clarity and security you deserve.
UV Exposure Effects
Prolonged UV exposure can gradually degrade your Ring doorbell lens, leading to a cloudy appearance that diminishes image clarity. If you live in a sunny area, you might notice this effect more prominently.
To guarantee your doorbell continues to function at its best, consider these factors:
- UV rays can weaken the lens material over time.
- Protective coatings may wear off faster with constant sunlight.
- Pollution and dust can combine with UV exposure, creating a film that obscures visibility.
- Regular cleaning is essential to maintain clarity and performance.
Community Tips and Experiences
Many users have shared their experiences and tips for keeping the Ring doorbell lens clear and free from obstructions. Regular cleaning is essential, especially in areas with high dust or pollen levels. Here's a quick summary of community suggestions:
Tip | Details |
---|---|
Use Microfiber Cloth | A soft microfiber cloth dampened with water works best. |
Opt for Lens Cleaning Wipes | Consider lens cleaning wipes designed for electronics to avoid residue. |
Avoid Harsh Chemicals | Steer clear of abrasive materials and harsh chemicals to protect the lens. |
Clean Regularly | Consistent cleaning reduces blurry images and enhances performance. |
Support Resources and Contact Information
If you need assistance with cleaning or maintaining your Ring doorbell lens, the support team is ready to help. They provide various resources to guarantee you can keep your device in top shape.
Here are some options you can explore:
- Access online FAQs for quick answers.
- Check troubleshooting guides for detailed cleaning instructions.
- Visit the official Ring website for personalized support.
- Call customer service for direct assistance (available for both US and international users).
Don't hesitate to reach out if you have questions about cleaning techniques or need help with lens clarity issues. The support team is dedicated to assisting you and can provide the contact information you need to get started.
It's also a good idea to review the warranty details on the Ring website, as proper device care is vital for maintaining coverage during the warranty period.
With these support resources at your disposal, you'll be well-equipped to keep your Ring doorbell lens clean and functional.
Maintaining Your Ring Doorbell
Keeping your Ring Doorbell well-maintained guarantees it captures clear video and operates effectively at all times. Regular cleaning and maintenance are essential to avoid dirt accumulation, especially after inclement weather. Use a soft microfiber cloth to wipe the lens, guaranteeing peak video clarity.
Here's a quick reference table to help you maintain your device:
Task | Frequency |
---|---|
Clean the lens | Monthly |
Check camera positioning | Every month |
Inspect for obstructions | After severe weather |
For cleaning, slightly dampen your microfiber cloth or use a lens cleaning solution designed for electronics. Avoid harsh chemicals or abrasive materials that could scratch the lens. Additionally, routinely check the camera's positioning to guarantee nothing obstructs the view.
Frequently Asked Questions
How to Fix a Cloudy Ring Doorbell?
To fix a cloudy Ring doorbell, start by inspecting the exterior for grime or moisture.
Wipe the lens gently with a soft, lint-free cloth and a mild cleaner like rubbing alcohol.
If it's still cloudy, check for moisture inside the device.
Reposition it if necessary to minimize exposure to elements.
Regular maintenance can help prevent future cloudiness, but if problems persist, reach out to Ring support for further assistance.
Why Is My Ring Doorbell Camera Blurry?
They say, "A clear view is worth a thousand words."
If your Ring doorbell camera's blurry, it might be due to smudges on the lens, moisture inside the device, or even the angle it's mounted at.
Environmental factors like dirt or spider webs can also obstruct your view.
If cleaning doesn't help, consider checking for deeper issues that might need professional attention or possibly replacing the camera for clearer footage.
How Do You Clean a Doorbell Camera Lens?
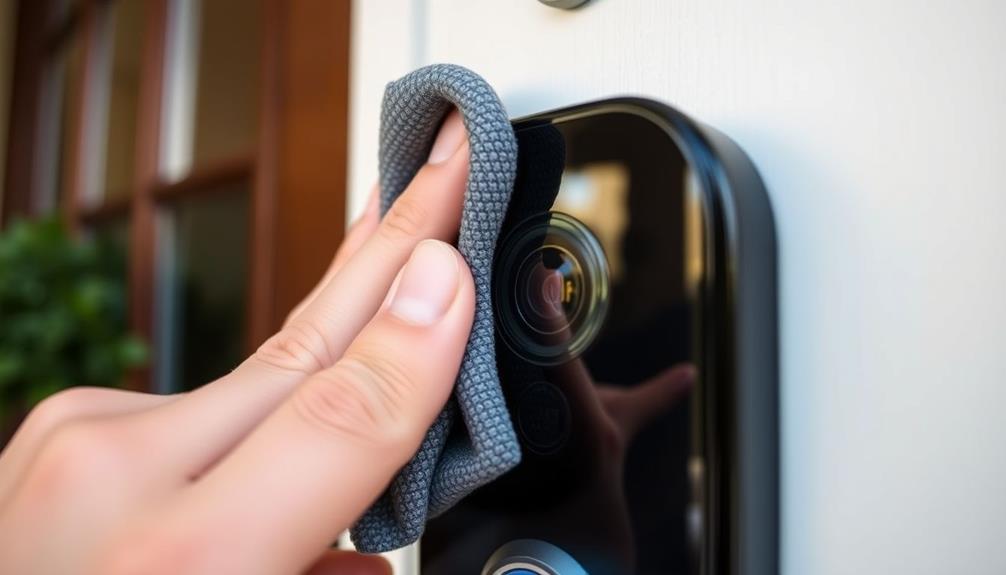
To clean a doorbell camera lens, start by using a soft microfiber cloth.
Lightly dampen it with water or a lens cleaning solution, then gently wipe the lens.
Avoid harsh chemicals or abrasive materials, as they can damage it.
For stubborn dirt, a mild detergent like Dawn works, but rinse and dry thoroughly.
Always use a separate, clean cloth to dry the lens to prevent streaks and keep your footage clear.
How to Clean the Lens Ring?
To clean the lens ring, you'll want to start by using a soft microfiber cloth.
If it's particularly dirty, dampen the cloth slightly and gently wipe the lens.
For tougher grime, add a mild detergent solution to the cloth, but steer clear of harsh chemicals.
After wiping, dry the lens with a separate, dry microfiber cloth to avoid streaks.
Regular cleaning helps keep your lens clear and functioning properly.
Conclusion
Cleaning your Ring doorbell lens is like polishing a diamond; it enhances clarity and guarantees you don't miss a thing.
By following the right steps and using proper materials, you'll keep your doorbell's eyes sharp and ready to capture every visitor.
Remember, a little maintenance goes a long way in keeping your home secure.
Stay proactive and enjoy the peace of mind that comes with a clean lens, letting you see clearly who's at your door.
Ring Security Cameras
How to Pop off Ring Doorbell
Find out how to easily pop off your Ring Doorbell and discover essential tips that will ensure a smooth removal process.
To remove your Ring Doorbell, begin by identifying the security screw located at the bottom of the faceplate. You can use the star-shaped screwdriver that comes with the Ring package, or a T6 Torx-head screwdriver if needed. Turn the screw counterclockwise, then gently pull the bottom of the faceplate downwards while using your thumbs to push up from the bottom. If it’s stuck, you can carefully use a small flathead screwdriver to help pry it off. Once the faceplate is removed, you’ll have access to the battery or the mounting bracket. Following these steps, you’ll be prepared to move forward. There is even more information available to help guide you through the process.
Key Takeaways
- Locate the security screw at the bottom of the faceplate and use the special screwdriver to remove it counterclockwise.
- Gently pull the bottom of the faceplate down and towards you to detach it from the main unit.
- If the faceplate is stuck, use a small flathead screwdriver to carefully pry it off.
- Ensure the doorbell is powered off before accessing the battery or performing any maintenance.
Reasons for Removal
There are several reasons you might want to remove your Ring Doorbell, from upgrading to a new model to simply relocating it when you move.
If you're pondering a shift to a different brand like Arlo or Google, you'll want to remove a Ring Doorbell to make way for the new device. When moving to a new home, taking your Ring Doorbell with you guarantees you maintain your security setup without starting from scratch.
Additionally, you might want to reflect on the latest trends in home technology, such as technology integration in decor, which can enhance your overall living experience. Upgrading to a newer Ring model is another common motivation. New versions often come with improved technology and enhanced features, making the upgrade worthwhile.
Additionally, you might need to remove the device for maintenance, such as when it's time to charge the battery or perform repairs.
In some cases, you might choose to remove your Ring Doorbell as a precautionary measure. This is especially true if you're concerned about theft or unauthorized access.
Whatever your reason, understanding how to remove the device securely, including dealing with the security screws, is essential to guarantee a smooth process.
Tools Required
Before you start removing your Ring Doorbell, gather the necessary tools to make the process efficient and straightforward. First, you'll need the special star-shaped screwdriver that came with your Ring package. If you've misplaced it, a T6 torx-head screwdriver works as a solid backup. This screwdriver is vital for removing the security screw that holds the doorbell in place.
When managing home installations, it's also beneficial to reflect on hiring professional services for complex setups, as they often provide expert insights on efficient and safe installation processes.
Next, have a small flathead screwdriver or a flat, skinny object like a butter knife handy. This will help you pry off the faceplate if it's stuck. It's important to be gentle to avoid damaging the doorbell or the wall.
Don't forget to wear safety goggles to protect your eyes during the removal process. It's a simple step that can prevent any accidents.
Steps to Remove for Charging
To charge your Ring Doorbell, it's important to guarantee a safe environment while working on the device, much like the safety features you'd implement in caring for someone at home in-home care tips.
You'll start by removing the security screw at the bottom of the faceplate.
Once that's done, gently pull the faceplate down to access the battery inside.
With the battery accessible, you can easily release it for charging.
Security Screw Removal
Start by locating the security screw at the bottom of the Ring Doorbell faceplate, as it's vital for removing the faceplate for charging. This screw keeps the faceplate securely attached, so you'll need to handle it carefully.
To remove the security screw, follow these steps:
- Use the screwdriver included in your Ring package.
- Turn the security screw counterclockwise until it's completely removed.
- Gently pull the bottom portion of the faceplate down and towards you.
Once the faceplate is off, you'll have access to the battery compartment. Remember to keep the security screw in a safe place, as you'll need it to reattach the faceplate later.
After you finish charging the battery, align the faceplate properly and secure it with the security screw again. This guarantees your device remains protected and functions properly.
Battery Access Procedure
With the faceplate removed, you can now access the battery for charging or replacement. Follow these simple steps to guarantee a smooth process:
Step | Action |
---|---|
1 | Locate and remove the security screw at the bottom of the faceplate using the provided screwdriver. |
2 | Pull the bottom portion of the faceplate down and towards you to detach it from the device. |
3 | Find the battery pack and a small silver lever inside the device. |
4 | Press the silver lever to release the battery, allowing you to pull it out for charging or replacement. |
Once you've charged the battery, simply reinsert it into the device. Don't forget to reattach the faceplate and secure it with the previously removed security screw. Confirm everything is snug and properly aligned. Remember, keeping your Ring Doorbell charged is essential for peak performance and security. This simple procedure can keep your device running smoothly, giving you peace of mind. Now you're ready to enjoy a fully functional Ring Doorbell!
Removal Without Special Tool
You can easily remove your Ring Doorbell even without the special screwdriver by using a small flathead or a T15 Torx head screwdriver instead.
Start by locating the security screw at the bottom of the faceplate. Using your chosen screwdriver, gently manipulate the screw to loosen it.
Once the screw is loosened, carefully pull the faceplate down and towards you. This action will detach it from the doorbell unit, giving you access to the battery or allowing you to remove the entire doorbell from its mounting bracket.
Here's a quick checklist to guide you through the process:
- Gather your tools: A small flathead or T15 Torx head screwdriver.
- Locate the security screw: It's at the bottom of the faceplate.
- Loosen the screw: Use your screwdriver to turn it counterclockwise.
If you run into any issues with the screw, don't hesitate to reach out to Ring customer support for assistance or to request a replacement screwdriver.
Permanent Removal Process
Permanently removing your Ring Doorbell involves a straightforward process that guarantees your walls remain intact and free from openings.
Start by using the security screw tool to carefully detach the faceplate from the device. This step is essential, as it exposes the screws that secure the doorbell to the mounting bracket.
Once the faceplate is removed, you'll see the screws holding the doorbell in place. Use a screwdriver to unscrew these, ensuring you keep them in a safe spot in case you need them later. If your model is hardwired, make sure the power is turned off before you proceed to disconnect the wires attached to the chime.
After you've removed the doorbell, check that it's completely detached from the mounting bracket to prevent any future structural concerns.
Finally, don't forget to seal any holes left behind in the wall with silicone or filler. This step not only protects your walls from leaks but also keeps pests at bay.
Faceplate Removal and Detachment
Removing the faceplate from your Ring Doorbell is an essential first step in accessing its internal components for maintenance or upgrades. To start, locate the security screw at the bottom of the faceplate. Use the provided screwdriver to unscrew it counterclockwise.
Once you've removed the security screw, gently push up from the bottom of the faceplate with your thumbs to loosen it. If it doesn't come off easily, you might need to use a flat object to pry it away carefully.
Here are some tips to guarantee smooth removal:
- Support the front of the faceplate with your fingers while applying upward pressure.
- Avoid dropping the faceplate by maintaining a fluid motion during removal.
- Place the removed faceplate in a secure location to prevent damage.
Once the faceplate is loose, carefully pull it away from the body of the doorbell. Following these steps will guarantee you can safely access the internal components without damaging your device.
Battery Access and Replacement
Accessing and replacing the battery in your Ring Doorbell is a straightforward process that guarantees your device stays powered and functional.
Start by making certain your doorbell is powered off to avoid any electrical hazards.
Next, you'll need to remove the faceplate. Locate the security screw at the bottom of the faceplate and unscrew it. Once the screw is out, gently pull off the faceplate to reveal the battery compartment.
Inside, you'll find a black tab that makes it easy to access the battery. Press down on this black tab while pulling the battery towards the bottom to detach it.
Now you can either charge the battery or replace it with a new one. After you're done, reinsert the battery by sliding it back into the compartment. Make sure it clicks securely in place to guarantee proper function.
Post-Removal Considerations
Once you've popped off your Ring Doorbell, it's important to take a few steps to confirm everything is handled properly. Failing to address post-removal considerations can lead to unnecessary issues down the line. Here's what you should do next:
- Clean the area: Remove any dirt or debris left behind after the doorbell's removal.
- Store the Ring Doorbell: Keep the doorbell and all components, like screws and brackets, in a safe place to prevent loss or damage.
- Update the Ring app: If you plan to keep the doorbell for future use, reflect the device's removal in the app and check for necessary system updates.
Lastly, make sure you dispose of any unwanted hardware responsibly. Follow local regulations for electronic waste to confirm you're recycling properly. By taking these steps, you'll confirm that everything is organized and ready for whatever comes next!
Frequently Asked Questions
How Do You Pop Out a Ring Doorbell?
To pop out a Ring Doorbell, you'll first need to find and remove the security screw at the bottom.
Use the screwdriver that came with it or another suitable tool.
Once that's done, gently pull the bottom of the faceplate down to detach it.
If it's mounted, grip the device firmly and pull it away from the bracket.
For wired models, make sure to disconnect the chime wires before completely removing it.
How to Detach a Ring Doorbell?
Imagine you're moving to a new house and need to detach your Ring Doorbell.
Start by locating the security screw at the bottom of the faceplate; use the right screwdriver to remove it.
Gently pull the faceplate down and towards you.
If it's hardwired, disconnect the wires carefully.
If it's stubborn, grip both the doorbell and bracket while lifting.
Remember to keep all screws safe for future use, sealing any holes left behind.
How to Unscrew Ring Doorbell Without Tool?
If you need to unscrew your Ring doorbell without a tool, try using a small flathead screwdriver to gently pry the security screw out.
If you have a T15 Torx head screwdriver, that works too.
Be careful not to strip the screw, as that'll make removal tougher.
If you've lost your original screwdriver, contact Ring customer support for a replacement.
Once the screw's out, you can access the doorbell's components easily.
How to Take Faceplate off Ring Doorbell?
To take the faceplate off your Ring Doorbell, start by locating the security screw at the bottom.
Use the provided screwdriver to loosen it by turning counterclockwise.
Next, apply upward pressure with your thumbs from the bottom while supporting the front with your fingers.
If it's tough to remove, gently insert a flat object to help pry it away.
Once loose, pull it off smoothly and store it safely.
Conclusion
Now that you know how to pop off your Ring doorbell like a pro, you're ready to tackle any charging or battery replacement challenge that comes your way!
You'll feel like a tech wizard, effortlessly managing your smart home devices.
Just imagine the awe on your neighbors' faces when they see you handling your doorbell with such finesse!
So go ahead, pop it off and show off your newfound skills—soon, you'll be the Ring master of your block!
Ring Security Cameras
How to Place Ring Doorbell
Unlock the secrets to perfectly placing your Ring Doorbell for optimal performance and connectivity—discover essential tips that ensure your setup is flawless!
To install your Ring Doorbell, begin by charging the built-in battery using the provided cable. Position the device at a height of approximately four feet to ensure optimal performance. Utilize the Ring app to verify the viewing angle before marking the screw holes. If you are using a wired model, connect it to the existing doorbell wires while ensuring they do not touch. Following the installation, test the device by pressing the doorbell and checking for app notifications. Remember the importance of wifi connectivity for seamless operation – it is crucial to enhance this as well. There is a lot more to discover in order to set it up perfectly! Also, be sure to refer to the doorbell whistle installation guide that accompanies the Ring Doorbell for any specific instructions or troubleshooting tips. It is also beneficial to familiarize yourself with the various settings and features available through the Ring app, such as motion detection sensitivity and night vision. Additionally, consider investing in extra accessories like a solar charger for extended battery life or a protective cover for outdoor use. By setting up properly and adding accessories, your Ring Doorbell will offer you dependable security and convenience.
Key Takeaways
- Mount the Ring Doorbell at approximately four feet high for optimal performance and accessibility.
- Use the Ring app to determine the best viewing angle before marking screw holes.
- Ensure the device is installed close to the wifi router for stable connectivity.
- Connect existing doorbell wiring for wired models, ensuring no contact between wires.
Overview of Ring Doorbells
Ring doorbells are popular home security devices that let you remotely see and communicate with visitors through your smartphone.
With features like motion-activated notifications, they alert you to deliveries or any suspicious activity happening at your front door. This capability not only enhances your home security but also provides video evidence of incidents, which can be essential for deterring trespassers. Many users have reported satisfaction with the best home comfort solutions offered alongside these devices, making them an attractive option for enhancing overall home security.
You can choose between wired and wireless options when selecting a Ring doorbell. Wired models can integrate with your existing doorbell system, utilizing low-voltage wiring, while battery-operated versions don't require any wiring at all, making them easy to install. This flexibility means you can find a solution that fits your home's setup and your personal preferences.
Using the Ring smartphone app, you can remotely view your doorbell's video feed and communicate directly with visitors, ensuring you're always connected to your home.
Whichever option you choose, Ring doorbells offer a convenient way to enhance your home security and stay informed about activity at your doorstep.
Installation Process
To begin the installation process, make certain you fully charge your Ring Doorbell's built-in battery using the provided orange cable. Once charged, it's time to mount your doorbell at an ideal height of about four feet above the ground. This height helps with clear facial recognition and effective motion detection.
For a seamless integration of your home security system, consider exploring home theatre connection alternatives that might complement your setup.
Follow these steps for a smooth installation:
- Use the Ring app to check the live video feed for the best angle.
- Mark the screw hole locations with a pencil for accuracy.
After securely mounting the doorbell, restore power at the breaker. Be sure to test device functionality by pressing the doorbell and checking the app for notifications.
Finally, customize your app preferences to enhance settings for alerts and motion detection. This will improve your experience and make certain you don't miss any important activity at your door.
With these steps, you'll have your Ring Doorbell installed and ready to go in no time.
Wiring and Power Considerations
When wiring your Ring Doorbell, it's crucial to verify your power source meets the required 8 to 24 VAC.
Additionally, consider integrating your doorbell with smart home technology for enhanced security features, as AI in Cybersecurity can help in identifying potential threats to your home network.
Always prioritize safety by disconnecting the power at the breaker before handling any wires.
Power Source Requirements
A power source of 8 to 24 VAC is vital for guaranteeing your doorbell operates correctly, making it compatible with most existing doorbell systems.
When you're planning to install your Ring Doorbell, it's important to verify that the power is disconnected at the breaker to avoid any electrical hazards during your work.
Here are some significant considerations for your installation:
- Make sure your existing doorbell wiring is in good condition and can handle the required voltage.
- Avoid connecting your Ring Doorbell to DC transformers or lighting transformers, as these won't provide the necessary power source.
If you're using wired models, you can easily reuse the existing doorbell wiring, simplifying the installation process.
Just be sure to connect the doorbell wires to the correct screws on the Ring Doorbell for proper functionality.
Keeping an eye on your power supply will help guarantee that your doorbell continues to perform at its best!
Wiring Safety Precautions
Guaranteeing safety during installation is essential, so always disconnect the power at the breaker before handling any wiring. This precaution prevents electrical hazards that could lead to injury or damage.
Next, confirm that your doorbell system is compatible with low-voltage wiring, specifically between 8 to 24 VAC. Avoid connecting your Ring Doorbell to DC transformers or lighting transformers, as this can cause damage to the device.
When you're ready to handle the wiring connections, use caution and proper tools to avoid shorts or damage. It's important to regularly inspect your wiring for any signs of wear, guaranteeing ongoing safety and functionality of your doorbell.
Compliance with local laws and building codes is vital, so if you're unsure about any aspect of the electrical work, don't hesitate to consult a professional electrician. They can guide you through the installation process and make sure everything is up to standard.
Ensuring Wifi Connectivity
To guarantee your Ring Doorbell stays connected, set it up close to your wifi router during installation for best performance. This guarantees ideal connectivity and reduces the risk of connectivity issues.
Regularly check the wifi signal strength in the area where your doorbell is installed. If you find the signal weak, consider these enhancements:
- Use a wifi extender to boost your signal.
- Install a Ring Chime Pro to improve connectivity.
Proper router placement greatly impacts wifi coverage, which is vital for your Ring Doorbell's functionality. If your doorbell is located far from the router, these solutions can help improve your setup.
Additionally, keeping your Ring Doorbell firmware up to date is essential. Updates not only maintain connectivity but also provide the latest performance improvements, making certain your doorbell operates smoothly.
Safety Precautions
Before you start installing your Ring doorbell, it's essential to shut off the power at the breaker to prevent any electrical hazards.
You should also check local laws and building codes to guarantee you're following the right regulations.
Handling electrical wiring safely is key, so don't hesitate to call a professional if you're unsure about any steps.
Power Shutdown Importance
Shutting off power at the breaker box is essential for preventing electrical hazards while installing your Ring Doorbell. This step guarantees you're working safely with wiring and minimizes the risk of electric shock. Always turn off power before you begin installation, even if you don't have an existing doorbell. Exposed wiring can pose an exposure risk, so confirming that no current is running is vital.
To enhance your safety precautions, consider these tips:
- Use non-contact voltage testers to verify that the power is truly off.
- Wear insulated gloves to protect yourself from any accidental contact with live wires.
Local Code Compliance
Checking local building codes and regulations is vital for guaranteeing your Ring Doorbell installation complies with safety standards. Before you begin, familiarize yourself with any requirements specific to your area, especially regarding electrical work related to doorbell installations. Some jurisdictions may require permits, particularly if you're hardwiring the device into an existing system.
It's important to follow the National Electrical Code (NEC) guidelines, which outline safe practices for low-voltage wiring. Ignoring these regulations can lead to safety hazards and potential legal issues. If you're unsure about the local laws or how to proceed safely, consider hiring a licensed electrician. They can help guarantee your installation meets all necessary codes.
Once you've installed your doorbell, don't forget about ongoing compliance. Regularly inspect your installation to make certain it continues to adhere to local codes and safety standards. This proactive approach will help you maintain a safe environment and prevent any future complications.
Handling Electrical Wiring Safely
Guaranteeing your safety while handling electrical wiring is vital, so always disconnect the power at the breaker before starting any installation. This precaution minimizes the risk of electrical hazards while you work on your Ring Doorbell.
While installing, keep the following safety tips in mind:
- Always use the provided screws to secure the Ring Doorbell; using incorrect screws can lead to instability.
- Be cautious when handling wires; prevent them from touching each other to avoid short circuits.
If you're unsure about any aspect of the electrical work, don't hesitate to hire a professional. They can handle the installation safely and guarantee everything is done correctly.
Proper handling of electrical wiring is vital for your safety and the long-term functionality of your Ring Doorbell. By following these guidelines, you'll minimize the risk of hazards and confirm a successful installation. Remember, your safety should always come first!
Maintenance and Care
Regular maintenance is vital for keeping your Ring Doorbell functioning at its best and guaranteeing reliable home security.
Start by regularly checking the battery levels, especially for battery-operated models. You'll need to charge it approximately every 6 to 12 months, depending on usage.
To maintain clear visuals for monitoring, remember to clean the camera lens periodically, removing any dirt or debris that may obstruct the view.
Don't forget to update the Ring app frequently. This guarantees you can access the latest features and security enhancements, improving overall device performance.
Additionally, monitor your Ring Protect subscription status to maintain access to important features like video recording and playback, which are essential for your security.
Consider seasonal adjustments as well. For instance, if you have a solar charger, reposition it for the best sunlight exposure to reduce battery charging frequency and maintain functionality.
Troubleshooting and Support Resources
Even with proper maintenance, you might encounter issues with your Ring Doorbell, so knowing where to find troubleshooting and support resources can make all the difference. Fortunately, there are various avenues to explore for help.
- Ring Help Home: This is your go-to for thorough support on device functionality and subscription inquiries.
- Wifi Help: If you're facing connectivity issues, this section can assist you in troubleshooting and improving your wifi connection.
If you need installation assistance, don't hesitate to browse through troubleshooting articles and community forums. They're filled with valuable user experiences that can guide you.
Additionally, the Ring app offers tips on maneuvering its features, allowing you to customize settings and manage alerts effectively. If your device struggles to detect motion or if the motion sensors aren't performing as expected, these resources will provide the support you need to resolve any issues.
Frequently Asked Questions
Where Should a Ring Doorbell Be Placed?
When you're deciding where to place your Ring Doorbell, aim for about 48 inches off the ground for ideal facial recognition and motion detection.
Make sure it's within 5 to 30 feet of the area where you expect motion. Avoid mounting it too high, as this can hinder performance.
Consider the layout of your yard and use the Motion Zone feature in the Ring app to customize what areas you want to monitor.
How Do I Put My Ring Doorbell on My Door?
To put your Ring Doorbell on your door, start by marking the screw holes using the mounting bracket as a guide.
Drill the holes, then attach the bracket to the wall.
If you're using existing doorbell wires, wrap them around the screws, making sure they don't touch.
How Do You Put a Ring Doorbell Outside?
To put your Ring Doorbell outside, start by selecting a spot about 48 inches off the ground for the best visibility.
Use the mounting bracket to mark where you'll drill, making sure it's level.
If you're replacing an old doorbell, disconnect its wires and attach them to your Ring Doorbell.
Secure it in place until you hear a click, then check the app to customize your settings and verify everything's working right.
Where to Install a Ring Doorbell?
When you're deciding where to install a Ring Doorbell, aim for about 48 inches off the ground. This height guarantees you capture clear facial recognition and effective motion detection.
Consider your yard's layout and the distance from the door to the street; this helps maximize the doorbell's field of view.
Don't forget about Wi-Fi strength at the installation site, as a strong signal's essential for the doorbell's performance.
Conclusion
Now that you're equipped with the knowledge to install your Ring Doorbell, it's time to transform your home's entrance into a fortress of security.
Just like a lighthouse guiding ships safely to shore, your new doorbell will keep watch over your doorstep, ensuring peace of mind.
Embrace this smart technology, and let it illuminate your home with safety and convenience.
With proper care, your Ring Doorbell will stand guard, a vigilant sentinel, for years to come.
Ring Security Cameras
How to Pay My Ring Doorbell
I discovered the easiest way to pay my Ring Doorbell subscription, and you won’t believe how simple it is to ensure uninterrupted service.
To complete the payment for your Ring Doorbell subscription, first log in to your account on Ring.com. Go to the “Control Center” located under “Account Management” and ensure you have a valid payment method connected. You can add or edit your payment method in the “Payment Method” section. Remember to save any changes to prevent any interruptions in service. Review your subscription plan in the Ring app to verify billing information and upcoming payment dates. If you experience any problems, don’t hesitate to contact Ring support for assistance. There are other helpful tips available to help keep your setup operating smoothly.
Key Takeaways
- Sign in to your Ring account at Ring.com to manage payment methods and subscriptions under the Account section.
- Ensure a valid payment method is linked to your account to avoid subscription interruptions.
- Update your payment method in the "Payment Method" section of your account settings as needed.
- Use the Ring app to review your subscription details, billing history, and upcoming payment due dates.
Accessing Your Ring Account
To pay for your Ring doorbell or subscription, you'll first need to access your Ring account at Ring.com. Setting up your payment can be easily done by navigating to the “Account” tab and selecting “Payment Methods” from the dropdown menu. From there, you can add your preferred credit card or link your PayPal account for convenient, automatic payments. Once your payment method is added, you can easily manage and update your payment preferences at any time through your Ring account. If you’re looking for ring doorbell payment options, the Ring website also offers the ability to purchase your doorbell and subscription directly from the site. This provides a convenient way to not only set up your payment method, but also to purchase any additional accessories or upgrades for your Ring doorbell. With multiple payment options available, including credit card, PayPal, and direct purchase, Ring makes it easy to find the method that works best for you.
Once you're on the site, sign in using your credentials.
After logging in, navigate to the Account section. From there, select Control Center and then Account Management to find your payment options.
It's important to understand the significance of maintaining your privacy and data protection while managing your account.
It's vital to have a valid payment method linked to your Ring account to avoid any subscription lapses that could lead to loss of video access.
If you need to update your payment method, you can do so in the same Account Management section.
Make sure you've entered all the necessary information correctly.
After making any changes, don't forget to save changes to confirm your payment details are up to date.
Remember, only one payment method is permitted per Ring account, and if you have multiple subscriptions linked, any update will apply to all of them.
Keeping your payment method current is critical for uninterrupted service and access to your Ring features.
Adding or Updating Payment Methods
Adding or updating payment methods in your Ring account is essential for maintaining uninterrupted service and access to your device features. Efficient credit card processing is critical for guaranteeing that your payments go through smoothly, especially if you have multiple subscriptions linked to your account.
To manage your payment method, sign in to Ring.com and navigate to Account > Control Center > Account Management. Remember, you can only have one payment method on file, so if you need to add a new device or update your payment method, you'll need to replace the existing one.
Be sure to pay attention to your payment method needs, as changes will apply to all subscription plans linked to your account. This includes your Ring Protect plan, which requires a valid payment method to avoid any disruption during your subscription period. Understanding credit card terms is essential to guarantee you select the best option for your needs.
When you make changes, saving your new credit card details is crucial; otherwise, you risk accidental deletion of your payment information. To guarantee you always have help for your Ring and maintain your access to video footage, keep your payment method up to date.
Regularly checking your account management settings can help you stay on top of any necessary changes.
Managing Your Subscription
Managing your Ring subscription is vital for guaranteeing continued access to your device's features and video footage. To effectively manage your subscription, sign in to Ring.com and navigate to Account > Control Center > Account Management. Here, you can easily review your billing history and subscription details, helping you stay informed about upcoming payment due dates.
Regular updates to your subscription management are important, as AI in Cybersecurity can enhance your overall security by guaranteeing that your devices remain protected from potential threats.
As the account owner, you have the authority to update your payment method. It's essential to verify your payment method is valid to prevent any lapse in your Ring Protect subscription, which could lead to video loss.
If you own multiple devices, you can add them to your existing Ring Protect plan without needing separate subscriptions for each device.
Regularly check your account management settings to keep everything up-to-date. This way, you can maintain uninterrupted video storage and access to features.
Troubleshooting Payment Issues
Keeping your Ring subscription up to date is important, but you might run into payment issues that can disrupt your service.
First, check your account to confirm you have a valid payment method entered. If your payment method isn't valid, it can lead to declined transactions when trying to pay for your Ring doorbell or subscription.
Next, verify your payment details. Make sure your card number, expiration date, and CVV are entered correctly.
If you encounter payment issues, insufficient funds in your account can also cause payment failures, so be sure to check your balance before making a payment.
Regularly review your account for any outstanding charges or fees that could impact your ability to process payments.
If you still can't resolve payment issues, don't hesitate to contact Ring customer support. They're there for troubleshooting and can assist in resolving any problems you face.
Utilizing the Ring App
To manage your Ring Doorbell payments, you need to utilize the Ring app effectively.
Start by accessing your payment options and updating your information under the "Account" section.
This way, you can keep track of your subscription plans and make certain everything runs smoothly.
Accessing Payment Options
You can easily access payment options for your Ring doorbell by opening the Ring app and signing into your account. Once logged in, you can navigate to the settings menu and select “Payment Methods” to view and manage your ring doorbell payment methods. From there, you can add new payment options, update existing ones, or set a default payment method for your Ring devices. This simple process ensures that you can easily keep your payment information up to date for any subscriptions or purchases related to your Ring doorbell.
Once you're logged in, navigate to the "Account" section. From there, select "Control Center" and then tap on "Account Management." This is where you can manage your payment method effectively.
To guarantee smooth ongoing subscription renewals, make sure your payment method is current. You can add or update your payment method by entering valid credit or debit card information. Keeping this information up to date is vital to avoid interruptions in service or the potential loss of video recordings due to subscription expiration.
Additionally, the app allows you to review your billing history and upcoming payment due dates. This helps you stay informed about your subscription status and guarantees that you're aware of any payments coming up.
Updating Payment Information
Updating your payment information in the Ring app is a straightforward process that guarantees your subscription stays active.
To begin, open the Ring app and tap on the "Menu" icon located in the top left corner. From there, select "Account," then choose "Control Center" to access the "Account Management" section.
Once in Account Management, tap on "Payment Methods." Here, you can add or change your current payment option. It's vital to enter a valid credit or debit card since only these payment types are accepted for Ring subscriptions. By confirming your payment information is up to date, you can avoid lapses in your service.
After making your changes, don't forget to save changes to finalize the update. This step is critical in maintaining your subscription's active status.
Regularly checking and updating your payment information can help you manage your Ring services efficiently. By following these steps, you'll guarantee that your subscription remains active and that you continue to enjoy the benefits of your Ring doorbell without interruption.
Managing Subscription Plans
Managing your Ring Protect subscription plans is easy through the Ring app, allowing you to adjust your coverage as your needs change.
To manage your Ring Protect subscription, simply open the Ring app and head to the "Account" section. Here, you can view your current plan details and make any necessary adjustments.
If you want to upgrade or downgrade your subscription, tap on the "Protect Plan" tab. You'll find various options to choose from, guaranteeing you get the coverage that fits your lifestyle.
The Ring app also lets you manage multiple devices under a single subscription plan, making it a breeze to keep everything organized.
Updating your payment information is straightforward too. Just navigate to the "Payment Method" section within your account settings to make any changes.
To guarantee uninterrupted service, the app will send you notifications for upcoming payment due dates and any subscription changes you've made.
With these tools, you can easily stay on top of your Ring Protect subscriptions and enjoy the peace of mind that comes with thorough home security.
Community Support and Resources
When you join the Ring Community, you tap into a user interaction platform where you can ask questions and share insights about your Ring products.
Engaging with fellow users often leads to quick, peer-to-peer assistance that can help you solve issues or find new tips.
This resource is invaluable for steering through payment methods and managing your subscription effectively.
User Interaction Platform
The Ring Community platform provides a space where you can ask questions and connect with other users to share experiences and solutions related to your Ring products. Whether you're an account owner looking for help with your devices or want to discuss payment methods for your subscription, this platform is invaluable.
Here are some key benefits of using the Ring Community:
- Ask Questions: Get answers about the Ring app features or troubleshooting issues.
- Share Experiences: Connect with others who've navigated the same challenges, like understanding the Ring Protect Plus subscription.
- Find Solutions: Discover quick fixes for common problems and learn best practices.
- Community Support: Access a network of users who are enthusiastic to assist during your trial period or beyond.
Peer-to-Peer Assistance
Peer-to-peer assistance in the Ring Community empowers you to connect with fellow users who can share valuable insights and solutions for any payment-related questions you might have.
In the community forums, you can discuss which payment methods are accepted and get tips on the best subscription payment method that suits your needs. If you're looking for help with other billing inquiries, you'll find users enthusiastic to assist.
Many members frequently post about managing subscription payments, so you can learn how to troubleshoot payment issues effectively. If you need to update or remove a payment method, other users can guide you through the process. Sharing your experiences helps create a supportive environment, allowing you to enjoy the benefits of Ring products with confidence.
If you ever miss a confirmation email or need to clarify details, don't hesitate to ask in the forums. The community actively supports the use of shared knowledge, making it easier for you to find solutions.
Frequently Asked Questions
How Do I Pay My Ring Doorbell Monthly?
To pay your Ring Doorbell monthly, you'll need to access your Ring account at Ring.com.
Once logged in, navigate to your payment settings and choose a Ring Protect subscription plan that suits your needs.
Don't forget to add a valid payment method, like a credit or debit card, to prevent any interruptions in service.
Your payments will renew automatically each month unless you decide to cancel or change your subscription.
How Do I Pay My Ring Bill?
You might think paying your Ring bill is complicated, but it's actually pretty straightforward!
First, sign in to your account at Ring.com. Navigate to the Account section to manage your payment methods.
Remember, you can only use one valid credit or debit card. If you run into issues, check your account balance or contact customer support.
Keep everything updated to guarantee your service remains uninterrupted and your video storage stays active.
How Do I Access My Ring Doorbell Account?
To access your Ring Doorbell account, go to Ring.com and click on "Sign In" at the top right corner.
Enter your registered email address and your password.
If you've forgotten your password, just click on "Forgot password?" to receive a reset email.
Once you're logged in, you can manage your account settings and subscription options easily.
Make sure you've got a stable internet connection for a smooth experience!
How to Change Payment for Ring?
Did you know that over 90% of users prefer managing their subscriptions online?
To change your payment method for your Ring account, sign in at Ring.com. Navigate to Account > Control Center > Account Management.
Only you, as the account owner, can update these details, so keep your info secure.
Conclusion
Now that you've got the hang of managing your Ring Doorbell payments, it's like riding a bike—once you know how, you can cruise smoothly.
Remember to keep your payment methods updated and check your subscription regularly to avoid any hiccups.
If you run into issues, don't hesitate to tap into the community support.
With these steps, you'll guarantee your home security stays as reliable as your favorite vintage vinyl record!
-
Vetted1 week ago
15 Best Home Security Cameras in Sydney for Ultimate Peace of Mind
-
Vetted1 week ago
15 Best Home Security Systems of 2025 – Protect Your Home With Confidence
-
Vetted1 week ago
15 Best Exterior Home Security Cameras of 2025 – Protect Your Property With Confidence
-
Vetted1 week ago
15 Best Fake Home Security Cameras to Deter Intruders on a Budget
-
Vetted1 month ago
5 Best Ring Doorbells for Townhouses – Security Solutions That Fit Your Home
-
Vetted1 week ago
15 Best DIY Home Security Systems With Cameras for Ultimate Peace of Mind in 2025
-
Home Security Systems4 months ago
How Wireless Home Security System?
-
Home Security Systems4 months ago
How Much to Replace Home Security Systems?