Installing your Ring doorbell is easy and enhances your home’s security. To begin, verify compatibility with your current doorbell and understand local regulations. Prior to starting, it is important to turn off power for safety reasons. Install the bracket at a height of approximately four feet and carefully connect the wires, securing them properly. Next, restore power and link the doorbell to your Wi-Fi using the Ring app for optimal performance. Once installed, check the functionality and watch for any connectivity issues. When you’re prepared, there is a wealth of information available to help you make the most of your doorbell and resolve any common problems.
Key Takeaways
- Verify that your Ring doorbell is compatible with your existing doorbell model and meets local laws before installation.
- Turn off power at the breaker to prevent electrical hazards during wiring and installation.
- Use the Ring app to set up your device and streamline the installation process ahead of time.
- Ensure a strong Wi-Fi signal by placing your router centrally and using extenders if necessary for optimal performance.
Help Resources
When you need help with your Ring doorbell, there are plenty of resources available to guide you through installation and troubleshooting. The Ring Help Home is your go-to hub for all help resources, offering a wide range of installation guides tailored to your specific device.
If you prefer visual instructions, check out the video tutorials on the website, which provide step-by-step guidance for installation needs. Additionally, verifying safety features in your home, like proper doorbell placement, can enhance your security system safety features in the home.
For those moments when you encounter challenges, troubleshooting articles can help you identify and resolve issues quickly. If you want to connect with other users, community forums offer a platform for peer-to-peer support. Here, you can share experiences and solutions with fellow Ring users.
Should you require personalized assistance, don't hesitate to reach out to customer service. They provide expert guidance to address your specific concerns and guarantee a smooth installation process.
Installation Preparation

Preparing for your Ring doorbell installation involves several important steps to guarantee a smooth and safe setup.
First, verify the compatibility of your Ring doorbell with your existing doorbell model, whether it's 1st Gen or 2nd Gen. This confirms a proper fit and functionality.
Additionally, consider the benefits of using an air purifier for improved air quality while you work, as it can help eliminate any dust or allergens in your environment.
Next, set up the Ring Video Doorbell in the Ring app before you start the installation. This will streamline the process and allow you to access settings easily.
Safety is paramount, so shut off power at the breaker to avoid electrical hazards while handling wires.
Once the power is off, remove the existing doorbell button and disconnect the wires. This prepares your space for the new device.
Before proceeding, check your local laws and electrical codes. Compliance with these regulations guarantees that your installation meets all necessary requirements and avoids potential issues down the line.
Wiring and Power

With the existing doorbell removed and the power turned off, you're ready to tackle the wiring and power connections for your Ring doorbell. First, make certain you've disconnected the power at the breaker to avoid any electrical hazards.
The Ring Doorbell works with systems supplying 8 to 24 VAC, so don't connect it to DC or lighting transformers. It's important to guarantee that your installation area is clear and well-lit for safety, similar to how a proper oil checking can enhance the operation of paint sprayers.
Here's how to get the wiring right:
- Use a jumper cable to bypass the existing chime if your system supplies 10-24 volts AC.
- Securely connect the doorbell wires to the screw terminals on the mounting bracket.
Once you've made the connections, double-check that everything is secure.
After confirming the wiring setup, restore power at the breaker. Look for a power-on indication from the device to confirm proper installation.
With these steps, you'll guarantee that your Ring doorbell is powered appropriately and ready to use.
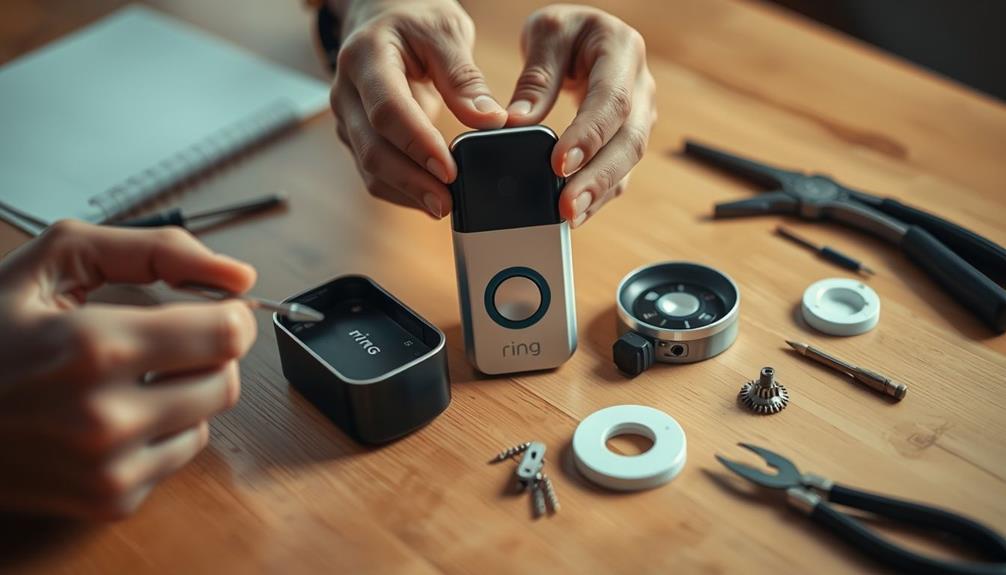
Mounting the Doorbell

Position the mounting bracket about four feet above the ground to guarantee optimal viewing and accessibility for your Ring doorbell. Before you start, grab the included level tool to verify the bracket is straight. Once you've positioned it correctly, mark the screw holes. After marking the screw holes, use a drill to create pilot holes for the screws. Make sure the holes are deep enough to securely hold the mounting bracket in place. Once the bracket is installed, you can then proceed with mounting your Ring doorbell. Additionally, I recommend referencing the instruction manual for troubleshooting common issues with your doorbell.
If you're installing on hard surfaces, drill pilot holes for the screws to make the process easier. If the surface is particularly weak, use wall anchors to ensure secure mounting.
Next, align the doorbell with the mounting bracket, making sure the tabs fit snugly into the slots. This alignment is vital for stability. Once aligned, it's time to tighten the security screws using the provided screwdriver. This step will prevent unauthorized removal of the doorbell and keep it securely in place.
After tightening the screws, double-check that everything is level and firmly attached. This will give you peace of mind knowing your doorbell is mounted correctly for the best viewing of visitors.
Following these steps guarantees you've mounted your Ring doorbell effectively, setting you up for success in monitoring your entryway.
Connecting Wires

Now that you've mounted your Ring Doorbell, it's time to connect the wires.
You'll want to make certain the wires are secure and avoid any chance of short circuits by keeping them separated.
Don't forget to double-check your connections before moving on to guarantee everything's set for peak performance.
Wire Connection Procedure
Connecting the wires to your Ring mounting bracket requires careful attention to guarantee they don't touch, preventing any potential short circuits. Start by connecting the existing doorbell wires to the terminal screws on the Ring mounting bracket. Make sure the wires are secured tightly to avoid any loose connections.
If you're bypassing an existing chime, use the provided jumper cable to connect to the Front and Trans terminals. Tighten the terminal screws securely to confirm a solid connection. If you're installing a digital doorbell, don't forget the diode installation—follow the instructions carefully to avoid electrical issues.
Here's a quick checklist to help you:
- Double-check all wire connections to confirm they're secure and fit snugly.
- Restore power at the circuit breaker once you've connected everything to test the functionality of your Ring Doorbell.
Avoiding Short Circuits
To avoid short circuits when connecting wires to your Ring Doorbell, make certain the wires don't touch each other at any point. This simple precaution prevents potential issues during installation.
Always handle existing doorbell wires with care, as they may still carry voltage, even if the power is turned off at the breaker. Verify you follow the manufacturer guidelines closely, especially if your doorbell system uses digital chimes. In such cases, install the included diode as instructed to avoid short circuits caused by incompatible wiring.
Before you finalize your connections, check that the wires are securely fitted to the terminal screws. Loose connections can lead to significant problems, including short circuits, jeopardizing your doorbell's functionality.
It's also essential to confirm that your existing doorbell system supplies a voltage between 8 to 24 VAC, verifying compatibility with your new installation.
Double-Check Connections
After verifying you've avoided short circuits, it's time to double-check your connections for the Ring Doorbell installation. This step is essential for guaranteeing that your doorbell functions correctly. Start by inspecting all your wires and connections carefully. Make sure each wire is securely attached to the terminal screws on the mounting bracket.
Here are a few key points to remember during this process:
- Secure Connections: Verify that your wires are firmly attached to the correct screws; loose connections can lead to malfunction.
- Inspect for Damage: Look for any signs of wear or damage on the wires before moving forward.
Double-checking these connections not only prevents electrical issues but also enhances the overall functionality of your installation. Once you're confident everything is secure and correct, you can proceed to the next steps in your Ring Doorbell installation. Keeping everything in check now will save you headaches later!
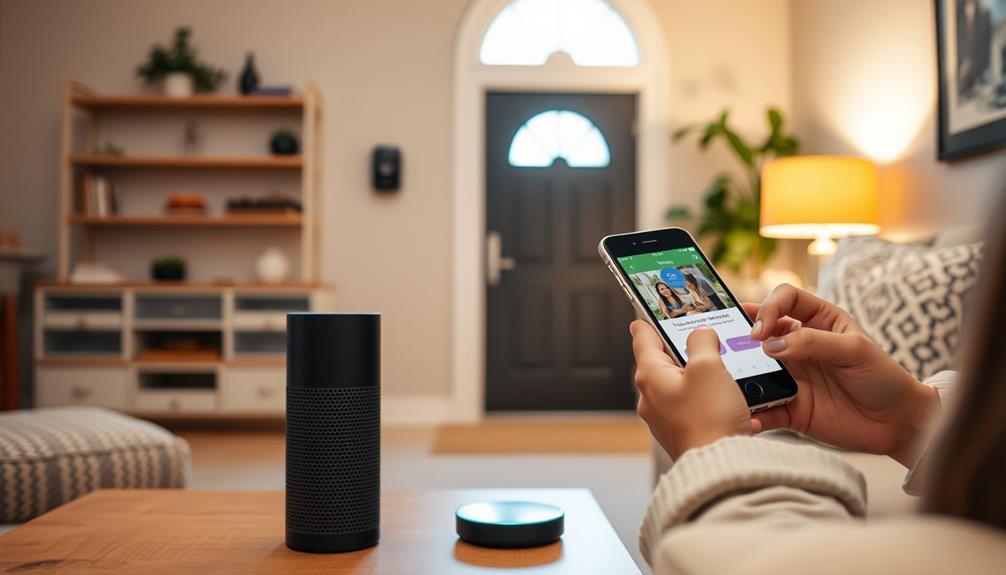
Wifi Connectivity

When setting up your Ring Doorbell, ideal router placement is essential for maintaining a strong wifi connection.
You should regularly monitor the signal strength to guarantee reliable performance and video quality.
If you're facing issues, adjusting your router's position can make a significant difference.
Optimal Router Placement
Placing your router in a central location within your home guarantees the best Wi-Fi coverage for your Ring Doorbell. This ideal router placement minimizes dead zones and guarantees strong connectivity.
To enhance your Wi-Fi performance, consider these tips:
- Elevate your router: Position it on a shelf or mount it on a wall to improve signal distribution.
- Keep it away from interference: Avoid placing the router near large metal objects, microwave ovens, or other electronic devices that can disrupt the Wi-Fi signal strength.
Signal Strength Monitoring
Monitoring your Wi-Fi signal strength is essential for guaranteeing your Ring Doorbell operates smoothly and effectively. You can easily check the wifi signal strength using the Ring app, which helps you identify any connectivity issues.
When the signal is weak, it can lead to poor video quality and delayed notifications. If you notice weak signals, consider repositioning your wifi router closer to your doorbell or using a wifi extender to enhance the signal strength.
Your Ring Doorbell performs best on a 2.4 GHz frequency, so make sure your router is set accordingly. If you're still facing issues, adding a Ring Chime Pro can be beneficial. Not only does it provide sound notifications, but it also acts as a dedicated wifi extender for your Ring devices.
Additionally, periodically monitor your home network for any interference from devices like microwaves or cordless phones, as these can negatively impact performance.
Keeping an eye on your wifi signal strength guarantees your Ring Doorbell remains connected and effective, providing you with the security and convenience you need.
Final Steps

After securing the doorbell, restore power at the circuit breaker to activate the device and confirm its connectivity. You'll want to monitor the doorbell for a power-on indication, verifying everything's working correctly. Once it powers on, you're almost done!
Next, reattach the faceplate of the doorbell and secure it with the provided small security screw for added protection. This step is essential for keeping the device secure and maintaining its performance.
Now, it's time to test the functionality of the Ring Video Doorbell. Use the app to check if it's operational and connected to Wi-Fi. Make certain you can see the live feed and receive notifications as expected.
To keep your device running smoothly, remember these tips:
- Regularly check for updates in the Ring app to enhance device performance.
- Monitor the connectivity to guarantee you're always connected.
Safety Precautions

Before you get started with your Ring Doorbell installation, it's important to take some safety precautions to protect yourself and guarantee a successful setup.
First, always disconnect power at the circuit breaker. This step is essential to prevent any electrical shock hazards during the installation process.
Next, familiarize yourself with local laws and building codes to confirm compliance with regulations.
When securing your Ring Doorbell, use only the provided screws. Using incorrect screws can lead to damage or an improper installation.
If you're unsure about handling electrical wiring, it's wise to think about professional installation. This can mitigate the risks associated with electrical work and make sure everything's done correctly.
After installation, regularly inspect your doorbell for any signs of wear or damage. Addressing issues promptly will help maintain safety and functionality.
Following these safety precautions won't only protect you but also guarantee your Ring Doorbell operates effectively and complies with local regulations.
Frequently Asked Questions
Does Ring Doorbell Require Wiring?
No, a Ring Doorbell doesn't always require wiring.
You can choose between wired and battery-operated models based on your needs.
Wired versions connect to existing low-voltage wiring and provide continuous power, while battery-operated models don't need any wiring at all.
Just keep in mind that if you go with a battery-operated option, you'll need to charge it regularly to keep it functional.
Can You Install a Ring Doorbell by Yourself?
Yes, you can definitely install a Ring Doorbell by yourself!
The process is straightforward, and you'll find it user-friendly, even without electrical experience.
It usually takes less than 10 minutes.
You'll just need basic tools, like a screwdriver and possibly a power drill.
Ring provides helpful video tutorials and step-by-step instructions to guide you through.
If you're ever unsure, it's okay to consult local laws or consider professional help for safety.
How to Install a Ring Camera Doorbell?
Imagine transforming your front porch into a fortress of security.
To install your Ring camera doorbell, start by charging its battery with the orange cable.
Then, set it up in the Ring app near your Wi-Fi router.
Mark and drill screw holes about four feet high, connect the wires carefully, and mount it securely.
Finally, restore power and test it through the app.
You've now fortified your home with a vigilant eye!
Do You Need a Drill to Install Ring Doorbell?
You don't necessarily need a drill to install a Ring Doorbell, but it can make things easier, especially on tough surfaces like brick.
If you're mounting it on wood, a screwdriver might be enough.
For renters or those avoiding damage, adhesive mounts work well, so drilling isn't required.
If you opt for wall anchors for extra security, though, using a drill is recommended to create the necessary holes.
Conclusion
As you stand at the threshold of your new doorbell's journey, remember it's not just a gadget; it's a guardian of your home.
Like a vigilant sentinel, it awaits your arrival, ready to announce visitors with a cheerful chime.
With each step you've taken in this installation process, you've woven a thread of connection between your world and those who enter it.
Now, enjoy the harmony that comes from a well-installed doorbell, welcoming friends and family alike.