To make a home security system with a Raspberry Pi, start by gathering essential components like a PIR motion sensor, a USB webcam, and a buzzer. Set up the Raspberry Pi with Raspbian OS, updating system packages, and install necessary libraries like OpenCV for motion detection. Wire your sensors and camera appropriately, making sure all connections are secure. You'll need to write a Python script for motion detection and configure email notifications. Once everything's set up, test the system to guarantee it works flawlessly. There are plenty more tips and enhancements to explore for your DIY security project!
Key Takeaways
- Start by setting up a Raspberry Pi with the necessary OS and libraries like OpenCV for image processing and motion detection.
- Connect PIR motion sensors, a USB webcam, and a buzzer to the Raspberry Pi GPIO pins for effective monitoring and alerts.
- Develop a Python script that utilizes RPi.GPIO and OpenCV to detect motion, capture images, and send email notifications.
- Test the system thoroughly by simulating motion to ensure sensors respond, alerts trigger, and emails with images are sent successfully.
Motivation for DIY Security Systems
Many homeowners are turning to DIY security systems to save on high monthly fees while gaining more control over their home protection. With traditional security companies charging several hundred NOK per month, the appeal of a DIY approach is clear. You can design your own home security system that meets your specific needs without breaking the bank. Plus, recent penalties against major companies for anti-competitive practices underscore the demand for more flexible solutions.
Additionally, leveraging AI in cybersecurity can enhance the effectiveness of your custom system by improving threat detection and response times.
Using a Raspberry Pi, you can create an effective alarm system without needing advanced programming skills. This accessibility opens the door for many people to build their own customized security setups. By integrating your DIY system with platforms like Home Assistant, you can easily monitor and control your security alongside other smart devices in your home.
Additionally, the wealth of community resources and shared knowledge available in forums can help you troubleshoot and spark innovative ideas for enhancing your security measures. This collaborative spirit makes the DIY approach not just a money-saving option, but also an empowering way to take charge of your home's safety.
You'll find that the satisfaction of building your own system is a significant motivation for many.
Essential Components List

To build a reliable home security system, you'll need several essential components that work together seamlessly.
First and foremost, the Raspberry Pi acts as your central controller, providing network access and GPIO pin connectivity. Choose any model that meets your basic functionality needs. Having a methodical approach to assembling these components is crucial, as it guarantees systematic evaluation of your setup for any potential issues, much like how best practices in software quality assurance emphasize thorough testing.
Next, you'll want to include a PIR motion sensor. This device detects movement, guaranteeing that any unauthorized activity is caught promptly. For enhanced security, consider adding door/window contacts as well.
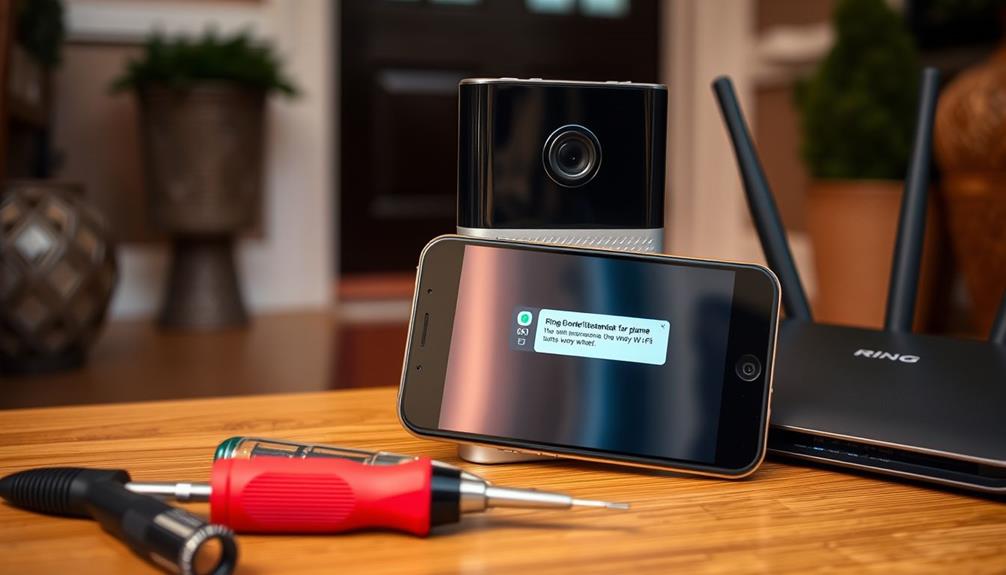
To capture images or video footage, a USB webcam or a Raspberry Pi Camera Module is necessary. This allows you to monitor your property remotely and review footage if an incident occurs.
Don't forget about a buzzer or siren; it's critical for alerting you and deterring intruders during security breaches. A reliable power supply is also crucial to keep everything running smoothly.
Setting Up Raspberry Pi

Setting up your Raspberry Pi is the first step toward creating an effective home security system. Begin by installing the Raspberry Pi operating system, typically Raspbian, onto a microSD card. You can use imaging software like Raspberry Pi Imager or balenaEtcher for this process. Next, connect the microSD card to the Raspberry Pi and boot it up. Once booted, set up a secure login and configure your network settings. After that, you can start adding the home security essentials, such as motion sensors, cameras, and alarm systems, and program them to work with your Raspberry Pi for a comprehensive security solution.
Once the OS is installed, connect the Raspberry Pi to a monitor via HDMI, attach a keyboard and mouse, and power it on to complete the initial setup. To maximize your project's visibility and reach, consider repurposing your content across various platforms, as it can greatly enhance brand authority and engagement through consistent messaging effective marketing strategies.
After booting up, it's crucial to update your system packages. Open the terminal and execute the commands 'sudo apt-get update' and 'sudo apt-get upgrade' to verify your Raspberry Pi is running the latest software version. This helps in maintaining system security and stability.
Next, you'll want to install necessary libraries for your security system. For image processing, install OpenCV by running 'pip install opencv-python', making sure Python is already installed.
Software Installation Process

Start the software installation process by updating your Raspberry Pi's package list and upgrading existing packages with the commands 'sudo apt-get update' and 'sudo apt-get upgrade'.
After that, you'll need to install essential libraries for webcam access and motion detection. Use the command 'pip install opencv-python' to add OpenCV functionality, which is vital for capturing video streams. Implementing AI-driven solutions can enhance AI enhances accuracy in medical diagnoses and treatment for various applications, including security systems.
Next, make sure you install any additional required libraries for email notifications and GPIO control. These libraries will support the alarm system's features and allow you to send alerts when motion is detected.
Once you've completed all installations, restart your Raspberry Pi. This guarantees that all updates and new packages are correctly applied.
After the reboot, it's important to confirm that all dependencies are properly configured. Test the functionality of the installed software components by running a simple Python script. This script should check the access to the camera and the GPIO pins to verify everything is working as expected.
Wiring the Security System

With the software installed and ready, it's time to wire the components of your home security system to guarantee everything communicates effectively. Start by connecting the PIR motion sensors to the Raspberry Pi GPIO pins using a breadboard and jumper wires. Make sure the signal pin is linked to a designated GPIO for motion detection input.
Next, attach your USB webcam or Raspberry Pi Camera Module to one of the USB ports on the Raspberry Pi. This will enable image capture when the motion sensors detect activity. For alerts, connect an LED or speaker/buzzer to the appropriate GPIO pins to serve as visual or audible alarms.
To help you visualize the wiring process, here's a handy table:
| Component | Connection Method |
|---|---|
| PIR Motion Sensors | GPIO pins via breadboard |
| USB Webcam | USB port on Raspberry Pi |
| LED/Buzzer | GPIO pins |
| Raspberry Pi Power | 5V power supply |
Code Development Essentials

To get started on your home security system, you'll need to set up your development environment with the right libraries.
Understanding the unique security challenges faced by home security cameras can help you tailor your system effectively; consider implementing advanced measures to guarantee safety home security challenges.
Once that's in place, you can write the detection logic that captures video and identifies any movement.
This foundation will help you build a robust and effective security solution.
Setting Up Environment
Setting up your Raspberry Pi environment for a home security system involves updating the software and installing essential libraries for motion detection and image processing.
Start by making sure your Raspberry Pi is up to date. Run the commands 'sudo apt-get update' and 'sudo apt-get upgrade' in the terminal to install the latest software updates. Additionally, it's beneficial to have a diversified approach to your security setup, similar to how diversification of retirement portfolios reduces risks in financial investments.
Next, you'll need to install Python libraries vital for motion detection and image processing. Use the command 'pip install opencv-python' to install OpenCV, which will help you capture images from your webcam. Additionally, you'll want to leverage the RPi.GPIO library to work with the PIR motion sensor.
To implement email notifications, include the smtplib library in your script. This allows you to send alerts containing images to your email address whenever motion is detected.
Finally, make sure your security system runs at startup. You can do this by editing the '/etc/rc.local' file or using '.bashrc', so your setup activates automatically each time your Raspberry Pi boots up.
With these steps, you're ready to build your home security system.
Writing Detection Logic
Creating effective detection logic is essential for ensuring your home security system accurately identifies motion without being triggered by minor disturbances.
To achieve this, you'll use the OpenCV library in Python to analyze video frames from your USB webcam. By comparing pixel values between consecutive frames, you can detect motion. Incorporating energy-efficient alternatives like heat pumps in your home can further enhance your overall home security by maintaining a comfortable environment, which can deter potential intruders.
Start by setting a threshold for the number of consecutive frames that must show detected motion to minimize false positives caused by random noise or small movements. In your Python script, utilize GPIO library functions to trigger an LED or buzzer when motion is detected, providing immediate feedback on your system's status.
You should also incorporate conditional statements to send email notifications when motion is detected, using the smtplib library to attach images taken during the event. This feature adds another layer of security by keeping you informed, even when you're not home.
Configuring Notifications

Configuring notifications for your Raspberry Pi home security system guarantees you receive timely alerts whenever motion is detected. To set this up, you'll use the 'smtplib' library in Python to send email alerts triggered by the PIR sensor. First, install Postfix on your Raspberry Pi to establish an SMTP server. You'll need to configure the credentials in the 'sasl_passwd' file.
Here's a quick overview of the setup:
| Step | Action | Purpose |
|---|---|---|
| Install Postfix | Run 'sudo apt-get install postfix' | Set up SMTP server |
| Configure Email | Edit 'sasl_passwd' file | Set email credentials |
| Update Python Script | Add conditions for PIR notifications | Trigger email alerts on motion |
In your Python script, make sure you include conditions that send an email alert whenever the PIR sensor detects motion and captures an image. Don't forget to customize the subject line and body text to include details like the time and date of the intrusion. After configuration, test the email functionality by sending a test email to confirm alerts are received correctly.
Testing System Functionality

To guarantee your home security system works effectively, you'll need to put it to the test.
Start by activating the system and observing how well the sensors respond to movement.
Don't forget to check that alerts and notifications are working as intended, so you stay informed of any activity.
System Activation and Testing
Activating your home security system starts with running the main Python script that initializes the PIR sensor for motion detection. This script sets up your DIY security alarm system, preparing it to monitor for any movement.
Once you've activated the system, it's time for testing. To check the functionality, physically move in front of the PIR sensor and observe whether the LED or buzzer activates. This step is essential to guarantee your system responds correctly. If it doesn't activate as expected, you might need to adjust the sensitivity settings of the PIR sensor during your testing phase.
Additionally, verify that the email notification feature is functioning properly. This means confirming that captured images are successfully sent to your designated email address when motion is detected.
Keep an eye on the system during testing for any irregularities or failures, as this allows you to make necessary adjustments before fully deploying your security system. By carefully monitoring these aspects, you'll enhance the reliability of your home security system and guarantee it effectively protects your space.
Sensor Sensitivity Adjustments
Adjusting the sensitivity of your PIR motion sensor is vital for guaranteeing it detects motion effectively while minimizing false alarms from pets or minor movements. Start by using the potentiometer on the PIR sensor to fine-tune sensitivity based on your environment. If the sensor is near windows or doors, you may need to make more significant adjustments.
To test the sensor's range, move within its detection zone at various distances and angles, typically up to 6 meters. Observe how well the sensor responds during these tests and adjust the sensitivity accordingly. It's important to document the sensor's response time and confirm it integrates seamlessly with your Raspberry Pi system, triggering actions like capturing images or sending notifications.
Remember to regularly review and readjust the sensitivity settings based on seasonal changes or modifications in your space. For example, foliage growth or changes in indoor layout can affect performance.
Monitoring Alerts and Notifications
Testing the functionality of your home security system involves validating that all components, including the PIR sensor and camera, are properly configured to communicate and respond to motion effectively. Start by simulating motion in front of the PIR sensor. This helps verify that it triggers the camera to capture images, which should be saved to the MicroSD card. Additionally, check the email notification system to validate alert emails with the captured images are sent to your designated email address upon motion detection.
Use the table below to track your system's performance during testing:
| Test Step | Expected Outcome | Observations |
|---|---|---|
| Trigger PIR sensor | Camera captures images | [Fill with your findings] |
| Email notification sent | Alert email received | [Fill with your findings] |
| Image saved on MicroSD | Image file successfully stored | [Fill with your findings] |
| Sensitivity adjustment | Reduced false alarms | [Fill with your findings] |
| Multiple test runs | Consistent performance | [Fill with your findings] |
Continuously monitor the system's performance to identify any issues, adjusting as needed for improved reliability.
Enhancing System Features

To boost your home security system's effectiveness, consider integrating advanced features like temperature sensors and smart relays for enhanced monitoring and automation.
Implementing temperature sensors such as the DS18B20 allows you to monitor environmental conditions inside your home. You'll receive alerts on extreme temperature changes, which could indicate potential issues like fire or HVAC failures.
Additionally, exploring smart relays can automate your lighting and appliances when the alarm is triggered. This not only enhances security but also offers convenience for your daily routines.
For quicker access during emergencies, integrating a keypad for panic modes will guarantee you can respond swiftly when it counts the most.
You can also configure zone timers for motion detection in multiple areas, enabling your system to react based on specific zones. This will improve overall efficiency and effectiveness.
Finally, consider adding remote access capabilities through a smartphone app. This feature lets you monitor and control your security system from anywhere, increasing your engagement and responsiveness to potential threats.
Community Engagement and Resources

Getting involved in collaborative development forums can connect you with others who share your DIY security interests.
Resource sharing platforms and project showcase events are great ways to exchange ideas and gather inspiration.
Collaborative Development Forums
Collaborative development forums offer a vibrant space for users to share insights and troubleshoot DIY security systems built with Raspberry Pi. By engaging with communities on platforms like GitHub, Reddit, and specialized developer sites, you gain access to a wealth of knowledge that can enhance your DIY security projects.
These forums encourage you to share your project updates, fostering an environment where ideas flow freely and collaboration thrives. You can post questions, seek advice, and receive valuable feedback from experienced developers who've faced similar challenges. This interaction not only refines your own projects but also inspires innovative solutions.
In addition to discussions, these forums often host a treasure trove of resources, including code snippets, hardware recommendations, and troubleshooting guides. This information can greatly simplify the learning curve for newcomers to Raspberry Pi-based security systems.
Whether you're stuck on a particular issue or simply looking for new ideas, these collaborative development forums are essential for anyone aiming to build a robust DIY security setup. Join the conversation, and you'll find that the community is keen to help you succeed in your home security journey.
Resource Sharing Platforms
Engaging with resource sharing platforms not only enhances your understanding of DIY security systems but also connects you with a community enthusiastic to share insights and tools.
Platforms like GitHub are invaluable for accessing shared source code, allowing you to contribute to ongoing development of Raspberry Pi security systems. You'll find numerous repositories dedicated to DIY security projects, where others have already tackled challenges you might face.
Additionally, the General Developer Forum offers a space for discussion, enabling you to share solutions and ideas with fellow enthusiasts. You can ask questions, troubleshoot issues, and gain insights from those who've been in your shoes.
Social media channels also play an essential role in keeping you updated on project developments, letting you engage in discussions about enhancements and fixes.
Don't overlook online tutorials and forums, which often provide step-by-step guides and troubleshooting tips, making the journey of building or improving your Raspberry Pi security system much smoother.
Community-driven resources like blogs and dedicated websites further foster collaboration, ensuring you have thorough support as you explore your DIY projects.
Project Showcase Events
Have you ever considered how project showcase events can spark creativity and collaboration among DIY security enthusiasts? These gatherings provide a fantastic opportunity to share your experiences with developing a Pi security alarm. You'll meet like-minded individuals who are just as passionate about Smart Home Security as you are.
Community engagement thrives on platforms like the General Developer Forum, where you can discuss challenges and brainstorm solutions. Attending these events often leads to fruitful collaborations, allowing you to enhance your projects further.
Many participants share their project updates on personal blogs and social media, inviting feedback that can refine your approach. You can find inspiration from successful showcases that highlight innovative alarm systems and practical ideas you can implement.
Don't forget about valuable resources like GitHub repositories, where you can access source code and configuration files. These tools empower you to replicate or adapt existing projects, tailoring them to fit your unique needs.
Frequently Asked Questions
Can You Use a Raspberry Pi as a Security System?
Yes, you can use a Raspberry Pi as a security system. It's affordable, customizable, and supports motion detection, remote access, and alerts, giving you extensive monitoring without the monthly fees of traditional services.
Can You Make a Home Server With a Raspberry Pi?
Yes, you can definitely make a home server with a Raspberry Pi. You'll enjoy hosting services like file sharing and media streaming, all while benefiting from its low power consumption and compact size.
Can You Make a Smart Home With Raspberry Pi?
Yes, you can create a smart home with Raspberry Pi! You'll integrate devices like lights, sensors, and cameras, using platforms like Home Assistant for centralized control, enhancing automation and connectivity throughout your living space.
What Is Smart Home Surveillance System Based on Raspberry Pi?
Oh sure, because who doesn't want a tiny computer watching their every move? A Raspberry Pi-based smart home surveillance system lets you monitor your space, alerting you to intruders while you binge-watch cat videos.
Conclusion
By building your own home security system with a Raspberry Pi, you're not just enhancing your safety; you're crafting a digital guardian for your home.
Embrace the challenge, as each step you take transforms your space into a fortress.
Remember, the effort you put in today can save you from worry tomorrow.
So, roll up your sleeves, engage in the process, and enjoy the peace of mind that comes with knowing you've got it all covered!