To install your wired home security system, start by planning device placements and the wiring layout. Use 22/4 wire for powered devices and install sensors on doors and windows. Run wires through walls using small holes, securing them with staples for a neat appearance. Connect your sounder to a power source, ensuring all connections are secure. After installation, test the system by opening entry points to check alerts. Regularly maintain your system by inspecting components and testing functionality. If you want deeper insight into ideal placement and additional tips, keep exploring this topic further.
Key Takeaways
- Begin by planning the placement of sounders and switches for optimal security coverage throughout your property.
- Use the appropriate wire types, such as 22/4 for powered devices and 22/2 for non-powered devices, ensuring proper connections.
- Securely run and conceal wiring through small drilled holes, using staples to prevent movement and damage for a tidy appearance.
- Connect power using two 6-volt batteries, ensuring all connections are secure before finalizing the setup for safety.

Ring Battery Doorbell (newest model) — Retinal 2K with wide-angle video, up to 6x Enhanced Zoom, Two-Way Talk, and Built-In Battery, Speckled Gray
- Video Resolution: Retinal 2K with wide-angle view
- Zoom Capability: Up to 6x Enhanced Zoom
- Two-Way Communication: Real-time audio and video
As an affiliate, we earn on qualifying purchases.
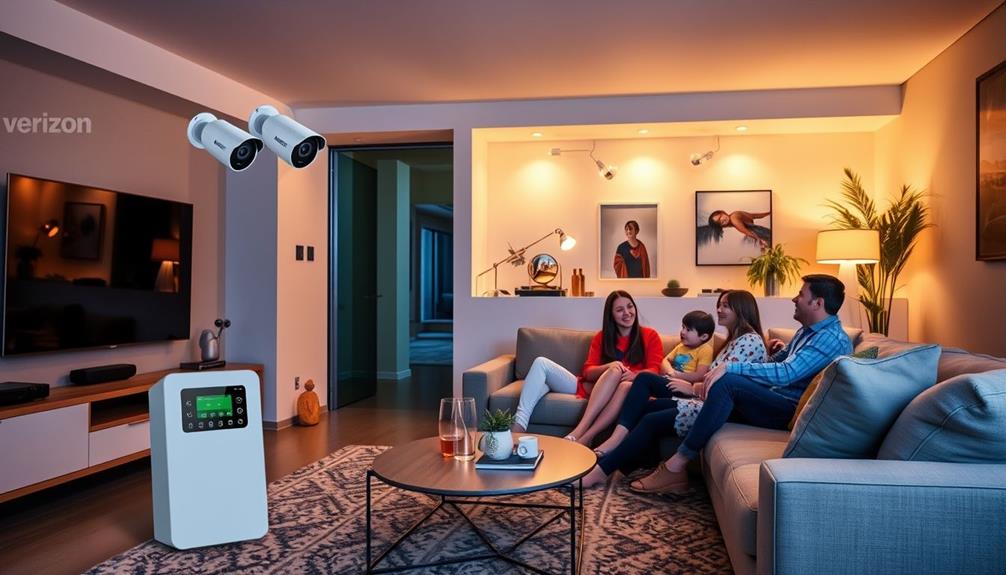
Overview of Wired Security Systems
Wired security systems, with their reliable connections and high-quality video output, offer a robust solution for safeguarding your home. These hardwired systems connect surveillance cameras using coaxial cables, supporting a minimum of four cameras and expandable up to 16. This makes them ideal for larger properties where multiple viewpoints are essential for security.
The implementation of best practices in software quality assurance can similarly guarantee that your security system operates efficiently and effectively.
The installation process typically involves running cables through walls and ceilings, which can be complex. Because of this, hiring a professional is often recommended to guarantee everything is set up correctly. A well-executed installation not only assures the best camera placement but also minimizes the risk of cable damage or signal interference.
Wired security systems are generally more reliable than their wireless counterparts, providing consistent signal transmission without the worry of interference. They offer two main types: traditional DVR systems and advanced NVR systems. While traditional systems may suffice for basic needs, NVRs provide superior video quality and features like two-way communication.

ANNKE 3K Lite Wired Security Camera System Outdoor, 8X 2MP Cameras, 1TB HDD
- AI Motion Detection 2.0: Human and vehicle detection with flexible areas
- Universal Compatibility: Works with TVI, AHD, CVI, CVBS, IP cameras
- Supports 1080P and 3K Cameras: Hook up with 1080P@30fps or 3K/5MP@20fps cameras
As an affiliate, we earn on qualifying purchases.
Essential Components of the System

When setting up your wired home security system, understanding the key components is essential.
You'll need to take into account various elements like sensors, control panels, and keypads, each playing an important role in your system's effectiveness.
Additionally, you might want to incorporate smart organization techniques to keep your security setup neat and efficient.
Knowing the wiring requirements will help guarantee a smooth installation process.
Key System Components
The key components of a wired home security system work together to provide extensive protection and peace of mind. Understanding these components is vital for effective installation and operation. For instance, integrating a smart thermostat can optimize energy usage while ensuring your security system operates efficiently.
Here are the three main elements you'll want to focus on:
- Alarm Control Panel: This serves as the central hub of your system, coordinating signals from various sensors and managing alarm notifications. It's where all the magic happens.
- Sensors: These include door/window contacts and motion detectors, which are essential for detecting unauthorized entry and activity within your home. They alert the control panel when something's amiss, ensuring your property remains secure.
- Keypads: Important for arming and disarming your system, these user interfaces allow you to control features easily. External keypads can enhance user interaction, often featuring emergency buttons or status indicators.
Wiring Requirements Overview
Understanding the wiring requirements is essential for ensuring your home security system operates effectively and reliably. When installing a hardwired alarm, you'll need to take into account the specific wiring for various security devices.
For window and door sensors, it's recommended to use 22/4 wire, which provides the necessary conductors for connection and communication. Non-powered devices usually require 22/2 wire, while powered devices like PIR sensors may need 22/4 or even 6 wires to support power, alarm, and tamper functions.
Additionally, it's wise to evaluate your overall home environment to make informed decisions about the placement of devices and wiring routes, as a well-planned system enhances security.
It's important to use fire-rated wire for smoke detectors and alarms to enhance safety during emergencies. When drilling for wire passage, make small holes to avoid damaging structural elements, and coil any excess wire in window returns for potential future installations.
A tidy wiring layout not only improves aesthetics but also makes it easier to troubleshoot or modify your system later on.
What to look for in a home cleaning service can also provide insights on ensuring a safe living space.
Ring Battery Doorbell (newest model) — Retinal 2K with wide-angle video, up to 6x Enhanced Zoom, Two-Way Talk, and Built-In Battery, Matte Mocha
- Video Resolution: Retinal 2K wide-angle video
- Zoom Capability: Up to 6x Enhanced Zoom
- Two-Way Communication: Real-time see, hear, speak
As an affiliate, we earn on qualifying purchases.
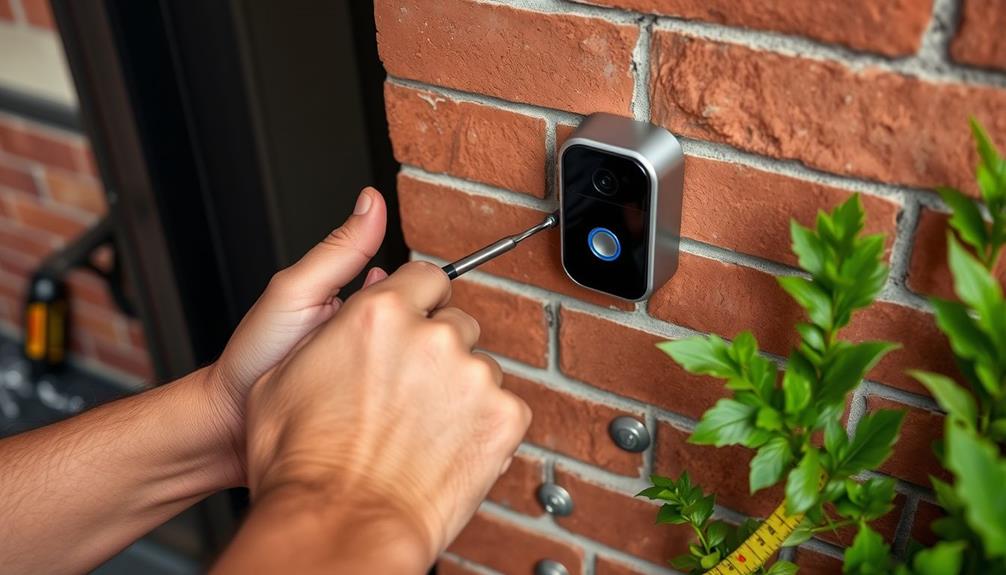
Installation Procedures

When installing your wired home security system, you'll want to start with the placement of the sounder and switches for maximum effectiveness. This means strategically placing sounders in areas of the home where they will be most audible in the event of an alarm. Similarly, switches should be located in areas that are easily accessible for arming and disarming the system. When installing home security systems, it’s important to consider the layout and specific security needs of your home to ensure that sounders and switches are placed in the most effective locations. This will help to maximize the overall effectiveness and reliability of your wired home security system.
Proper planning and understanding of your target audience can also help in determining the best installation locations.
Next, focus on the wiring techniques and tips to guarantee everything is securely connected.
Sounder and Switch Placement
Proper placement of sounders and switches is essential for maximizing the effectiveness of your wired home security system. You want to guarantee that both sounders and door and window switches are positioned strategically to enhance security and minimize tampering. Additionally, utilizing exclusive design insights can help inform your placement decisions to guarantee ideal security coverage.
Here's how to properly place them:
- Sounder Location: Install the sounder in a strategic location. For outdoor units, use protective metal boxes to shield them from the elements. Indoor sounders can be mounted directly on the wall, but make sure to securely attach the backplate to prevent tampering or dislodging during activation.
- Door and Window Switches: Position your door and window switches so they operate effectively when the doors and windows are closed. This guarantees the system remains responsive and can alert you to unauthorized access.
- Tamper Switches: Consider integrating tamper switches for additional security. These devices can detect if someone tries to disable or remove your sounders, providing an extra layer of protection.
Wiring Techniques and Tips
Start by using a thin, inconspicuous two-wire cord for the entry-detection switch loop, beginning from the farthest point away from the sounder to guarantee a clean installation. This wiring technique guarantees minimal visibility while maintaining the integrity of your alarm system.
For those looking to enhance their home security, consider investing in advanced garage door openers with smartphone connectivity and security alerts.
When you're securing the wiring, use small staples, but be careful only to cut the copper-colored wire when connecting devices. This precaution will help you avoid damaging the circuit.
For door and window switches, position them ideally within the window frame to ensure they operate effectively when closed. You might also consider adding fire sensor switches for enhanced security.
When wiring powered devices, utilize 22/4 wire, and pay attention to proper drilling techniques. This will prevent any structural damage when creating holes for wire passage.
After you've connected all components, conduct a thorough system test. Secure all entry-detection switches and activate the alarm to confirm functionality. This final step is essential to guarantee your alarm system is fully operational and ready to protect your home.
Power Connection Setup
To set up the power connection for your security system, first purchase two 6-volt lantern-type or rechargeable batteries and choose a suitable location for their installation, like a closet or shelf. This power connection setup is essential for your hardwired security system to function effectively.
Follow these steps for a smooth installation:
- Use red and black insulated single-conductor wire (bell wire) to connect the positive (+) and negative (-) terminals of the batteries to the sounder. Make sure to leave the connecting wire between battery cells out until the final step to prevent accidental discharge.
- When connecting the sounder, use solderless connectors to attach the battery wires to the sounder wires. Start with the red wire connected to the key switch if you have one.
- Cut and strip the red wire at the key switch, attaching the ends to separate screw terminals. Connect the switch loop wires to the sounder and secure the sounder to its backplate.

Ring Battery Doorbell (newest model), Matte Mocha with Indoor Cam Plus, Black
- Home Security Bundle: Battery Doorbell, Indoor Cam Plus, Matte Mocha, Black
- 2K Retinal Video: Clear, detailed footage with 6x zoom
- Color Night Vision: See in true color even in low light
As an affiliate, we earn on qualifying purchases.
Wiring Techniques

Wiring techniques play an essential role in guaranteeing your home security system operates effectively and efficiently. Start by selecting the right type of wire for your installation. Use 22/2 wire for non-powered devices like door and window sensors, and 22/4 wire for powered devices to guarantee proper functionality.
When you're ready to install, drill small holes in window frames and walls to pass the wiring through. Be cautious to avoid damaging your home's structure while keeping the wiring neat. Securely mount door and window switches for the best operation, guaranteeing the wiring doesn't interfere with normal use. To simplify routing cables through tight spaces, utilize steel fish tape, which makes your installation more organized.
Finally, secure all wiring with small staples to prevent movement and damage. Check all connections for firmness to avoid any signal loss or potential system failure. Here's a quick reference table for your wiring choices:
| Wire Type | Use Case |
|---|---|
| 22/2 | Non-powered devices |
| 22/4 | Powered devices |
| Fish Tape | Routing cables efficiently |
Power Supply Setup

Establishing a reliable power supply is essential for guaranteeing your wired home security system functions at its best. A well-planned power supply setup will keep your system operational and responsive. Here are three key steps to follow:
- Select Batteries: Purchase two 6-volt lantern-type or rechargeable batteries. These will serve as the primary power supply for your sounder and other components.
- Connect Wires: Use red and black insulated single-conductor wire (bell wire) to connect the positive (+) and negative (-) terminals of the batteries to the sounder. Remember to leave the connecting wire between battery cells disconnected until the final step to avoid accidental discharge during installation.
- Secure Connections: When you're ready to connect the sounder, use solderless connectors to join the battery wires to the sounder wires. This guarantees a secure and efficient connection.
Lastly, don't forget to regularly check battery levels and replace or recharge them before they deplete. Proper maintenance of your batteries is vital to keep your wired home security system reliable and effective.
Connecting the Sounder

When connecting the sounder, you'll start by making the necessary wiring connections, including integrating the key switch if your system uses one.
After securing the sounder to its backplate, you'll finalize the installation by completing the circuit.
Let's break down each step to guarantee a smooth setup.
Wiring Connections Overview
Connecting the sounder involves securely joining the battery wires with solderless connectors for a reliable installation. This step is vital in your security setup, as it guarantees that the sounder functions correctly when activated.
Here's a quick overview of the wiring connections you'll need to make:
- Join Battery and Sounder Wires: Use solderless connectors to attach the battery wires to the sounder wires. This provides a strong, reliable connection that won't come loose over time.
- Strip and Attach Wires: Cut and strip the red wire to connect it to the key switch, making sure to use the separate screw terminals for a secure fit.
- Finalize Connections: After everything else is in place, connect the switch loop wires to the sounder. Before you finish, leave the wire between the battery cells disconnected to prevent accidental discharge.
Once you've connected the battery to the sounder, switch the key to the OFF position before attaching the short wire between the battery cells to complete the circuit. Following these steps will guarantee your sounder is properly wired and ready to go.
Key Switch Integration
Integrating the key switch with the sounder is vital for guaranteeing your home security system functions properly and reliably.
To start, make certain the key switch is in the OFF position before you connect the sounder wires. Cut and strip the red wire from the sounder, then attach the ends to the screw terminals on the key switch for a secure connection. This step is essential for preventing accidental discharge.
Next, connect the switch loop wires to the sounder, making sure that everything is tightly secured. To maintain a reliable alarm system, use solderless connectors to join the battery wires to the sounder wires, which helps create a solid and dependable connection.
Once all these connections are made, you'll need to attach the short wire between battery cells. Do this only after confirming that all other connections are secure and that the key switch remains OFF. This precaution prevents any premature triggering of your alarm system, allowing you to integrate the key switch with the sounder effectively.
Finalizing Sounder Installation
Now that you've integrated the key switch with the sounder, it's time to finalize the sounder installation by securely connecting the sounder to the battery wires. Start by using solderless connectors to join the battery wires to the sounder wires, making certain to maintain proper polarity during the connection.
Follow these steps for a successful installation:
- Connect the Key Switch: Cut and strip the red wire to attach it to the key switch's screw terminals.
- Connect the Switch Loop Wires: Next, attach the switch loop wires to the sounder. This step is essential for confirming the sounder activates correctly.
- Secure the Sounder: Finally, secure the sounder to its backplate for a stable installation.
Before finalizing everything, verify you attach the short wire between the battery cells while keeping the key switch in the OFF position to prevent any accidental discharge.
Once all connections are made, test the sounder by activating the key switch, verifying it triggers the alarm as intended. This final step confirms your installation is complete and functioning correctly, providing you with the security you need.
Testing Your System

Testing your wired home security system is essential to guarantee it functions properly and keeps your home safe. Start by confirming all entry-detection switches are closed; secure all windows and doors. Once everything is secured, activate the key switch to start the circuit. Open a door or window to check if the alarm sounds. This step confirms that your system is working as intended.
If the alarm goes off immediately after activating the key switch, you may have a fault in the loop circuit that could lead to false alarms. It's critical to address these issues promptly to avoid unnecessary disturbances.
For peak reliability, conduct these tests weekly. This regular testing not only assures your system is functioning but also helps you monitor battery power. Keep in mind that sounders can drain batteries quickly, so staying on top of this is significant.
Don't forget, replacing batteries before they deplete is key to maintaining your system's effectiveness. By consistently testing your wired home security system, you can guarantee it remains a reliable protector for your home.
Maintenance Tips

Keeping your wired home security system in top shape requires regular maintenance to confirm it functions smoothly and effectively. Here are some essential maintenance tips to follow:
- Monthly Inspections: Check all cameras, sensors, and wiring for wear, damage, or obstructions. This will help you identify any issues that could compromise your security systems' effectiveness.
- Battery Checks: Even if you have a wired security camera system, some components may still rely on batteries. Regularly check and replace these batteries to verify all devices function properly.
- Firmware Updates: Periodically update your system's firmware. Manufacturers release updates that enhance performance, add features, and address security vulnerabilities.
Additionally, make sure to maintain a clean environment around your cameras and sensors. Dirt or dust can impair functionality and reduce video clarity.
Advantages of Wired Systems

Wired home security systems offer a robust and reliable connection, reducing the risk of interference and ensuring your property remains protected at all times. One of the standout advantages is their enhanced security; wired systems are harder to tamper with, which means your data remains safe from unauthorized access. This level of protection is essential for maintaining peace of mind.
Additionally, the cost-effectiveness of wired home security systems is significant. Unlike many wireless options, they typically don't incur ongoing monthly fees for monitoring. This results in lower maintenance costs over time, and you might even qualify for insurance discounts ranging from 5% to 20%.
Wired systems also integrate seamlessly with various smart home devices, providing you with flexibility and customization tailored to your specific security needs. While the installation process requires more effort, it leads to a permanent solution that can be designed for thorough coverage, addressing all points of entry, including windows and doors.
Ultimately, choosing a wired home security system not only safeguards your property but also offers long-term financial benefits.
Cost Considerations

When considering a wired home security system, it's important to factor in both the initial installation costs and the potential savings over time. The upfront costs can range from $300 to $2,000, depending on the complexity of your system and the number of components you choose. If your setup is complex, hiring a professional installer may add an extra $100 to $500.
However, many hardwired systems can be a cost-effective option in the long run. Here's why:
- No Monthly Fees: Unlike wireless systems that often incur subscription fees, wired systems typically don't have ongoing charges.
- Insurance Discounts: You might qualify for insurance discounts of 5% to 20%, which can help offset installation and equipment costs.
- Lower Maintenance Costs: Annual maintenance costs for wired systems usually range from $50 to $200, which is often cheaper than the fees for monitored wireless systems.
Frequently Asked Questions
How to Install a Wired Alarm System?
To install a wired alarm system, plan your layout, mark sensor locations, run appropriate cables, securely connect to the control panel, and test the system thoroughly. Regular maintenance checks keep everything functioning properly.
How Hard Is It to Install a Wired Security Camera System?
Installing a wired security camera system's like weaving a tapestry; it takes patience and precision. You'll navigate through walls and ceilings, ensuring every thread's in place. It's challenging, but the security it brings is worth it.
How Much Does It Cost to Install a Wired Security System?
Installing a wired security system can cost between $300 and $2,000, plus installation fees ranging from $100 to $500. You'll find it's often more cost-effective long-term, with lower maintenance and potential insurance discounts.
How Much Does a Hardwired Alarm System Cost?
Think of a hardwired alarm system as a sturdy fortress for your home. Costs usually range from $300 to $2,000, plus installation fees. However, you'll save on monthly charges and potentially lower insurance premiums.
Conclusion
In summary, installing a wired home security system can feel like setting up a trusty old rotary phone—reliable and straightforward.
By following the outlined steps, you'll create a dependable shield for your home.
Remember to keep up with maintenance and testing to make certain everything runs smoothly.
With the right setup, you can enjoy peace of mind, knowing your loved ones and belongings are well-protected, just like the good old days when security was all about solid connections.