To detach the faceplate of your Ring Doorbell, you will require a T15 Torx screwdriver or a Phillips screwdriver. Begin by identifying the security screw located at the bottom of the faceplate and turn it counterclockwise to loosen. Once the screw is removed, use your thumbs to push up from the bottom to detach the faceplate. If it is difficult to remove, a flat, thin object like a butter knife can assist in prying it off. Be sure to handle all screws with care to prevent misplacement. If you encounter any difficulties, there is a wealth of information available for troubleshooting the process.
Key Takeaways
- Gather the necessary tools, including a star-shaped screwdriver (T15 Torx) and a flat object for prying if needed.
- Locate the security screw at the bottom of the faceplate and turn it counterclockwise to remove it.
- Push up from the bottom of the faceplate with your thumbs to detach it after removing the security screw.
- Ensure the device is powered off if hardwired before attempting to remove the faceplate.
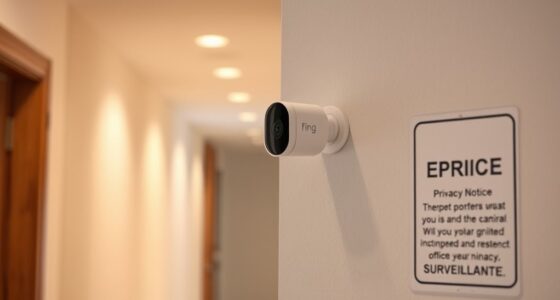
Ring Video Doorbell Overview
The Ring Video Doorbell offers a versatile way to enhance your home security, available in both wired and battery-operated models to fit your setup. This innovative device features HD video recording, motion detection, and two-way audio, allowing you to communicate with visitors from anywhere using the Ring app.
Additionally, its sleek design can complement a variety of home aesthetics, making it a great choice for modern decor trends like sustainable home decor. Whether you choose the Video Doorbell Classic or Video Doorbell 2, each model provides unique functionalities tailored to your needs.
When it comes time to customize or maintain your device, you might need to remove the faceplate. To do this, locate the security screw on the bottom of the faceplate. Using the provided tool, simply unscrew it to release the faceplate from the main unit.
Once the security screw is removed, you can gently pull the faceplate away, giving you access to the wiring or internal components for upgrades or replacements.
With the Ring Video Doorbell, you can enjoy peace of mind knowing that your home security is enhanced, and maintenance tasks like removing the faceplate are straightforward and user-friendly.
Tools and Preparation

Before you start removing your Ring doorbell faceplate, gather the necessary tools, like the special screwdriver that came with it or a T6 torx-head screwdriver.
It's crucial to have a clear understanding of the installation process, as it can help prevent any damage to your device.
Additionally, think about using essential kitchen gadgets to improve your overall home efficiency.
Make sure your workspace is clean and organized to prevent losing any small parts.
It's also wise to contemplate safety precautions to protect yourself and your equipment during the process.
Required Tools Overview
Gathering the right tools is vital for a smooth faceplate removal process on your Ring doorbell. You'll need specific items to effectively remove the faceplate without causing damage. It's also important to guarantee you have a good understanding of the necessary cleaning supplies to maintain your doorbell post-removal, as what should be in a home cleaning kit can help you keep your device in top shape.
Here's a quick overview of the required tools:
- Star-shaped bit (T15 Torx): This is essential for removing the security screw that holds the faceplate in place.
- Phillips screwdriver: If you don't have the Ring screwdriver, a #1 or #00 Phillips screwdriver will work as an alternative.
- Flat and skinny object: A butter knife or similar tool can help pry the faceplate off if it's stuck.
With these tools at hand, you'll be well-prepared to remove the faceplate efficiently. If you find yourself missing any of the required tools, you can easily order replacements through customer service or online marketplaces.
Now that you're equipped, you can move forward with confidence.
Preparation Steps Needed
Having the right tools ready sets you up for a successful faceplate removal, so let's go over the preparation steps you'll need to take.
First, gather your star-shaped screwdriver, as this is essential for loosening the security screw located at the bottom of the faceplate. If you don't have the original screwdriver, a T6 torx-head screwdriver can work as an alternative.
Next, set up a clean and organized workstation. This will help prevent losing small parts, like the security screw, during the removal process.
Once you're at your workstation, carefully locate the security screw and prepare to remove it by turning counterclockwise with your screwdriver. Make sure to set the removed screw aside in a safe place to avoid any mishaps.
If you notice the screwdriver is lost or damaged, don't worry. You can check with customer service or online marketplaces for replacement options.
Taking these preparation steps guarantees you're ready to tackle the faceplate removal efficiently and effectively, making the entire process smoother.
Safety Precautions to Consider
Ensuring your safety while removing the Ring Doorbell faceplate is essential, so make sure to power off the device if it's hardwired. This step is vital to avoid any electrical mishaps during the removal process. You'll also want to gather the proper tools and prepare your workspace ahead of time.
Here are some safety precautions to take into account:
- Use the right screwdriver: Make sure you have the special star-shaped screwdriver to handle the security screws without damaging them.
- Prepare a clean workspace: This prevents small parts like screws from getting lost during the removal.
- Check for stripped screws: If the security screw is stripped, try using a rubber band for better grip or consult Ring support for tool replacement.
Faceplate Removal Process

To remove the Ring doorbell faceplate, you'll need a special Ring screwdriver or a Phillips screwdriver #1 or #00 for the **security screwss* at the bottom. After unlocking the security screws, carefully lift off the faceplate. The next step in the process involves removing the back cover. Removing back cover of the Ring doorbell allows access to the internal components for maintenance or troubleshooting. You can use a small flathead screwdriver to carefully pry open the back cover and reveal the inner workings of the doorbell.
Start by locating the security screw(s) at the bottom of the faceplate. Use your provided Ring screwdriver or the alternative Phillips screwdriver to carefully remove the security screw by turning it counterclockwise.
Once the screw is loosened, push up from the bottom of the faceplate with your thumbs. You should feel the faceplate start to detach. Continue to push the faceplate toward the top of the doorbell until it clicks free from the device.
If you encounter any resistance, double-check for any remaining security screw(s) that may still be attached.
If the screws are stripped, using a rubber band can help improve your grip and make it easier to remove the security screw.
Remember to keep your workspace clean and secure to avoid losing any small parts, like screws. Following these steps will allow you to remove the faceplate efficiently, preparing you for any further maintenance or installation tasks.
Common Removal Challenges

Removing the faceplate of your Ring doorbell can present several challenges that might frustrate even the most experienced DIYers. One common issue is the screwdriver not catching on the security screw, leading to multiple attempts that can result in stripped screws. Visibility issues can also arise, making it tough to locate the security screw at the bottom of the faceplate.
Here are a few challenges you might face:
- Incorrect tools: Using a standard screwdriver instead of the provided Ring screwdriver can considerably hinder your progress.
- Stripped screws: If you've stripped a screw, rubber bands can help improve grip, but you might need alternative tools like Phillips screwdrivers #1 or #00.
- Angled screws: The angle at which the screws are positioned can make it difficult to get a good grip.
Battery Access and Replacement

Accessing the battery in your Ring doorbell requires first removing the faceplate by unscrewing the security screw at the bottom and gently prying off the cover.
Once the faceplate is removed, you'll locate the battery compartment inside the device. Before you detach the battery, confirm that the device is powered off to prevent any electrical issues.
To remove the battery, press down on the black tab at the bottom and pull the battery out towards the bottom of the doorbell. This step is vital, as it allows you to easily access the battery for replacement.
If you're replacing the battery, make certain that the new one is adequately charged for peak performance.
When you've inserted the new battery, double-check that it fits snugly in the compartment.
After you've completed the battery replacement, it's time to reattach the faceplate securely.
Properly accessing and replacing the battery will help maintain your Ring doorbell's functionality, allowing you to enjoy its features without interruption.
Reassembly and Securing Faceplate

Now that you've got the faceplate off, it's time to reassemble and secure it properly.
Start by aligning the top hook and then snap the bottom into place, making sure it fits snugly against the doorbell.
Don't forget to install the security screw at the bottom to keep everything secure!
Faceplate Alignment Techniques
To reattach the faceplate, start by aligning the top hook with the corresponding hole on your doorbell for a proper fit. Hold the faceplate at a 45-degree angle to make alignment easier. Once you've got the top in place, gently snap the bottom of the faceplate back into position for a secure attachment.
Here are a few tips to keep in mind during this process:
- Ensure a snug fit: Make sure the faceplate sits evenly against the doorbell body.
- Customize your look: Feel free to switch out different colored faceplates to match your style.
- Tighten securely: Once aligned, replace the security screw at the bottom and tighten it fully with the provided screwdriver.
Security Screw Installation Steps
After aligning the faceplate, you'll need to secure it by replacing the security screw at the bottom.
Start by making sure that the top hook of the faceplate is properly aligned with its corresponding hole. Hold the faceplate at a 45-degree angle to make alignment easier.
Once you've positioned it correctly, take the special star-shaped security screw provided with your Ring doorbell.
Using the specific Ring screwdriver, insert the security screw into the hole at the bottom of the faceplate. It's essential to tighten the screw fully to prevent any unauthorized removal of the faceplate.
Double-check that the faceplate is securely attached and that the security screw is tightened. This step is critical to avoid any potential detachment or damage to your device.
If you've misplaced the security screw, don't worry—replacement screws can be ordered in packs from Ring's customer service or found online.
Frequently Asked Questions
How Do You Get the Faceplate off of a Ring Doorbell?
To get the faceplate off your Ring Doorbell, start by locating the security screw at the bottom.
Unscrew it counterclockwise until it's loose.
Once removed, use your thumbs to push up gently from the bottom of the faceplate.
If it doesn't budge, you can carefully use a flat tool, like a butter knife, to help pry it off.
Make sure to keep the faceplate safe while you work on your doorbell!
How Do I Remove the Front of My Ring Doorbell?
Imagine opening a treasure chest; that's what removing the front of your Ring Doorbell feels like.
To get started, grab your special Ring screwdriver and turn the security screw at the bottom counterclockwise.
Once it's loose, push up gently from the bottom with your thumbs.
If it's stubborn, a flat object can help pry it away.
Lift it carefully and store it safely, just like a precious gem waiting to shine again!
How to Remove Door Bell Cover?
To remove your doorbell cover, start by locating any screws or clips that hold it in place.
If it's secured with screws, use the appropriate screwdriver to remove them.
For clip-on covers, gently pry it off using a flat tool, being careful not to damage the wall or the cover itself.
Once you've loosened it, lift it straight off.
Always keep screws and the cover in a safe spot while you work.
How to Unscrew Ring Doorbell Without Tool?
If you need to unscrew something without a tool, you can try using everyday items.
For instance, a sturdy coin might fit into the screw's groove well enough to turn it.
Alternatively, a butter knife can work to gently pry the object apart, though be careful not to damage it.
If you're still struggling, consider using rubber bands for extra grip.
If all else fails, reaching out for help could save you time and frustration.
Conclusion
To summarize, removing your Ring doorbell faceplate isn't a challenging task—it's more like a dance, where each step leads you closer to your goal.
With the right tools and a bit of patience, you can easily access the inner workings of your doorbell.
Remember, keeping everything secure during reassembly is key to ensuring your device functions flawlessly.
Now that you've mastered this process, you're one step closer to maintaining your home's security with confidence.